
Wiring: Making Simple Loops
This page is under construction, please bear with us as we add graphics and text. Thank you!
On this page you will find instructions on how to wire beads with a simple loop/ring cap construction method. We’ll also show simple loop/ring cap construction with formed eye pins. The photos on this page do not show the design, layout or the actual start to finish of a full rosary. Those photo guides will be found further along in the Construction Section.
Before you begin, please be sure to check and understand the bead size to wire gauge to ring size chart in the Parts and Findings catalogue.
Closing and Using Jump Rings in a Rosary
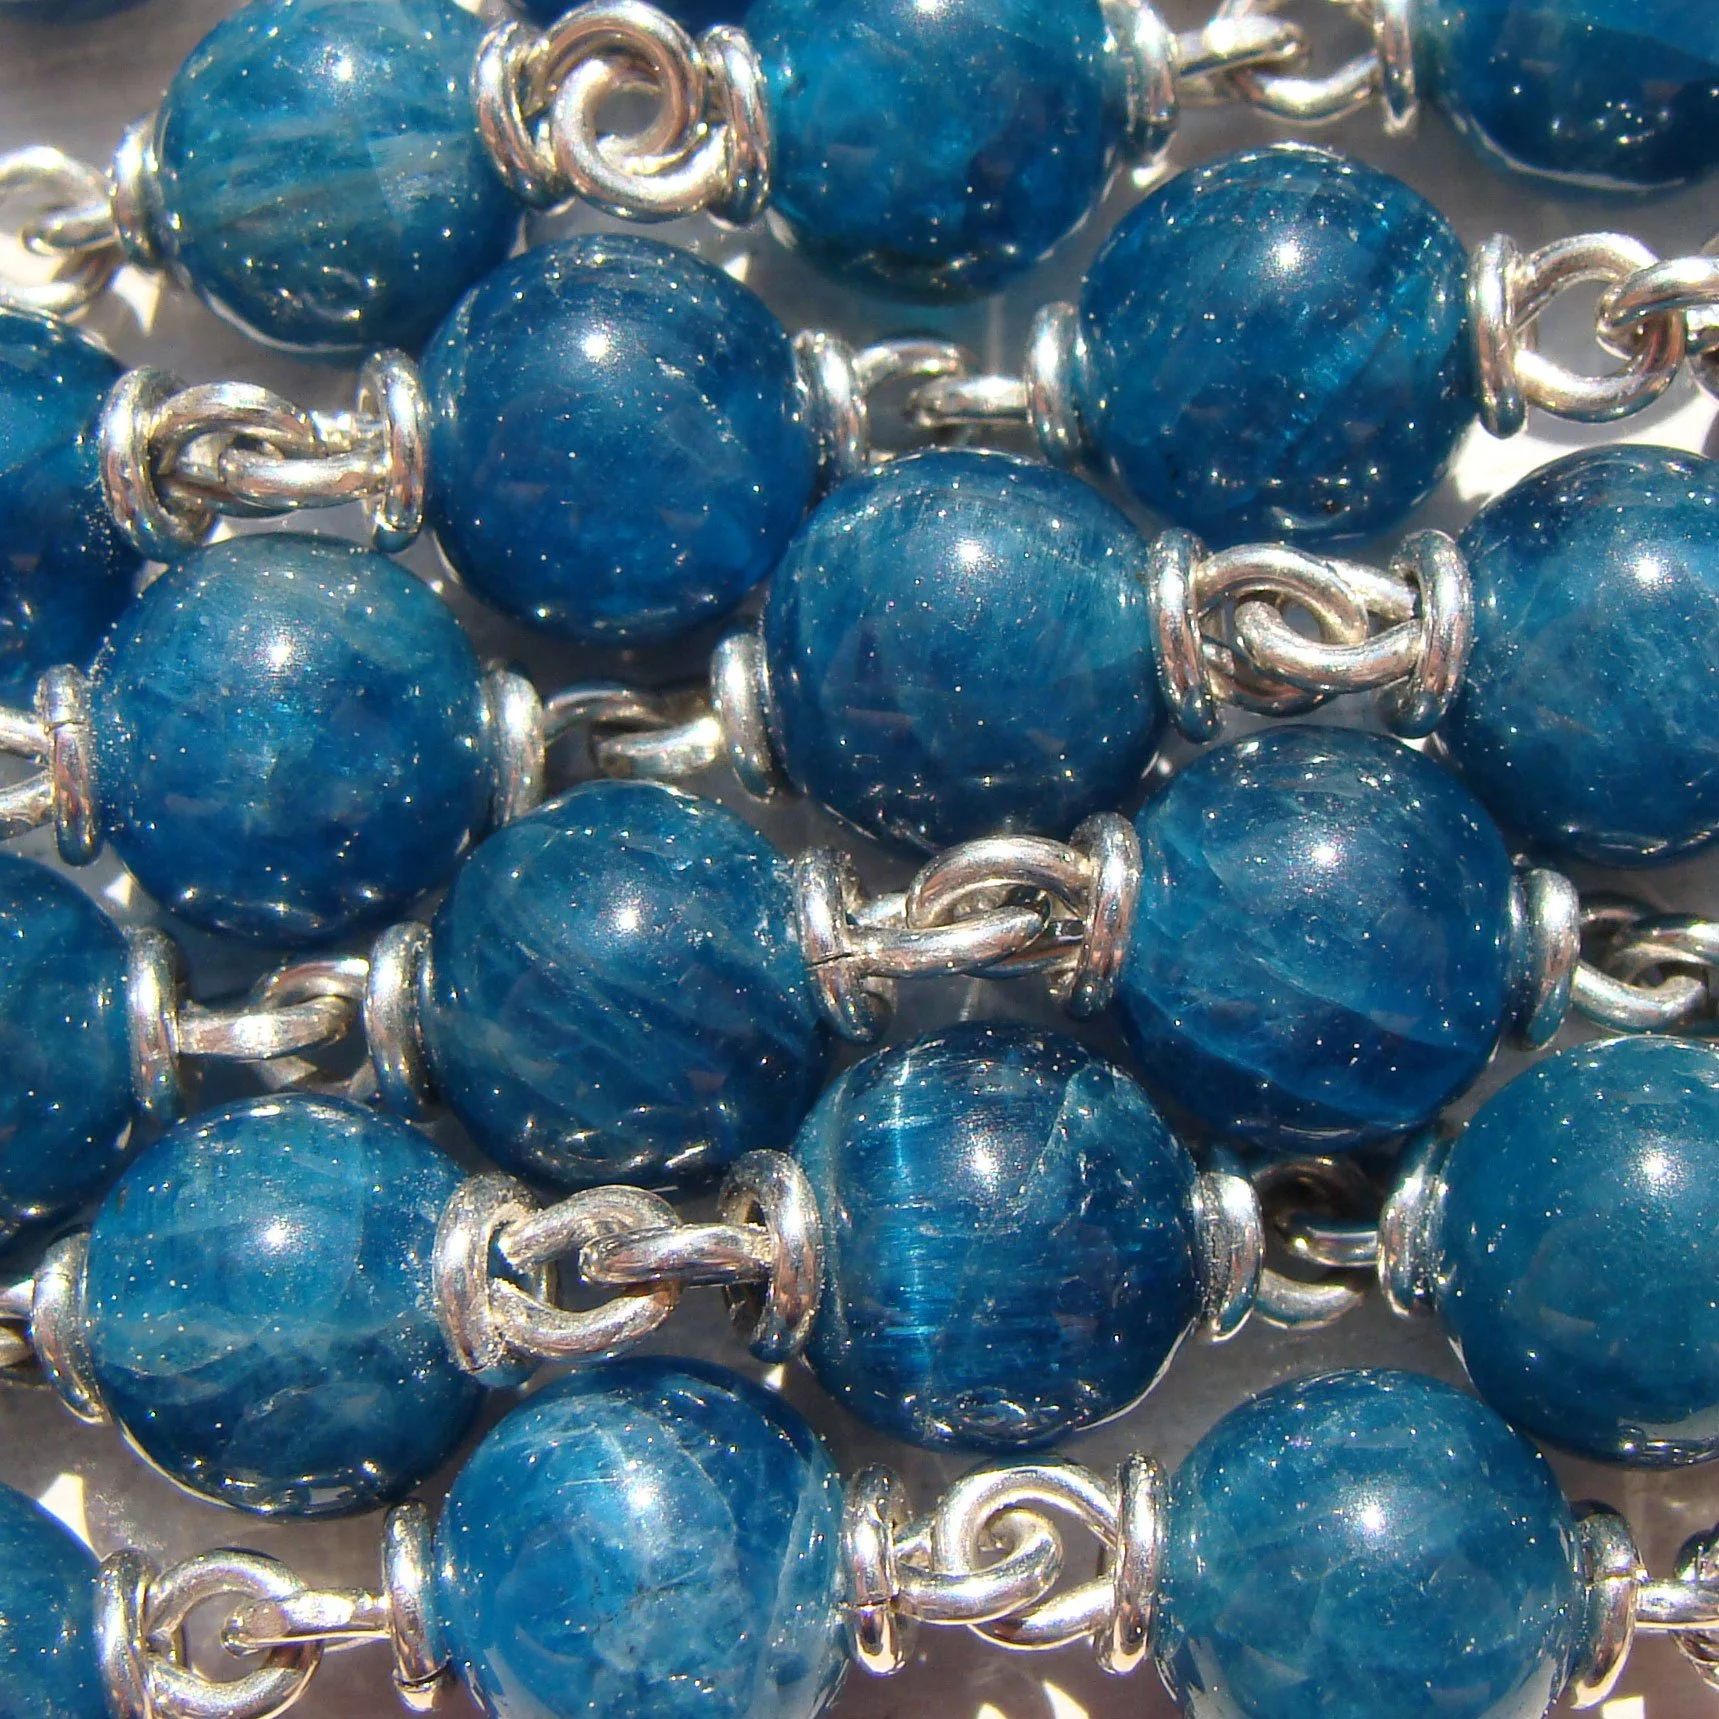
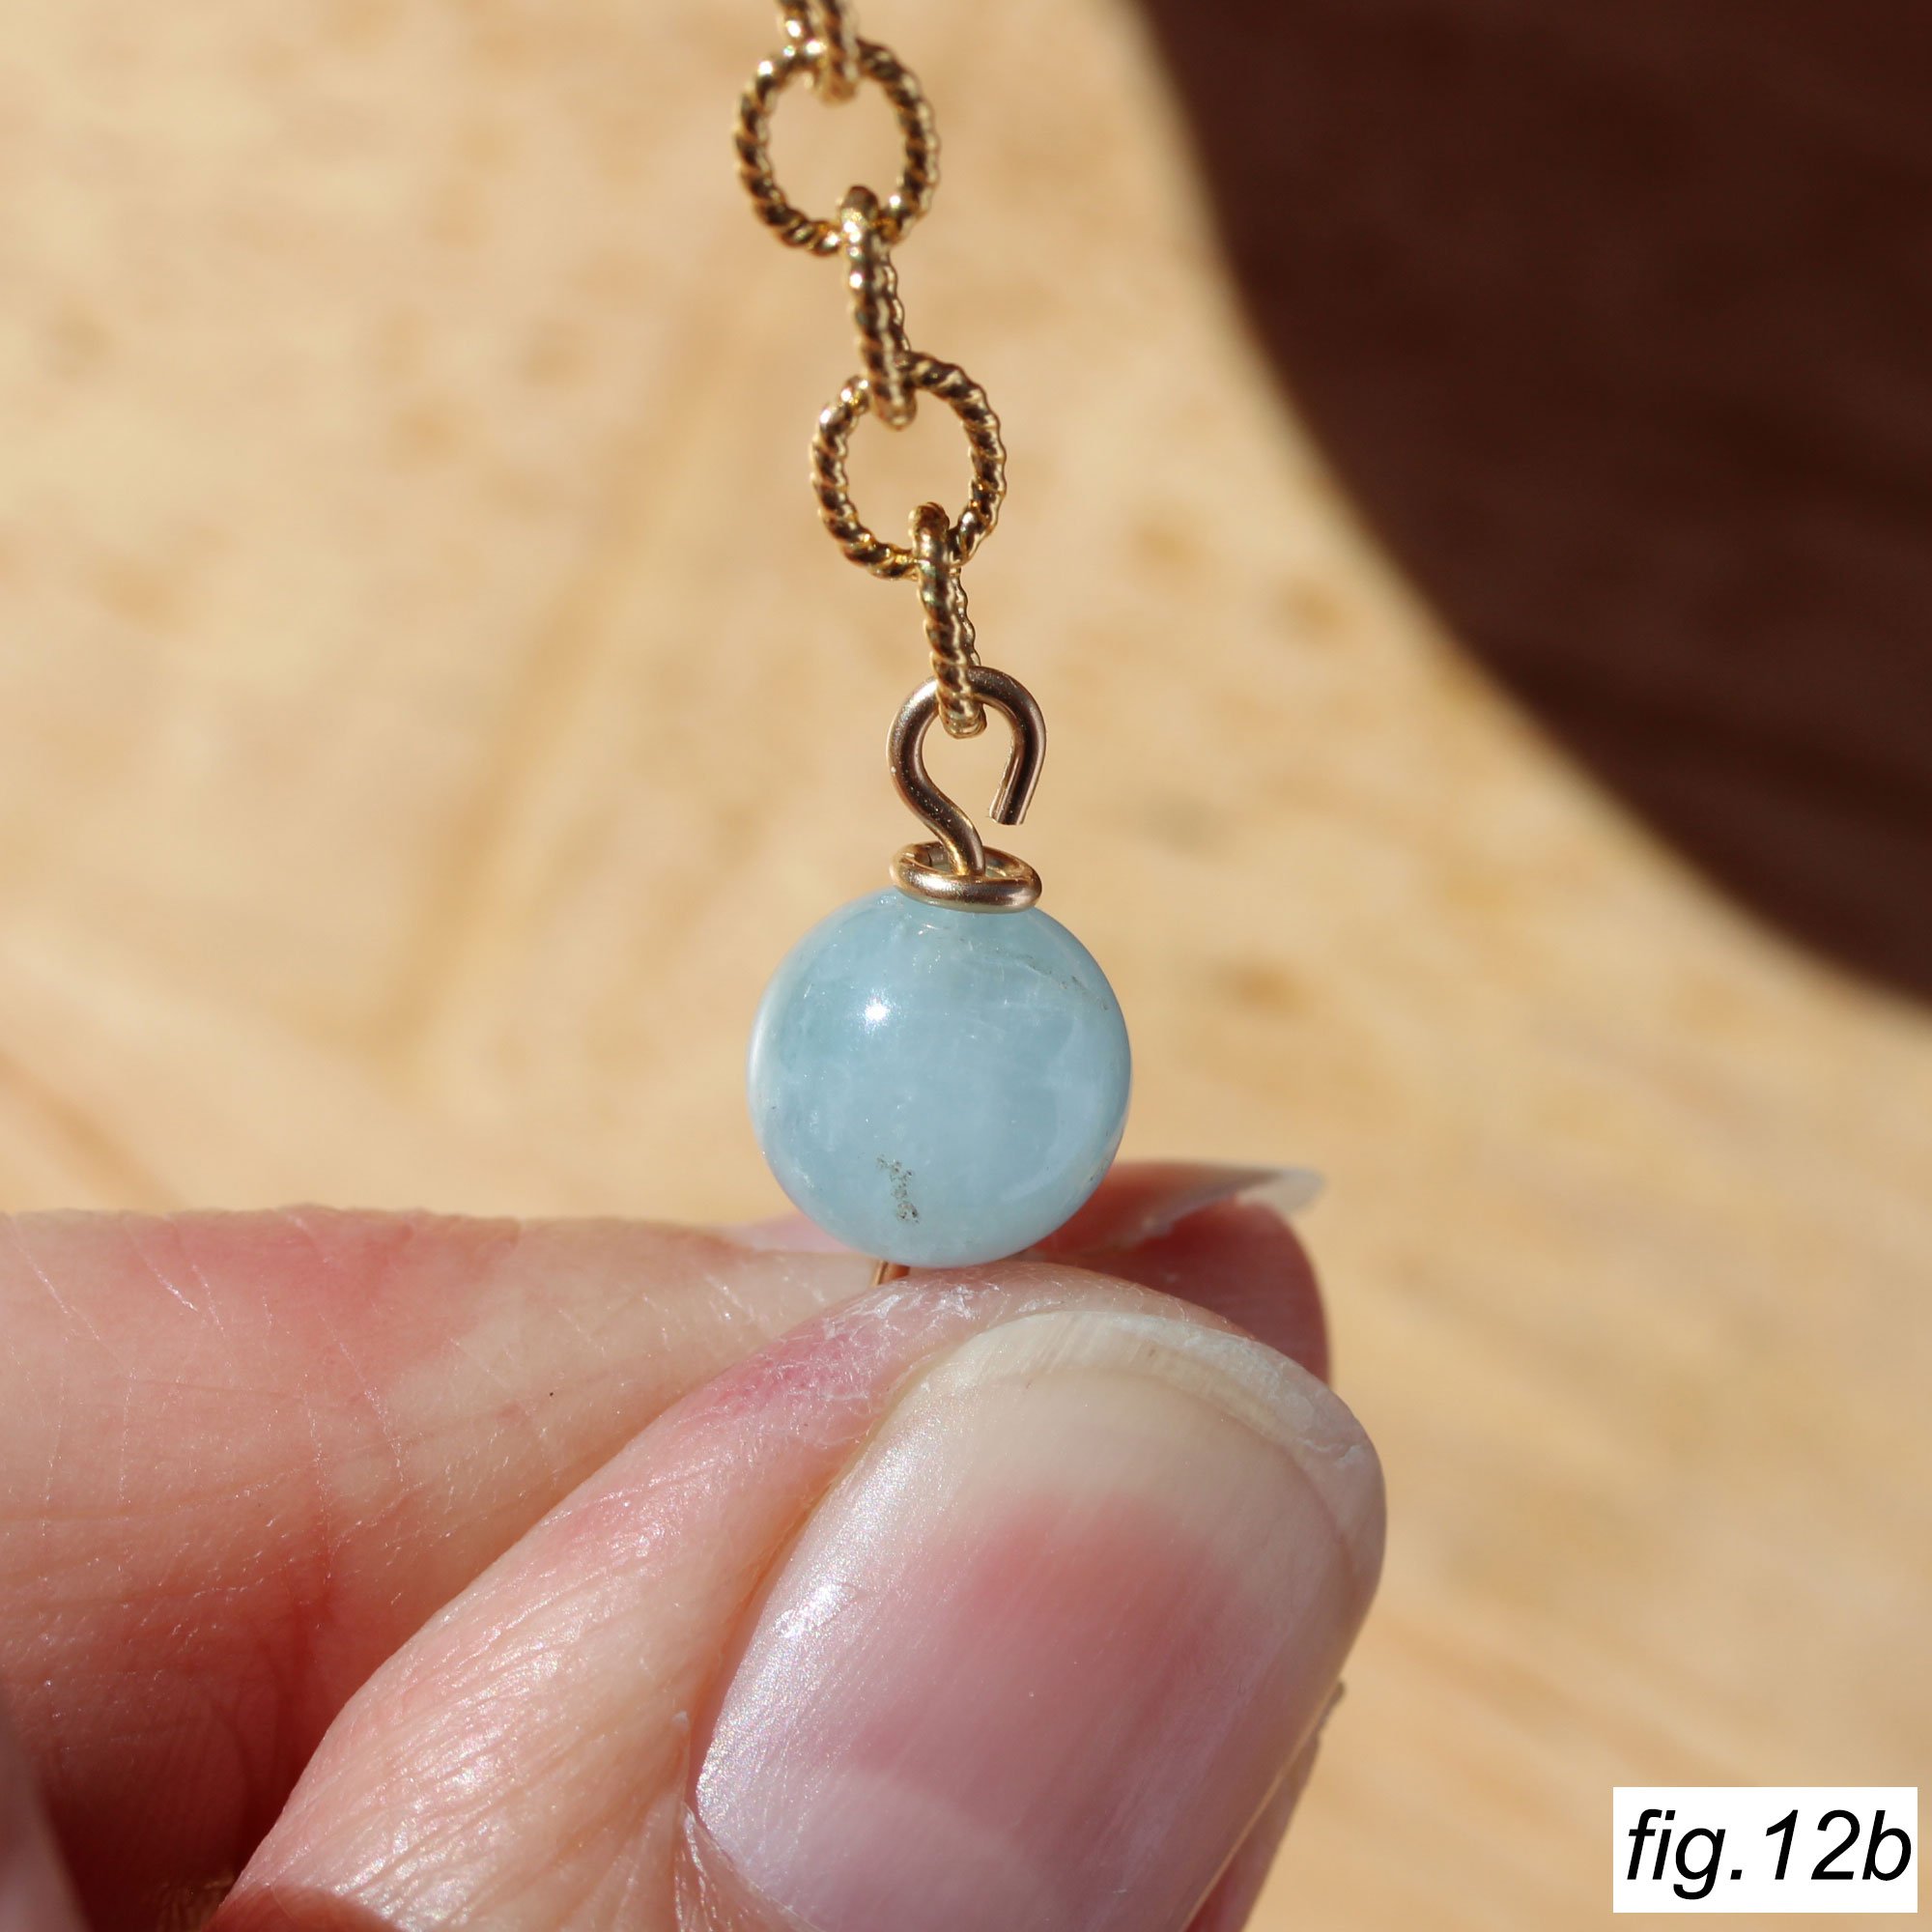
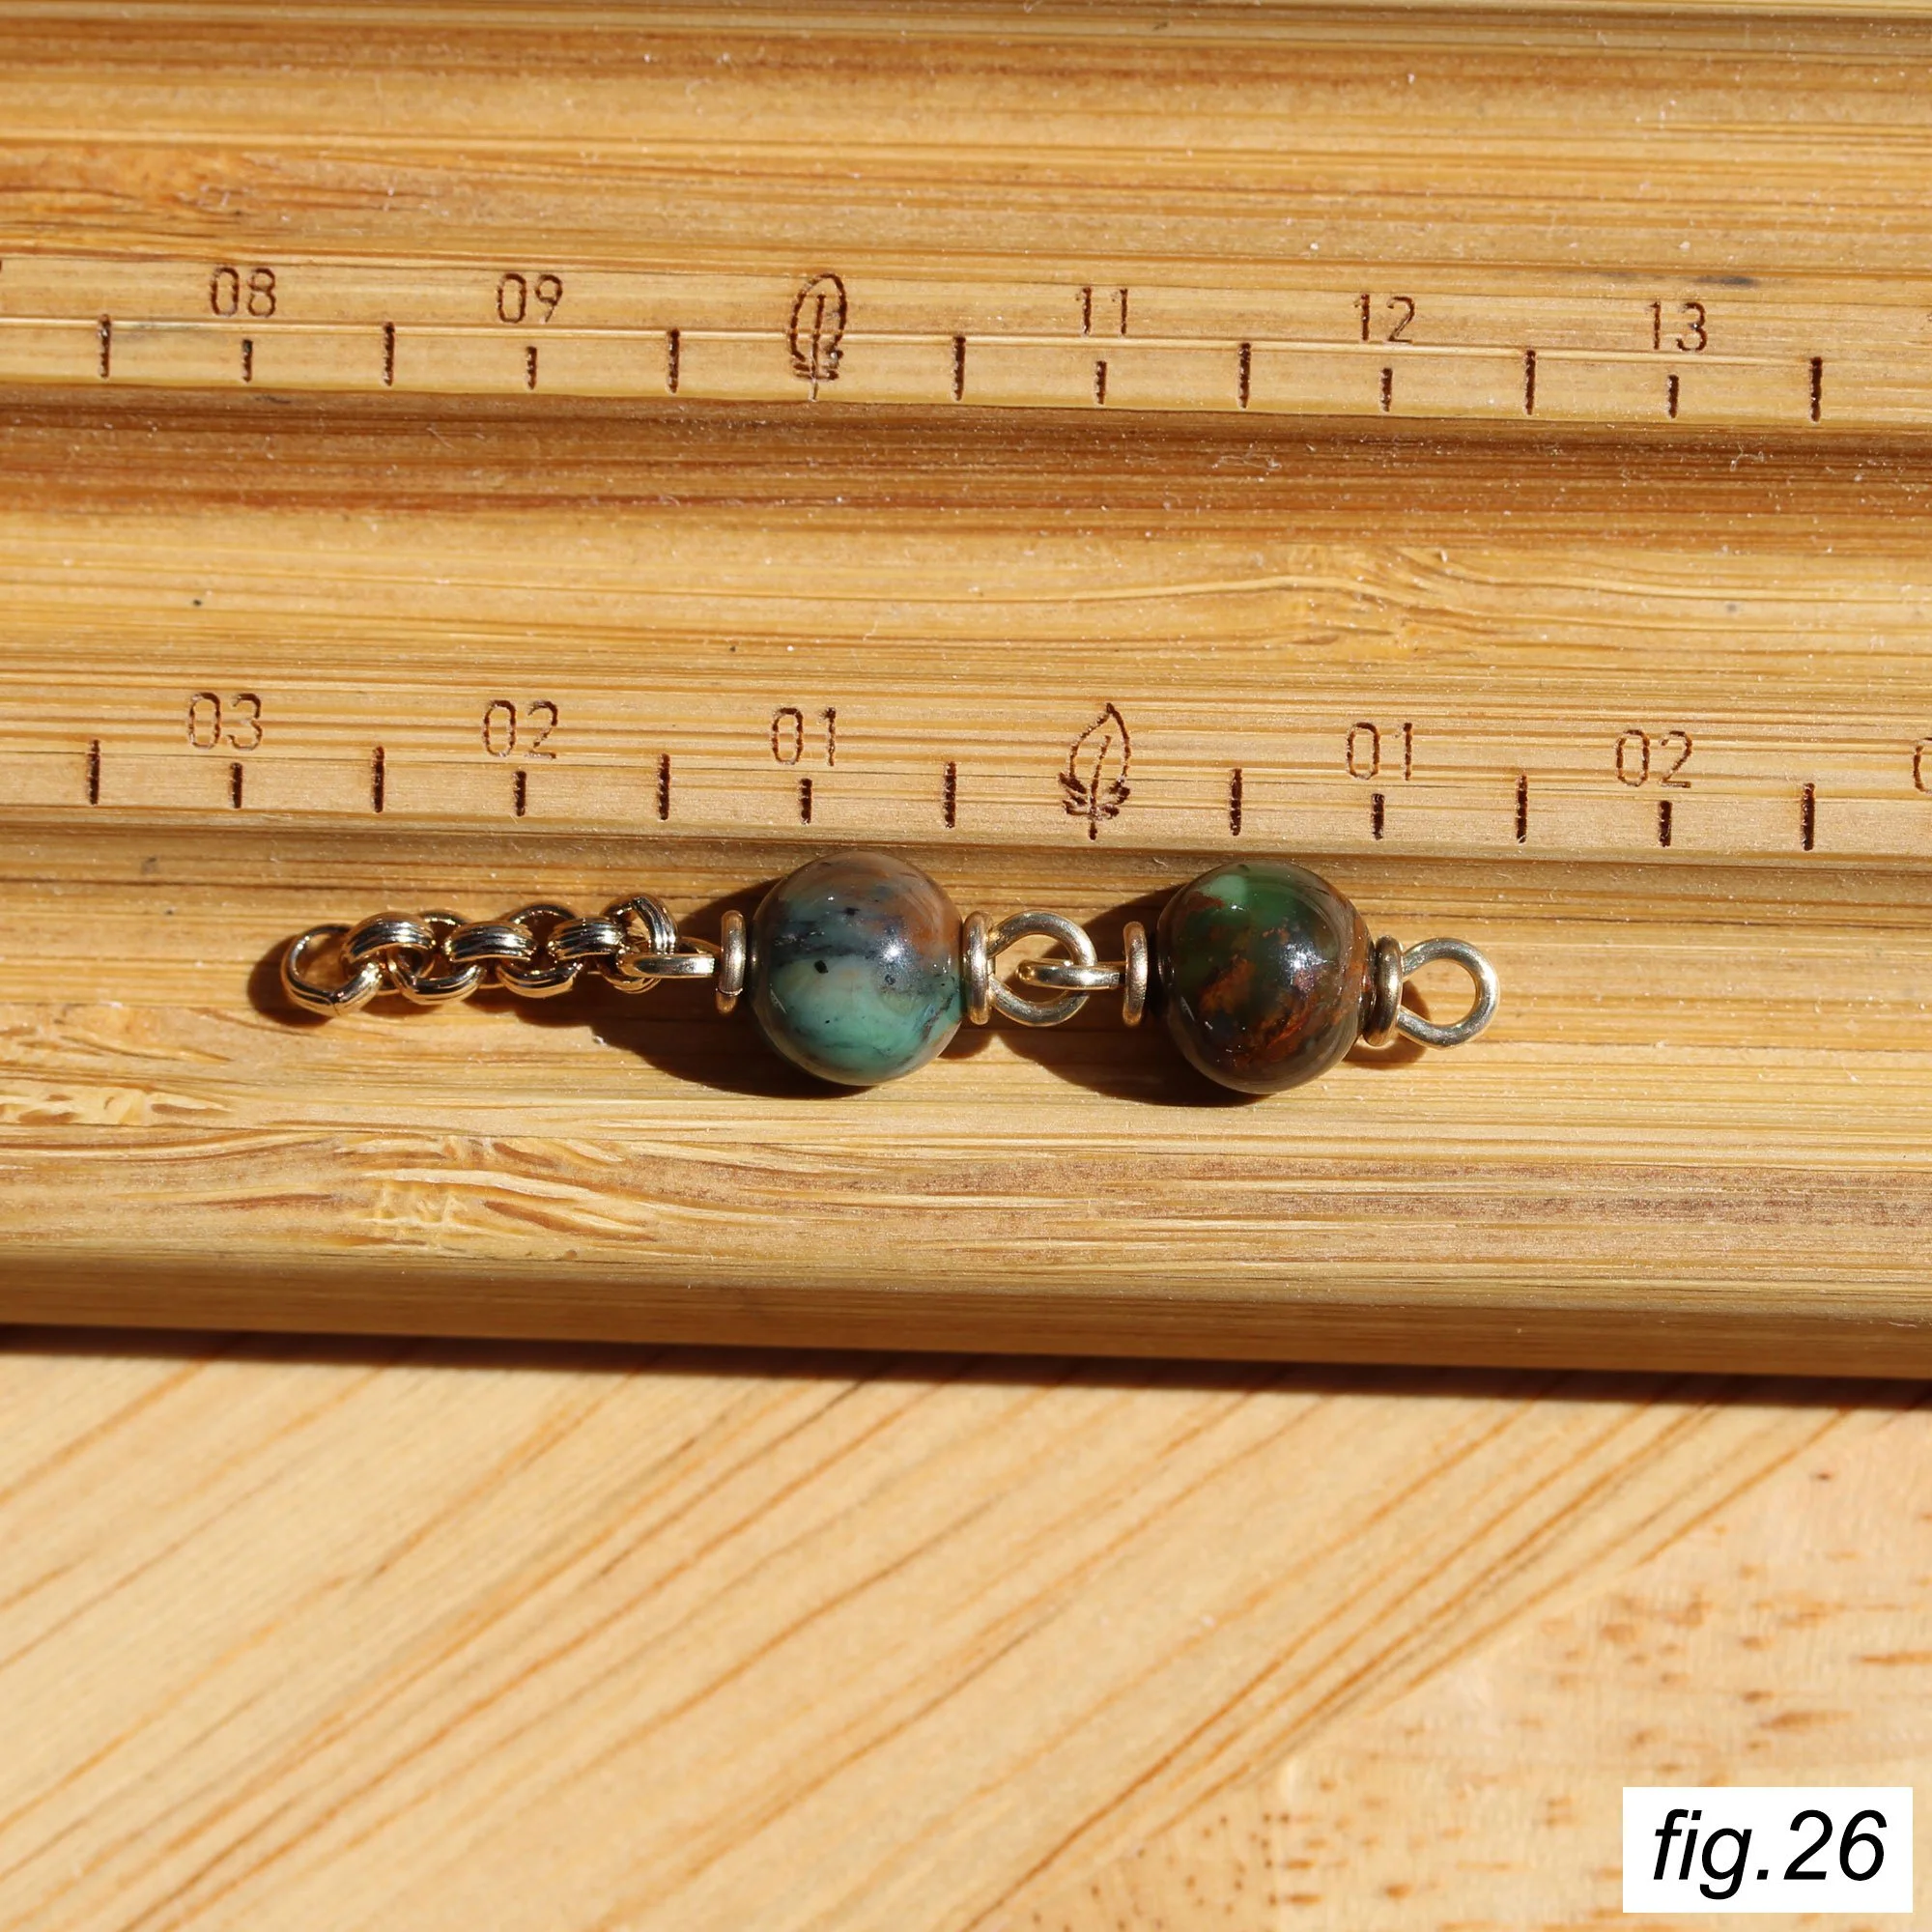
At Meinssen Handmade, our favorite style of rosary is the chained rosary with ring capped beads. As an example, the blue apatite beads shown here are ring capped and wired together with simple loops.
A jump ring is a simple circle of wire with a straight cut in it. In a “ring capped” rosary, jump rings are closed by hand, then used as “caps” above the drill hole of a bead. A piece of wire is threaded through the bead then bent into a loop, with the cut ends tucked into the ring caps. The photographic instructions below will show that process step by step.
Ring caps stabilize the simple loops of wire, and when the fit of the wire gauge, ring caps, and bead size is correct and tight, you will have a very strong finished rosary. Ring caps also provide your finished rosary with a beautiful drape; that is, how easily the rosary will curl up in your hand. The ring capping method may be found in some of the most beautiful antique rosaries. It’s tried and true!
The instructions just below show the correct method for closing jump rings.
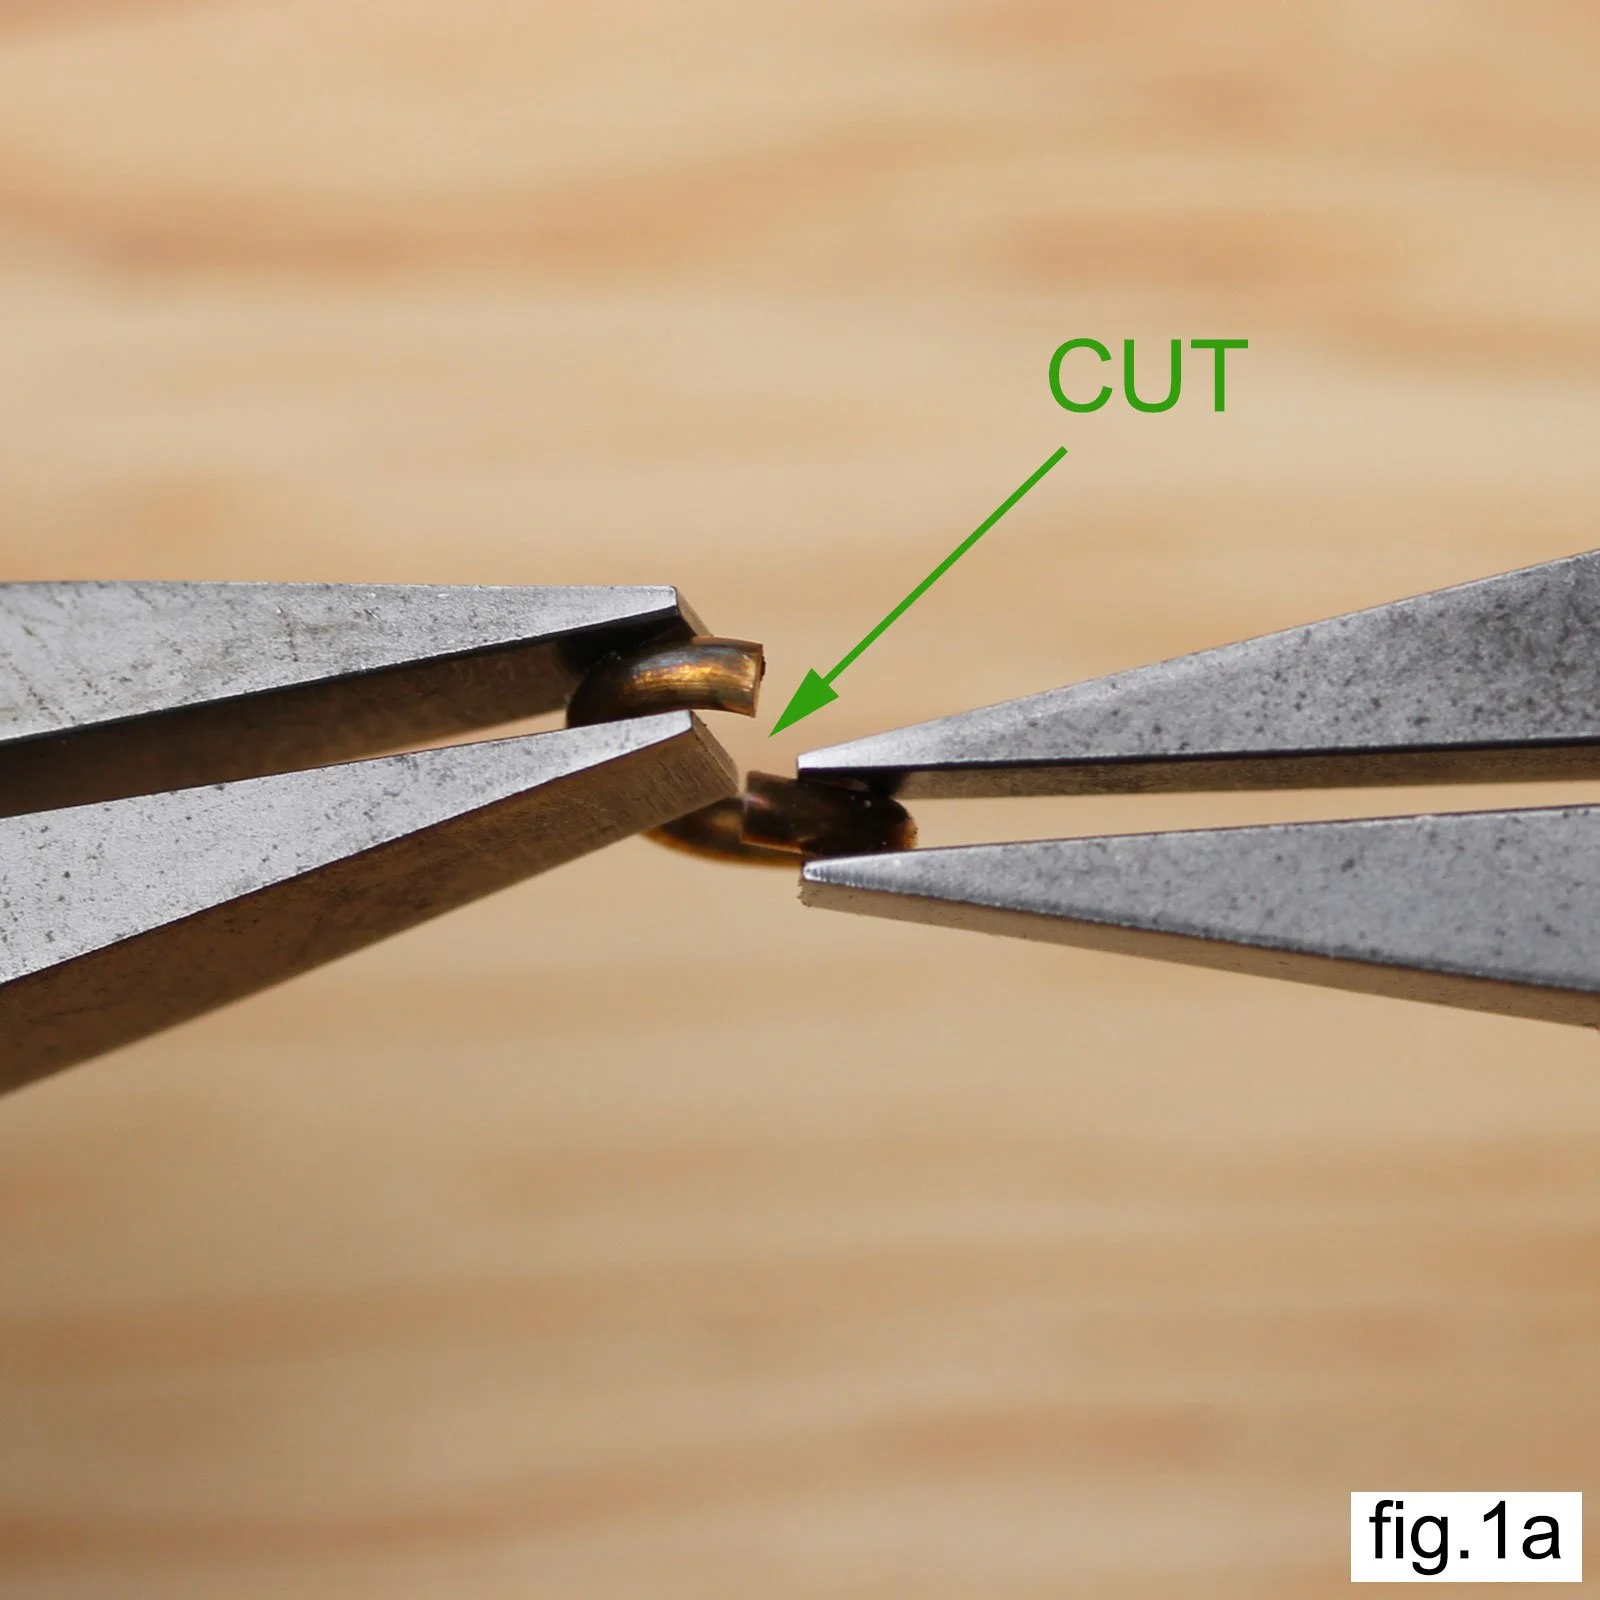
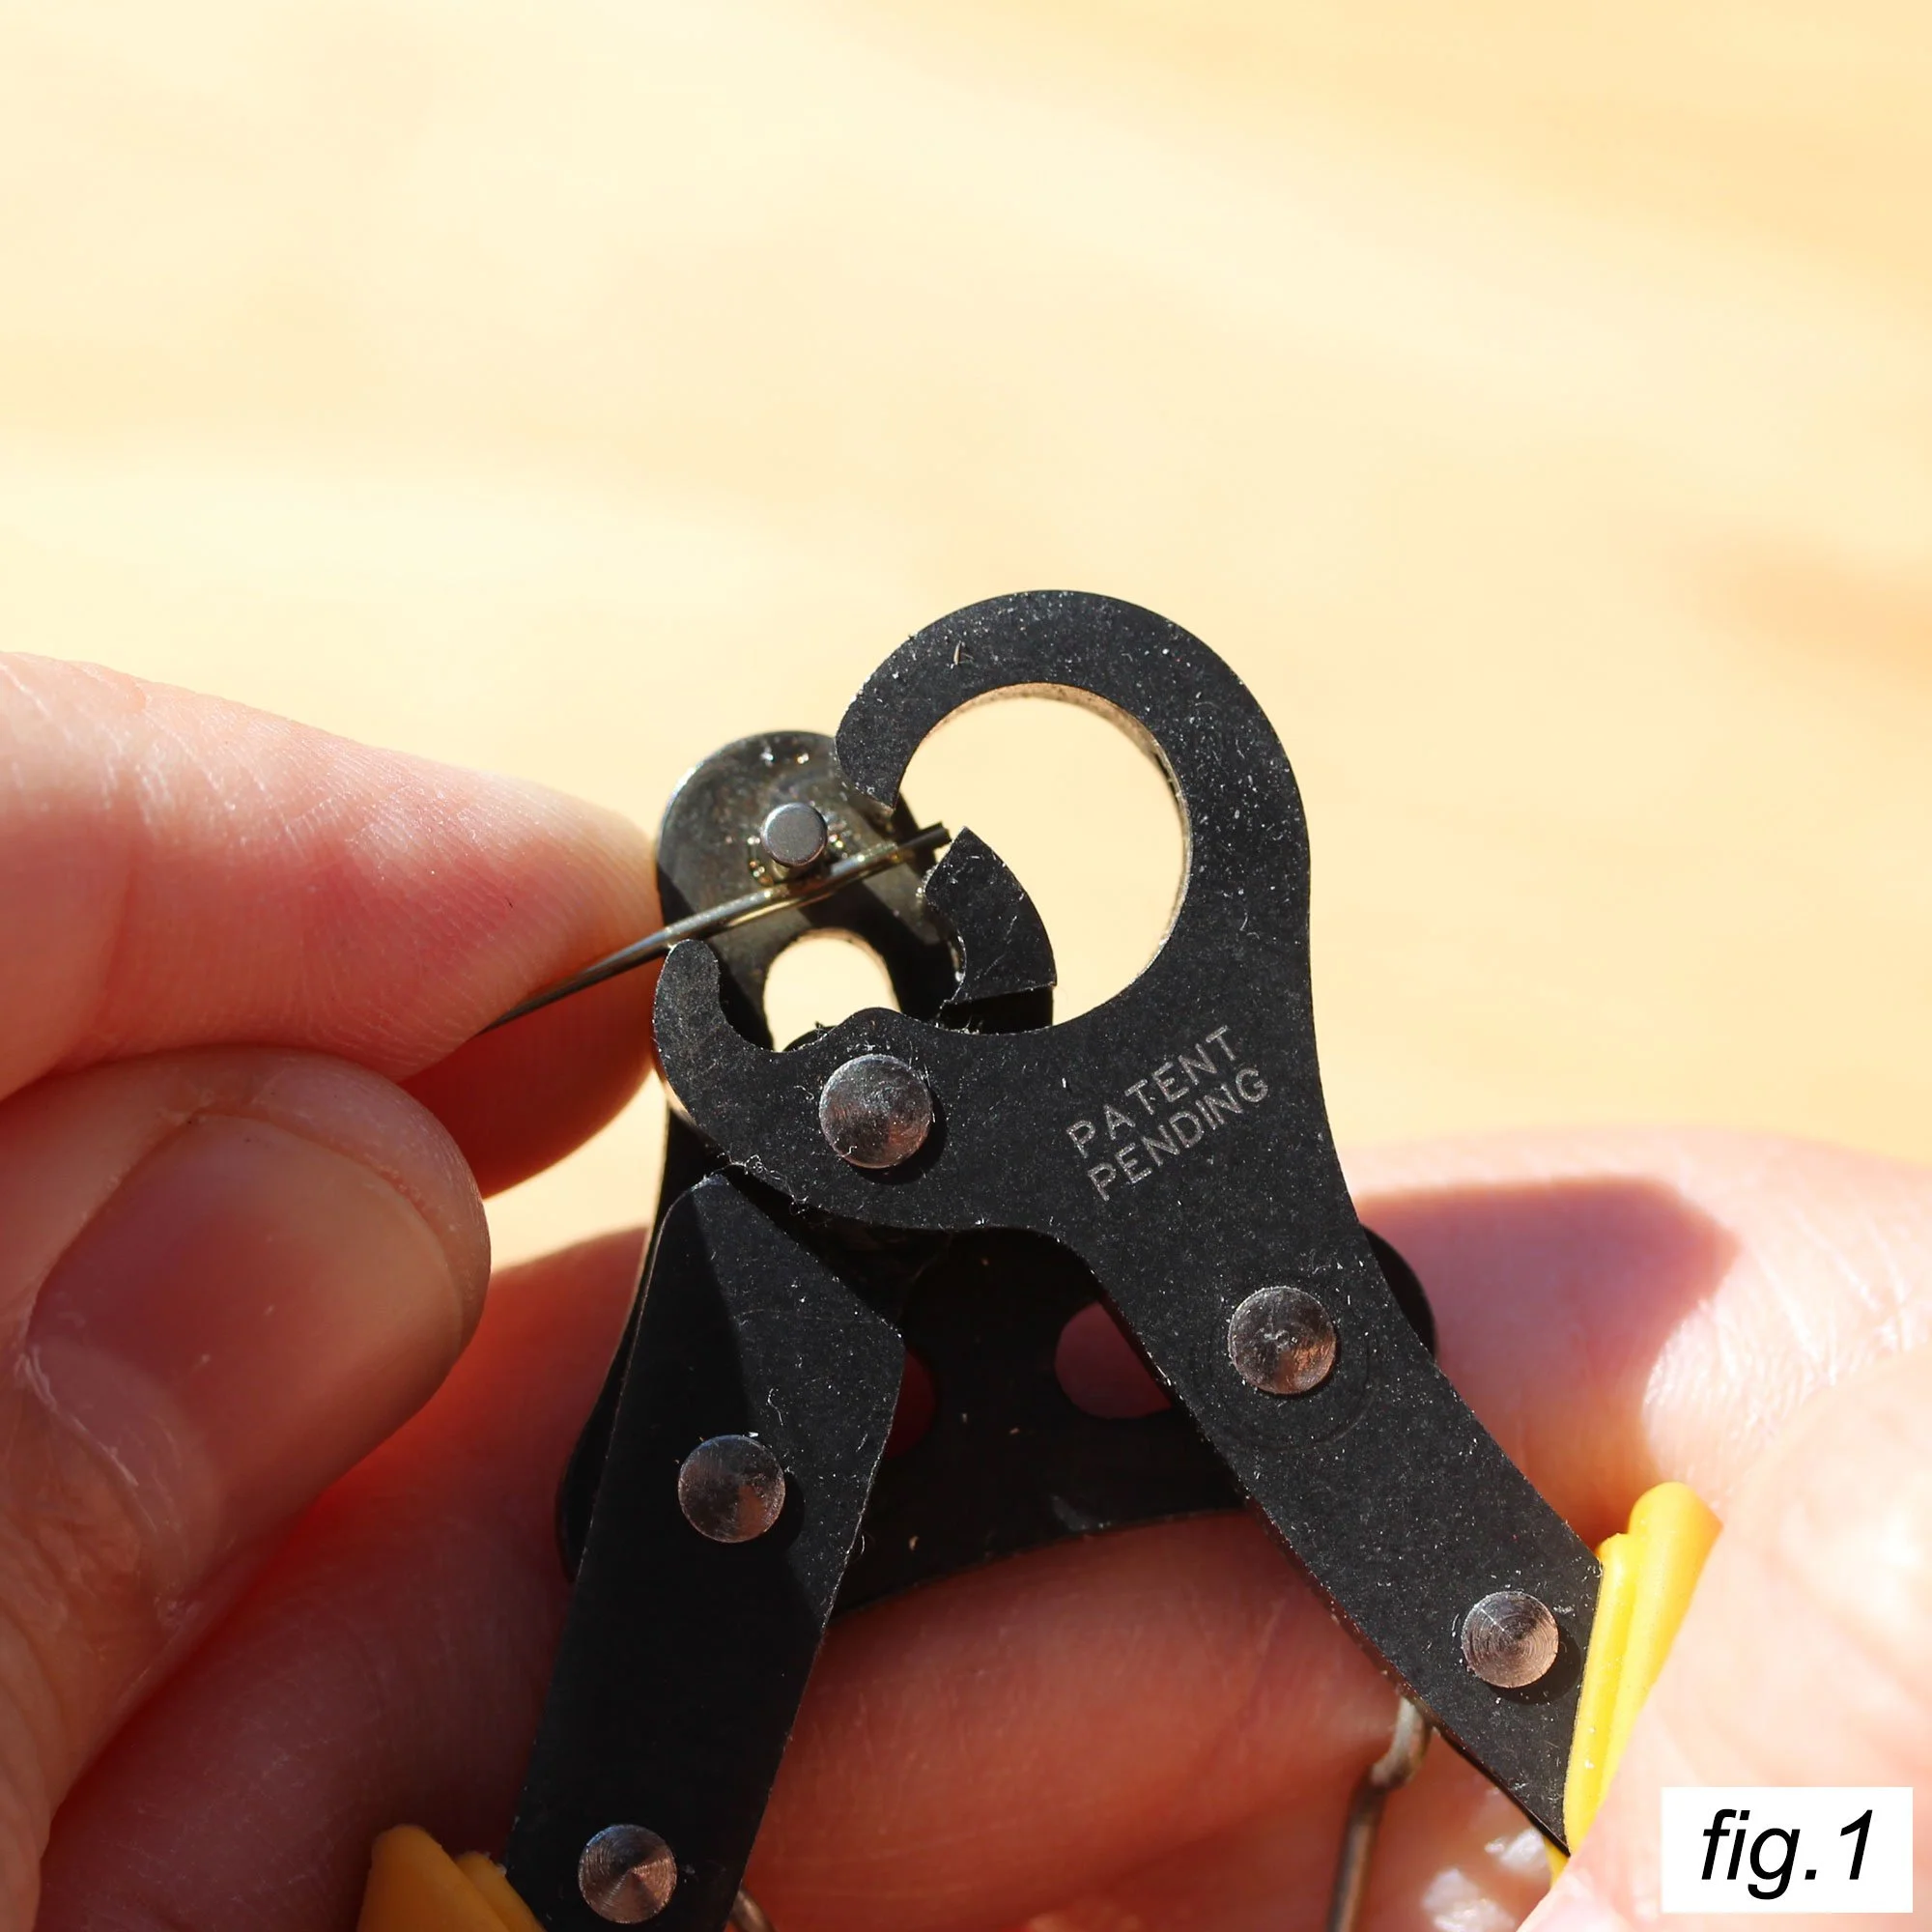
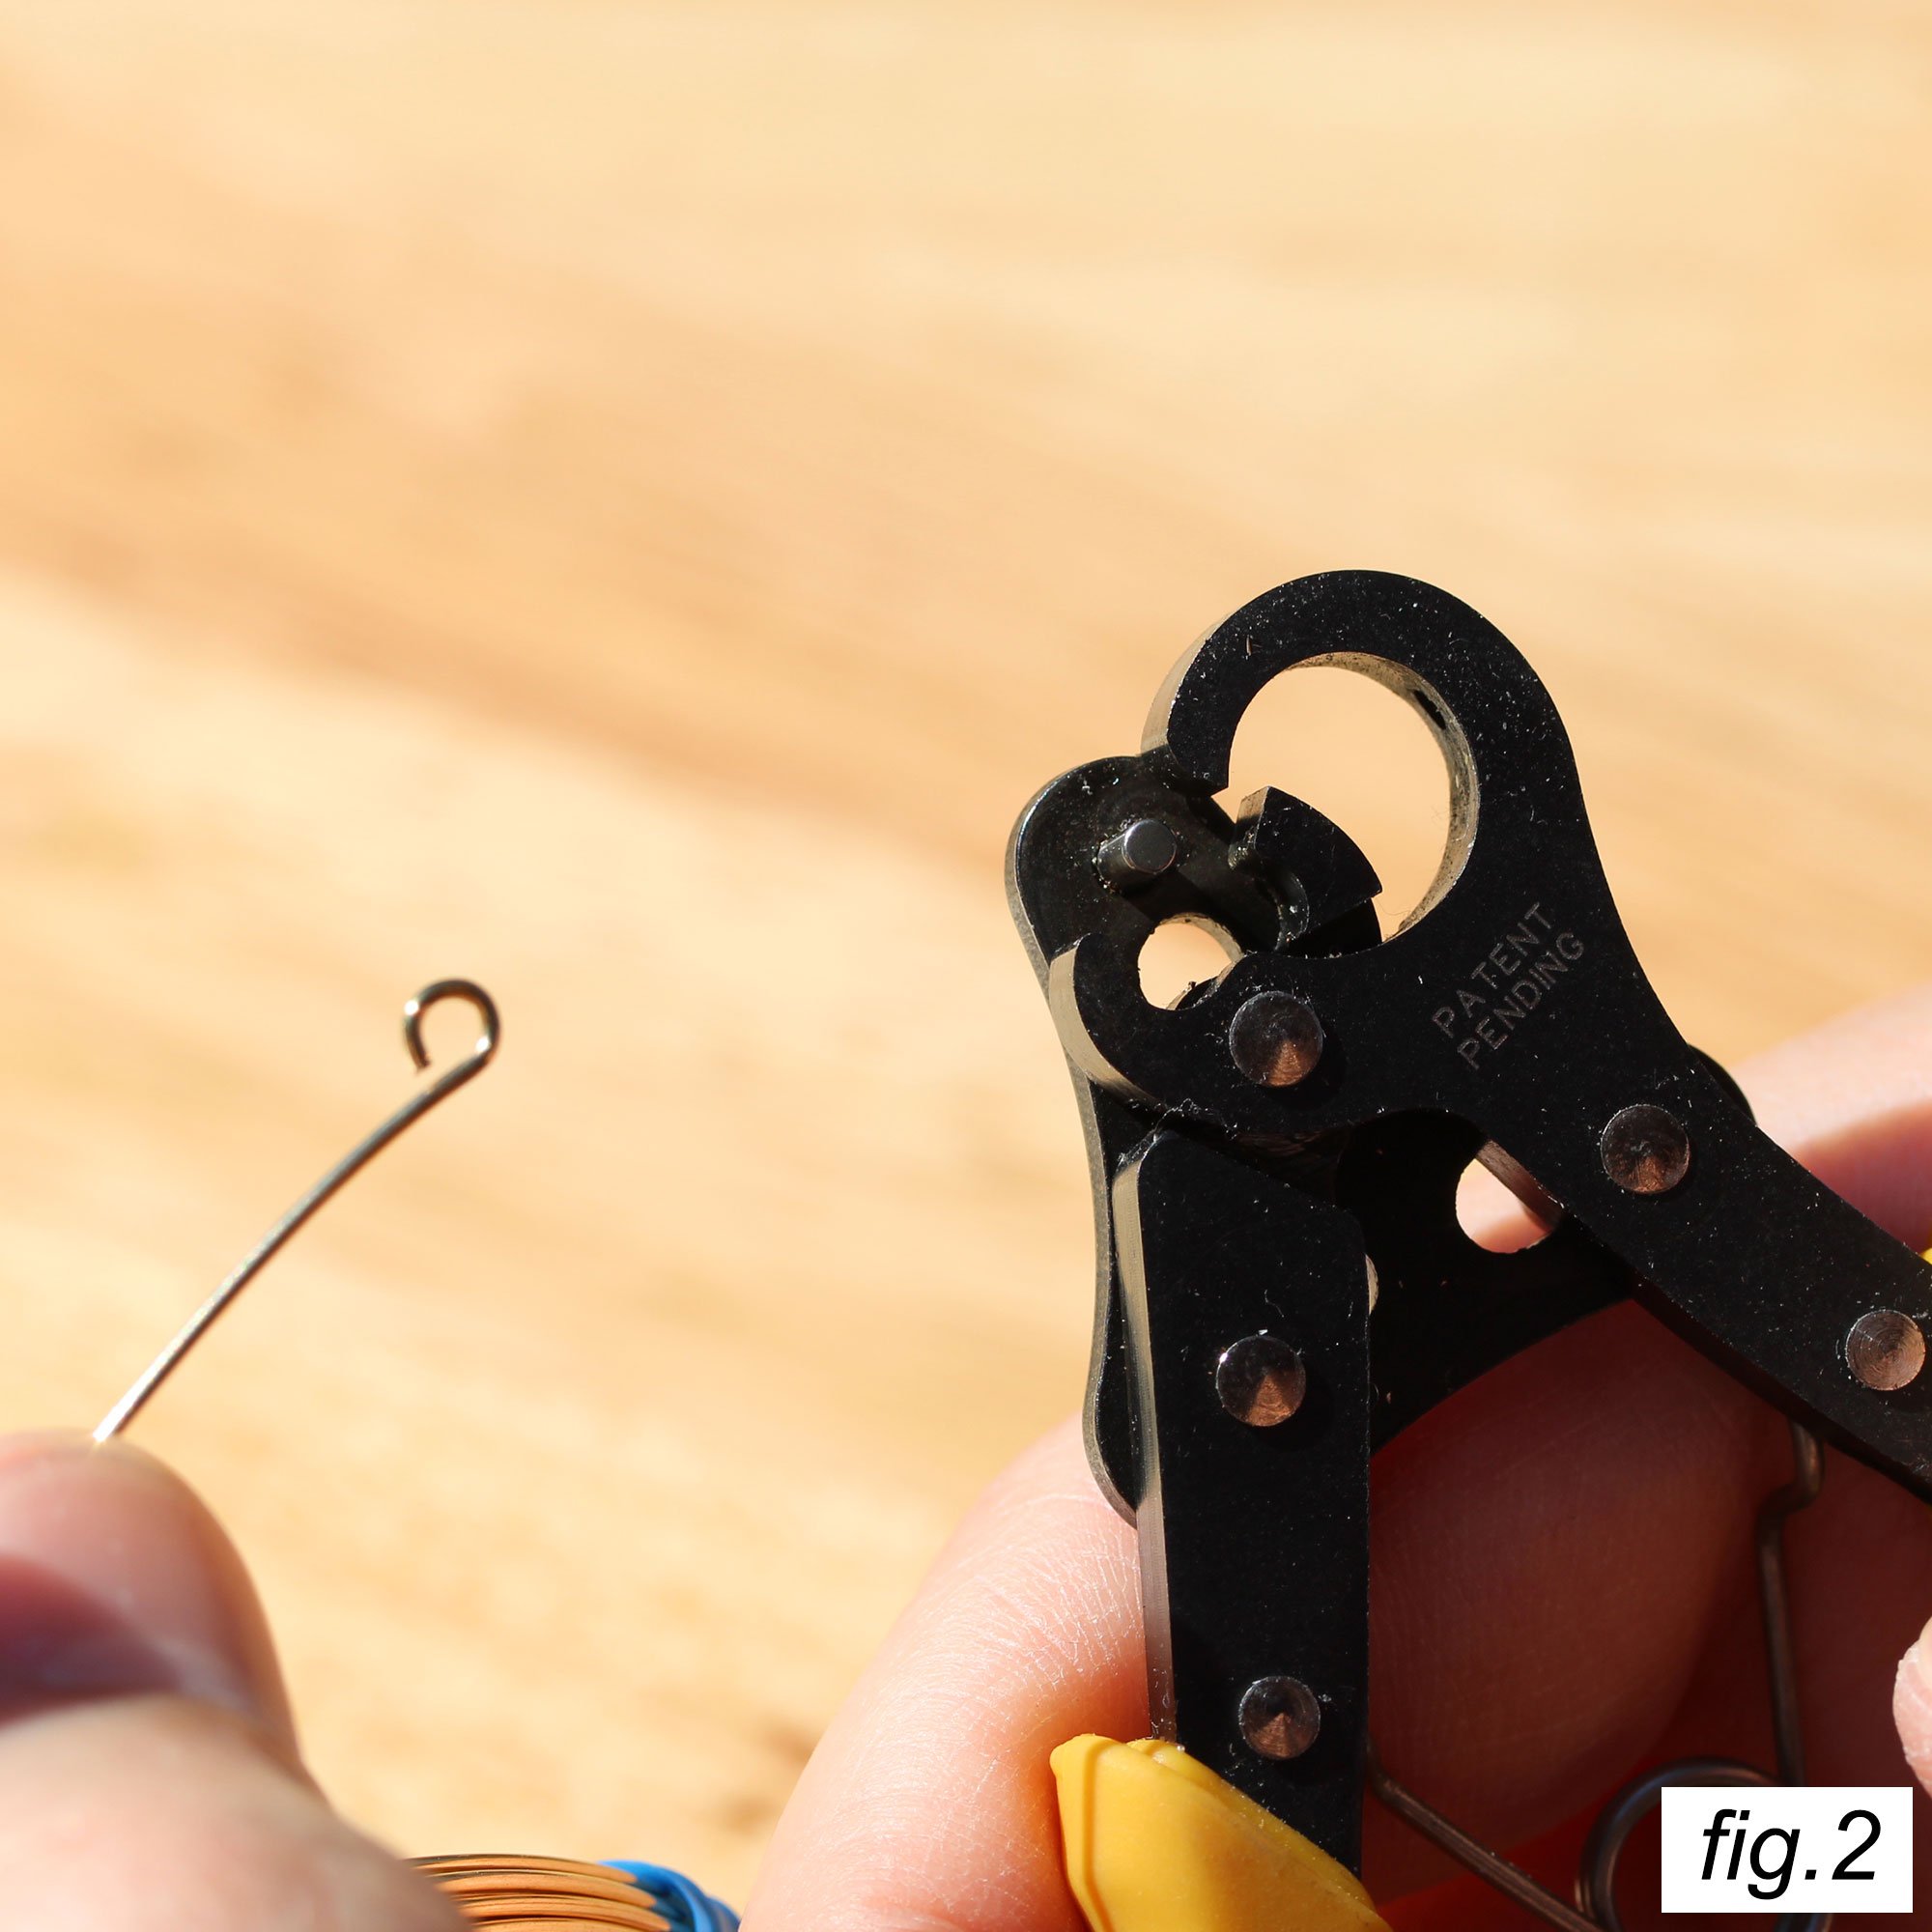
Figure 1a shows an open jump ring. To close it, begin by grasping the jump ring on either side of the cut with two pairs of flatnose pliers.
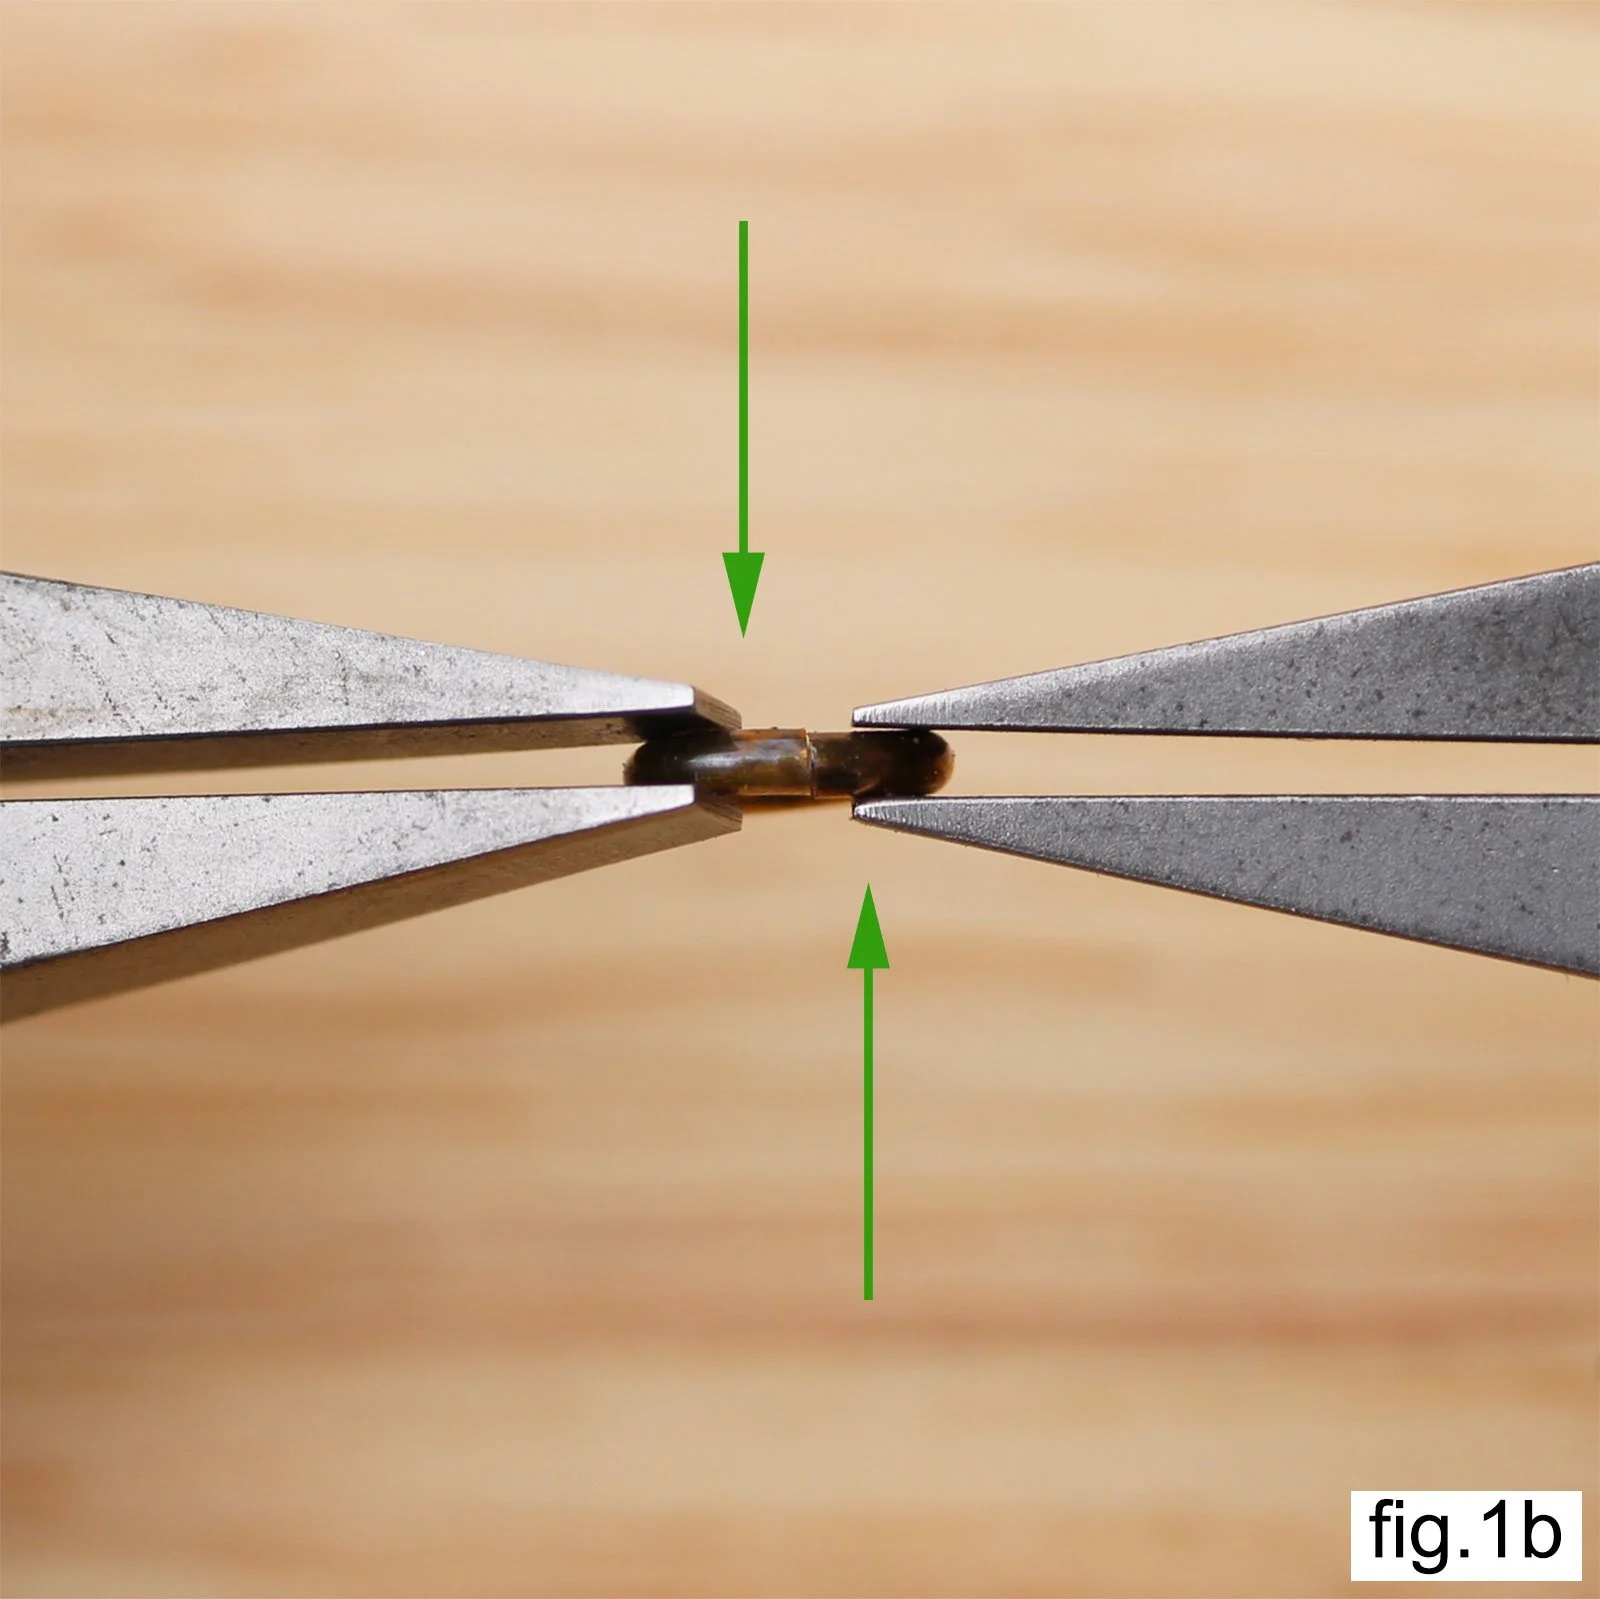
While holding firmly with the flat nose, pull the left hand flat nose toward your body and push the right hand flat nose away from your body until the two cut ends of the wire ring meet in the middle. There should be a slight clicking sound when the two ends meet tightly.
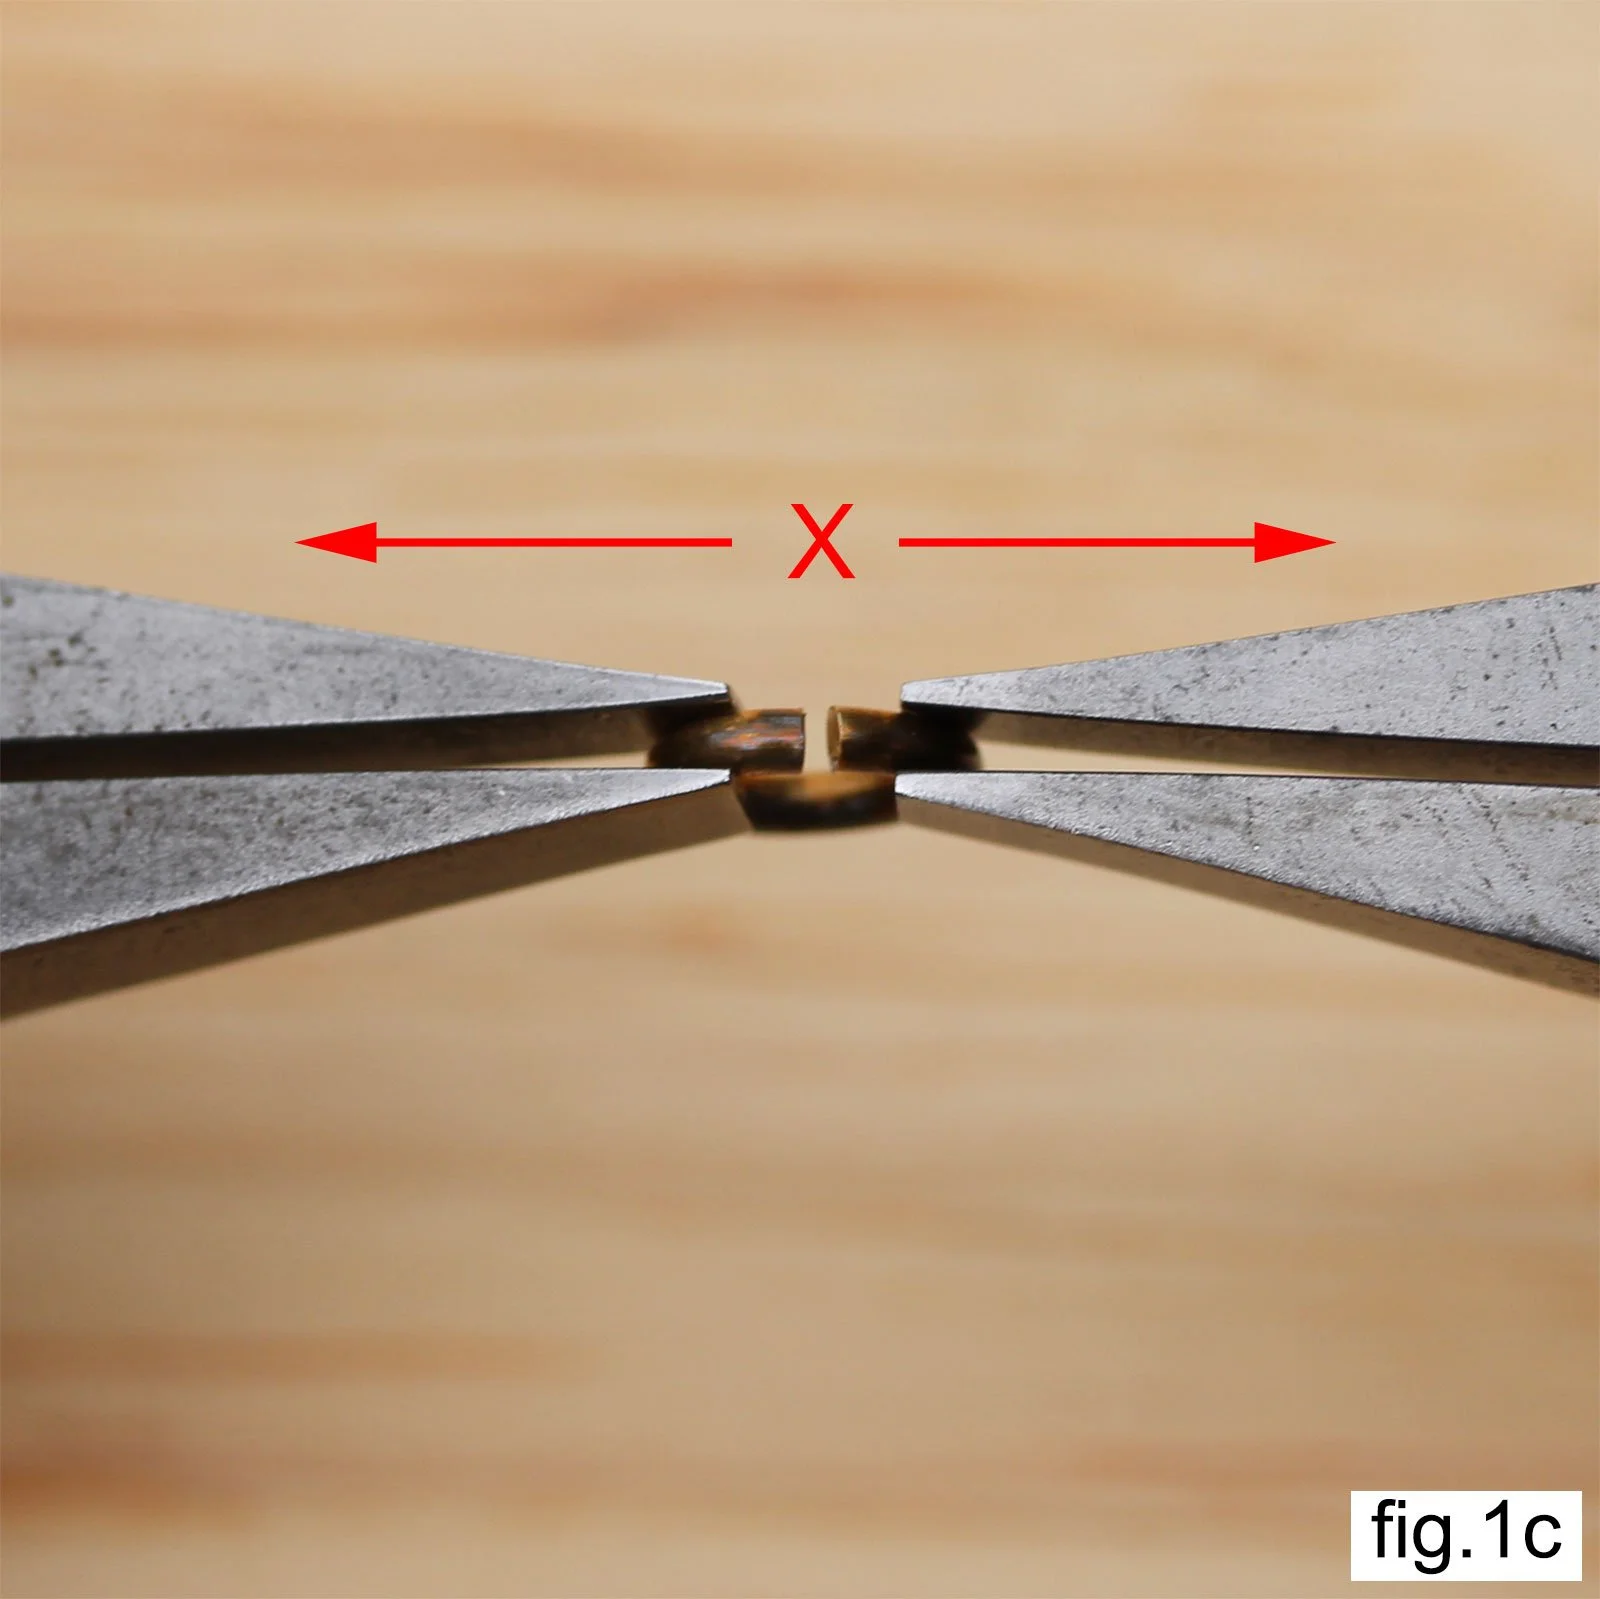
NEVER pull the two cut ends of the wire away from one another to open a jump ring, or toward one another to close it (as shown in fig. 1c ). This will deform the circle and ruin your ring.
Simple Loop Construction: Method 1 (Annie's Method)
Everyone will find their own favorite style of chained rosary construction, and once you get the hang of some basics, you will too! My preference is to use small wire segments and form loops on both sides of the beads with my round nose pliers. As you will see in the second set of instructions lower down this page, my son Alex prefers to use looping pliers to form eye pins (or you may purchase eye pins yourself), then complete the second loop of each rosary bead with round nose pliers.
Cut a segment of wire approximately 1 3/8” (35mm) long. This should work for 6mm, 7mm and 8mm beads with 20ga wire. If you are using 19ga wire which is harder to bend, or you have hand problems, you might want to cut this segment a little bit longer.
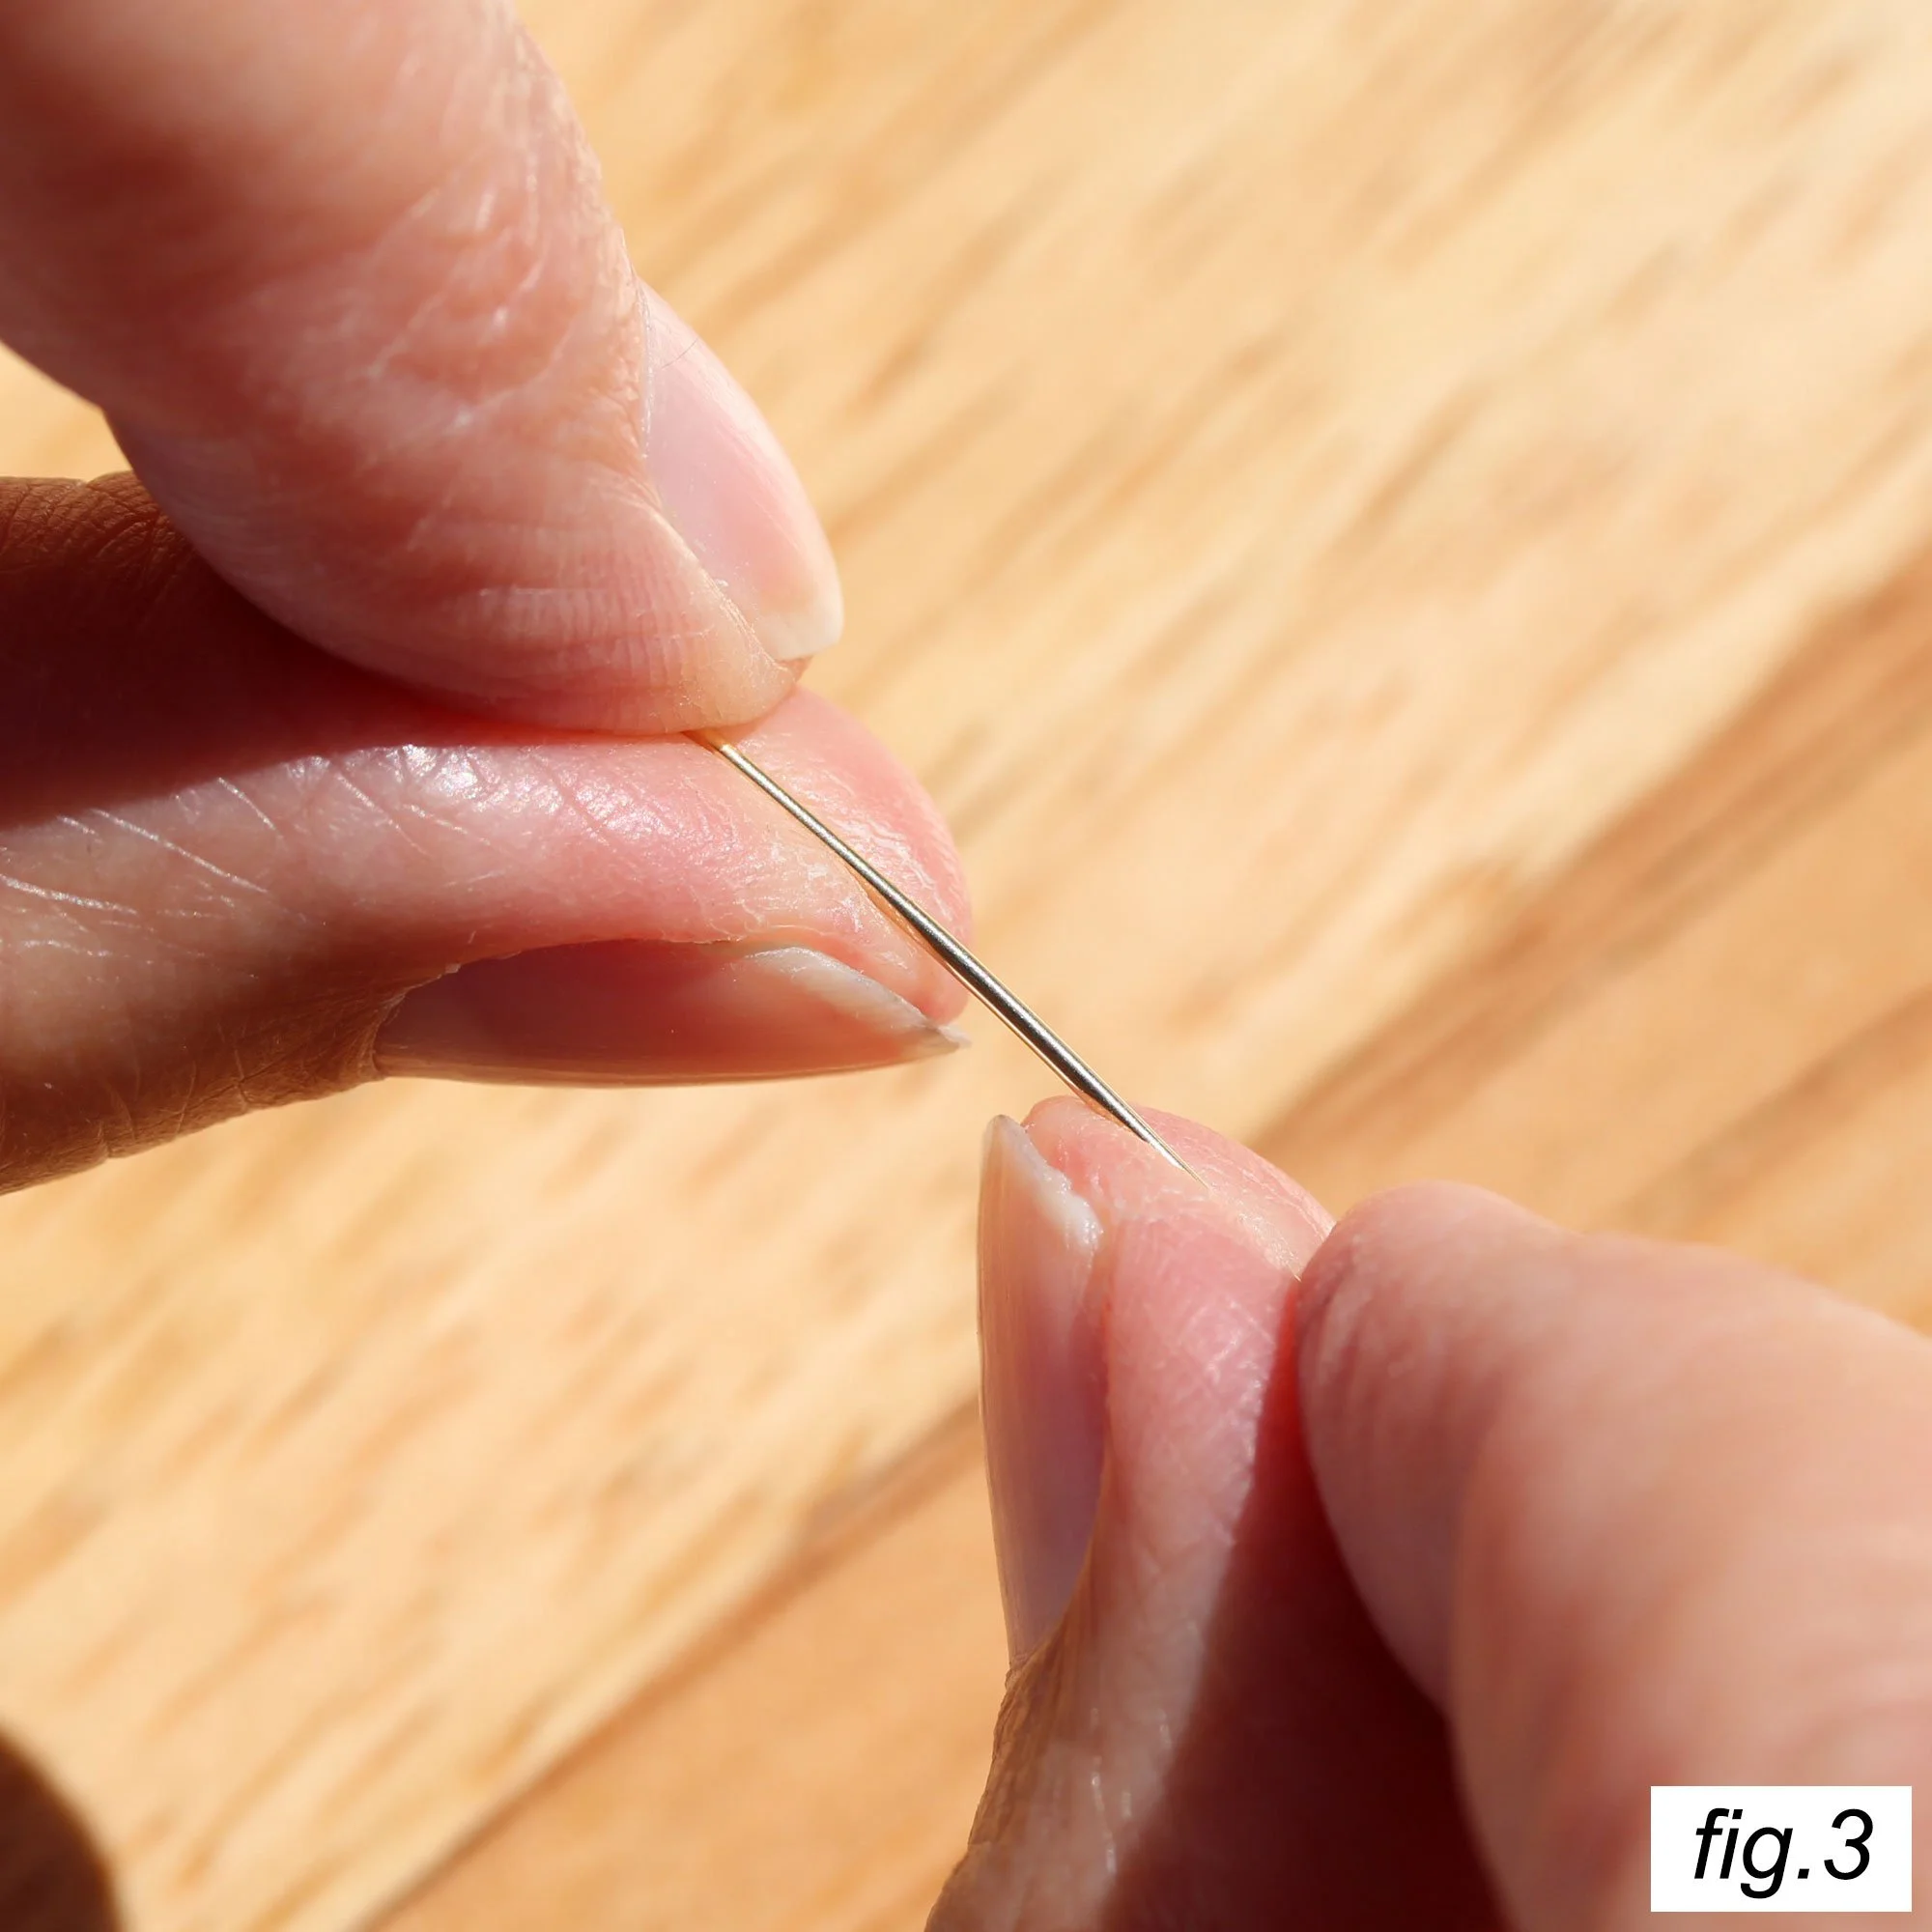
Using your two thumbs, straighten your piece of cut wire.
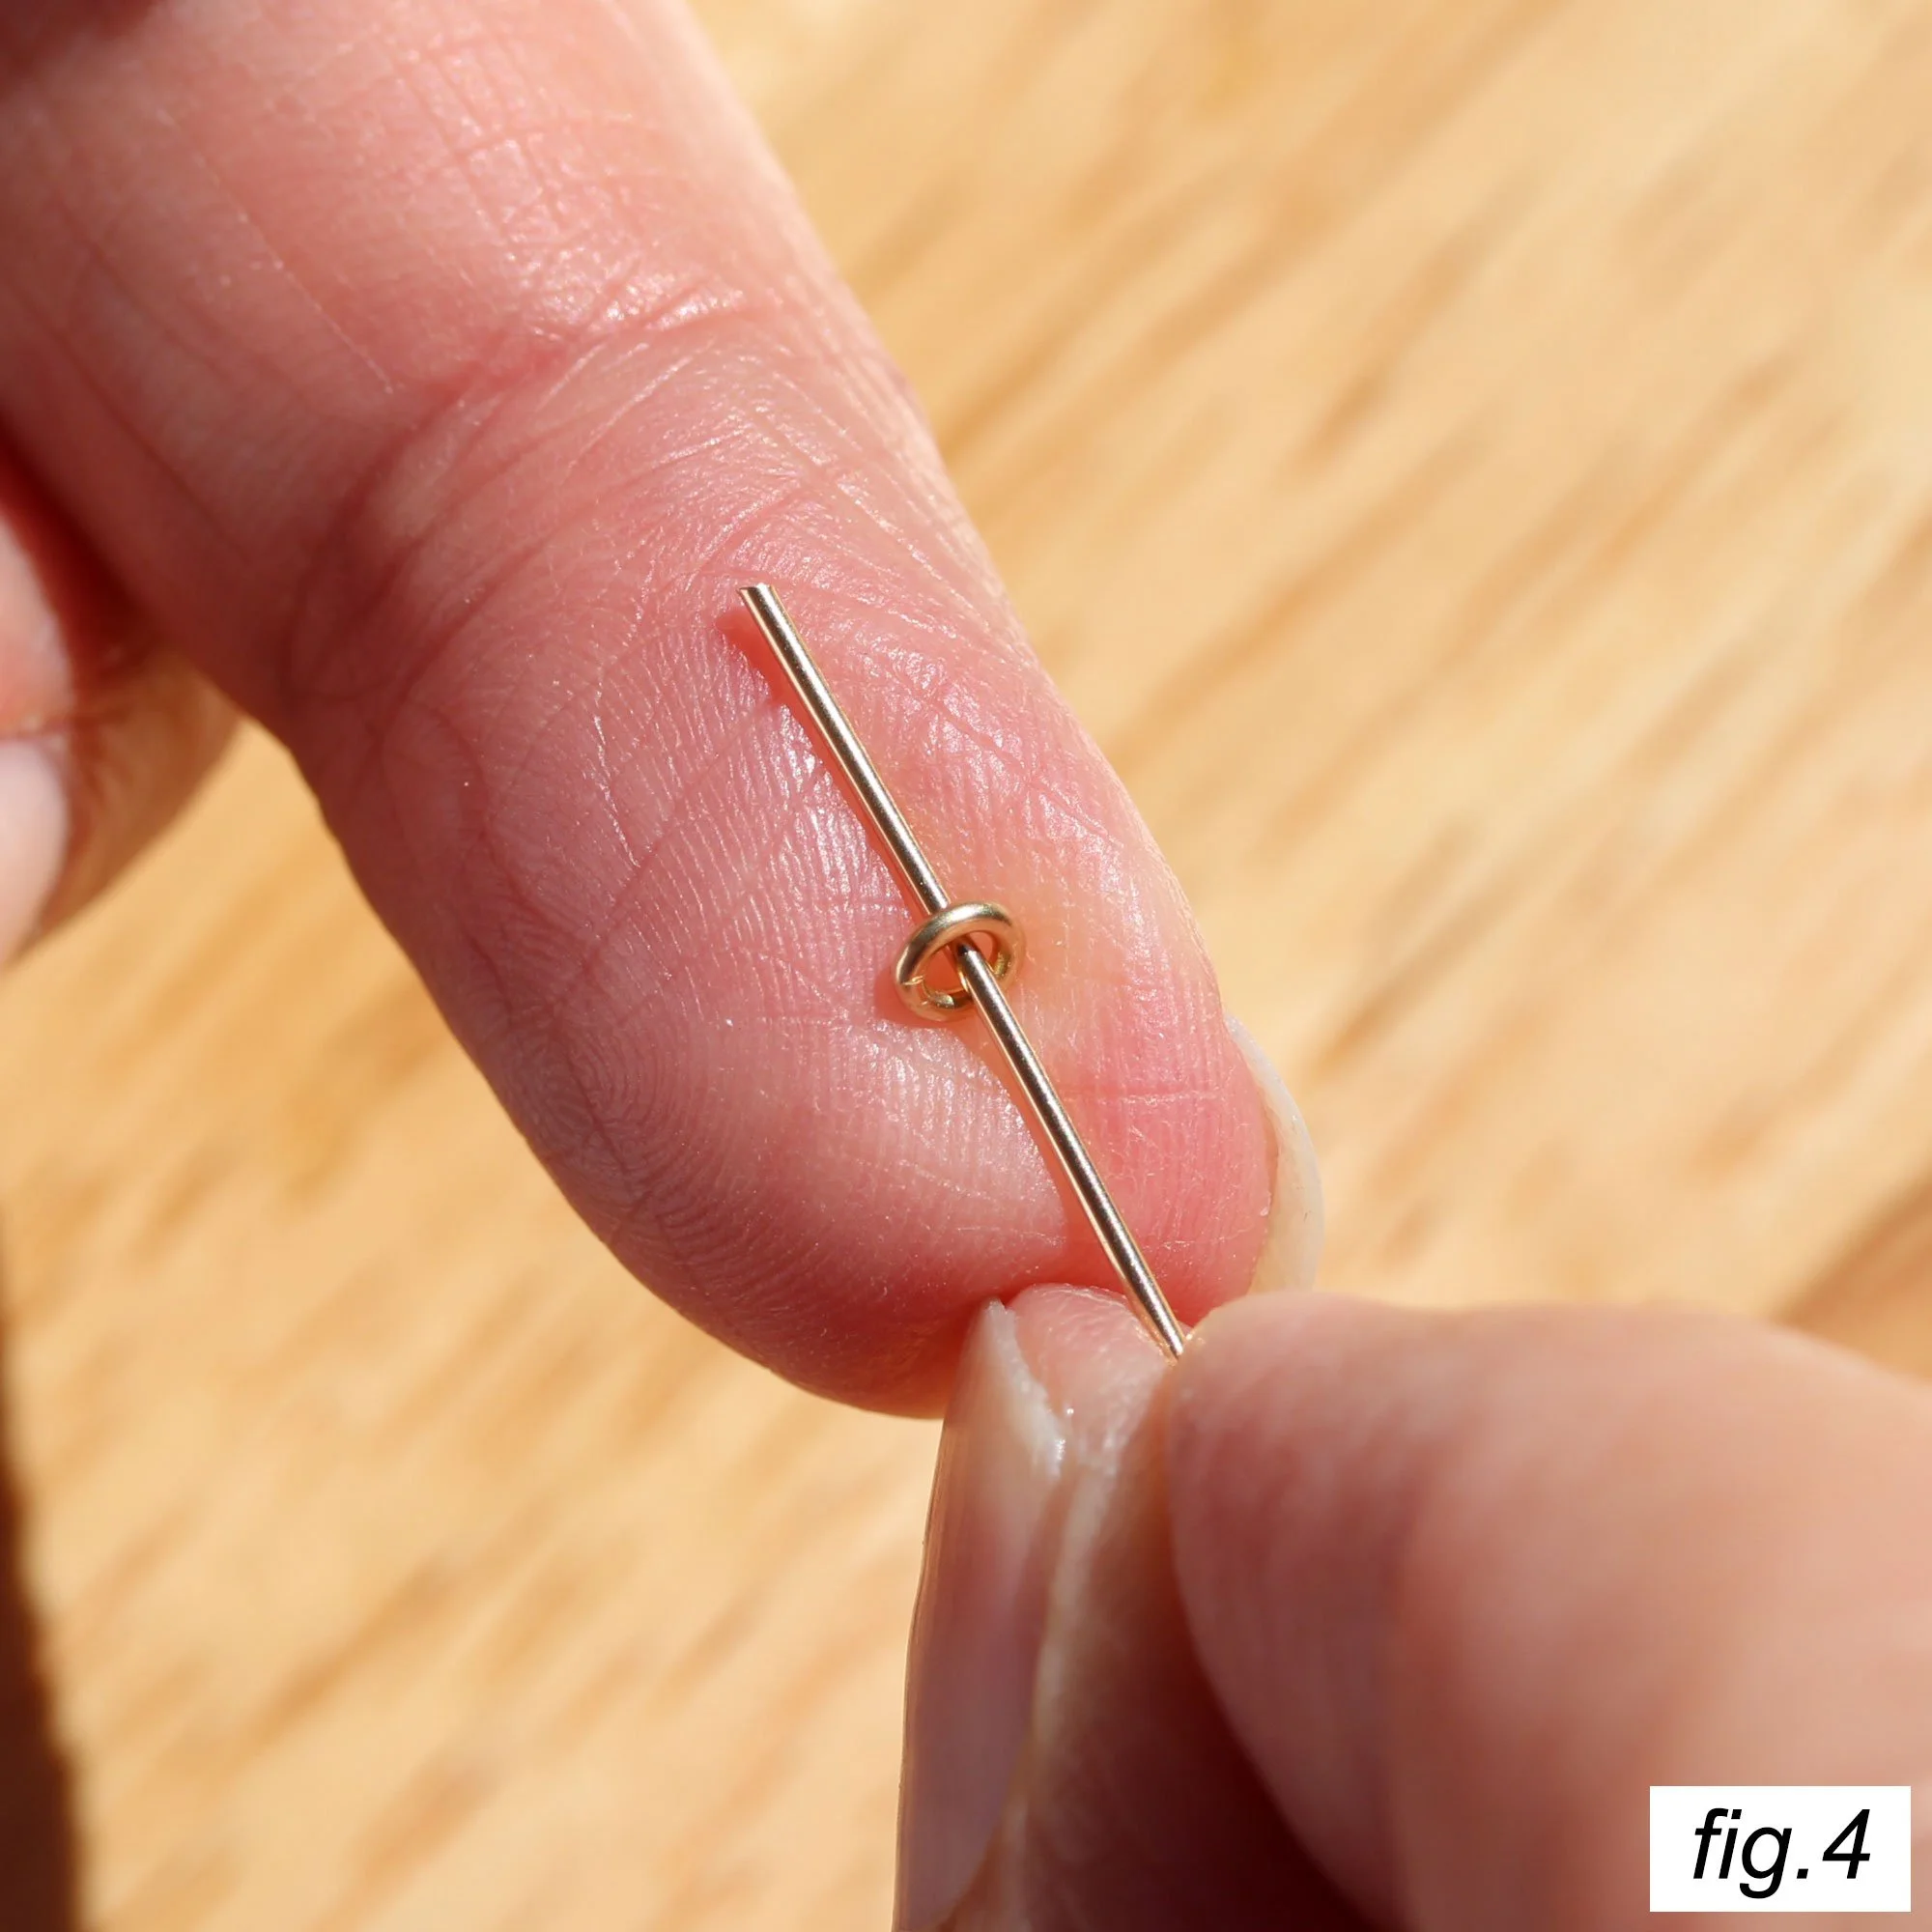
Thread a closed jump ring onto your wire segment.
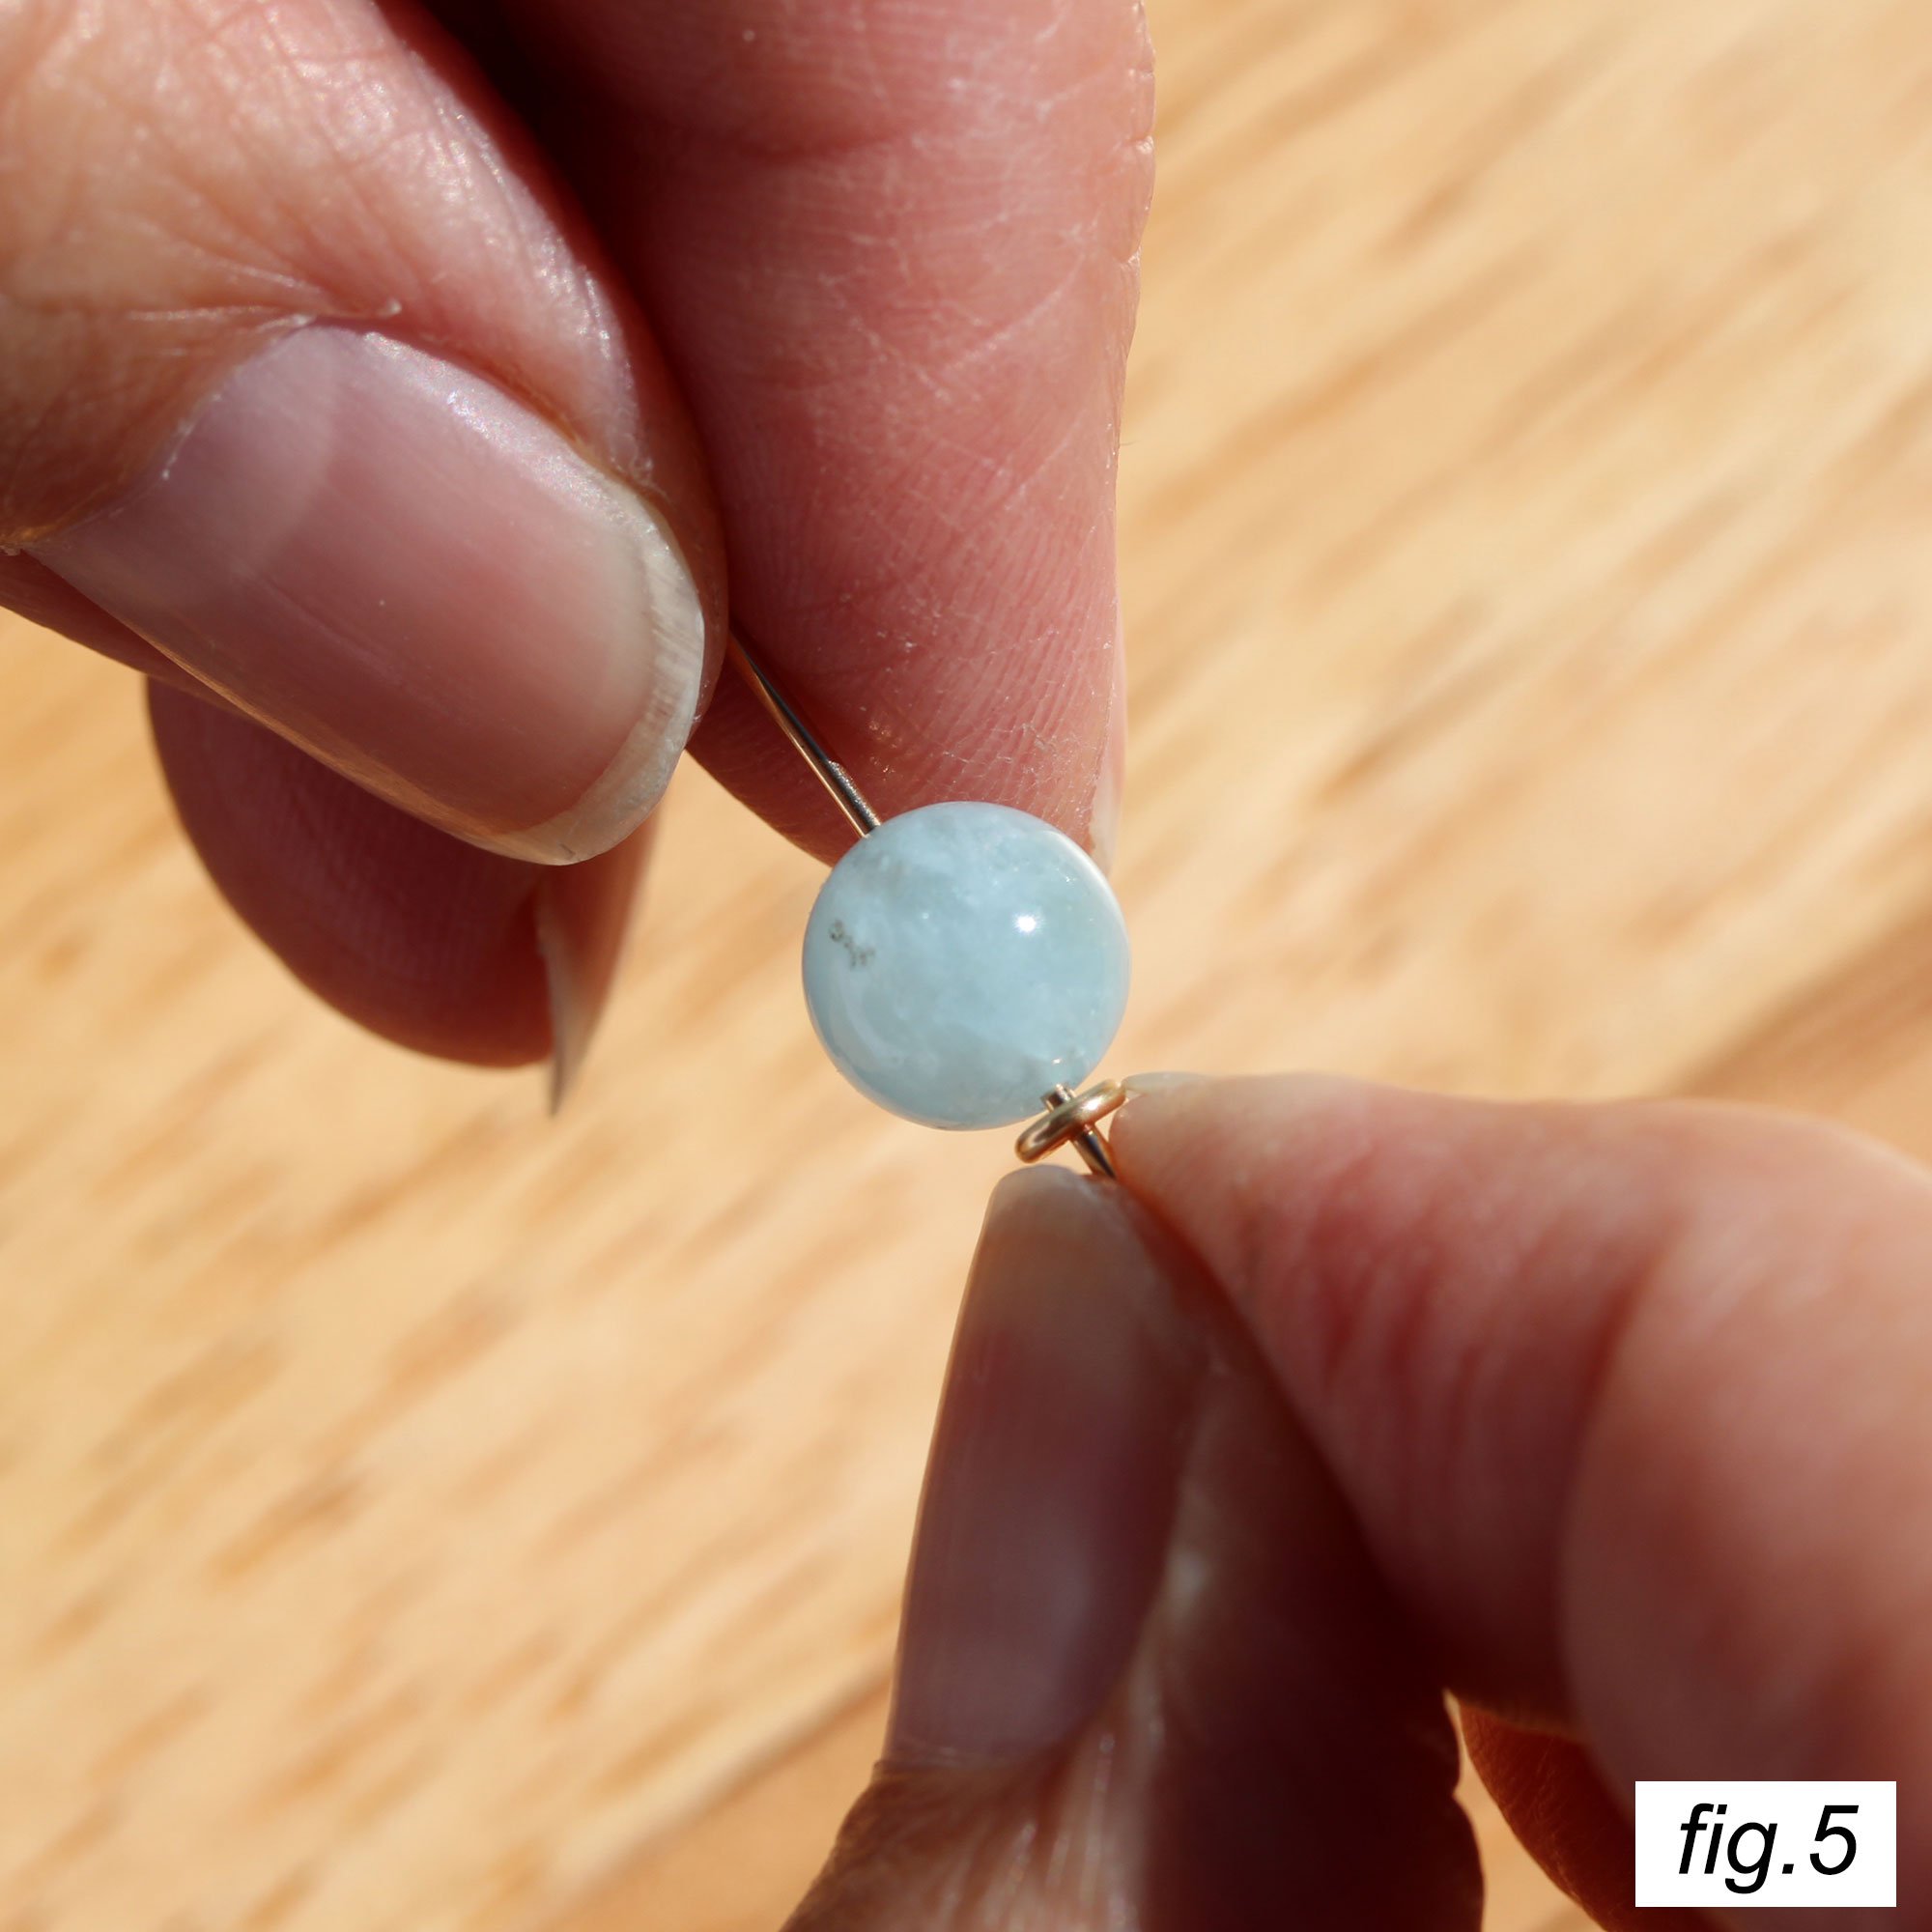
Thread a bead onto the wire after the jump ring.
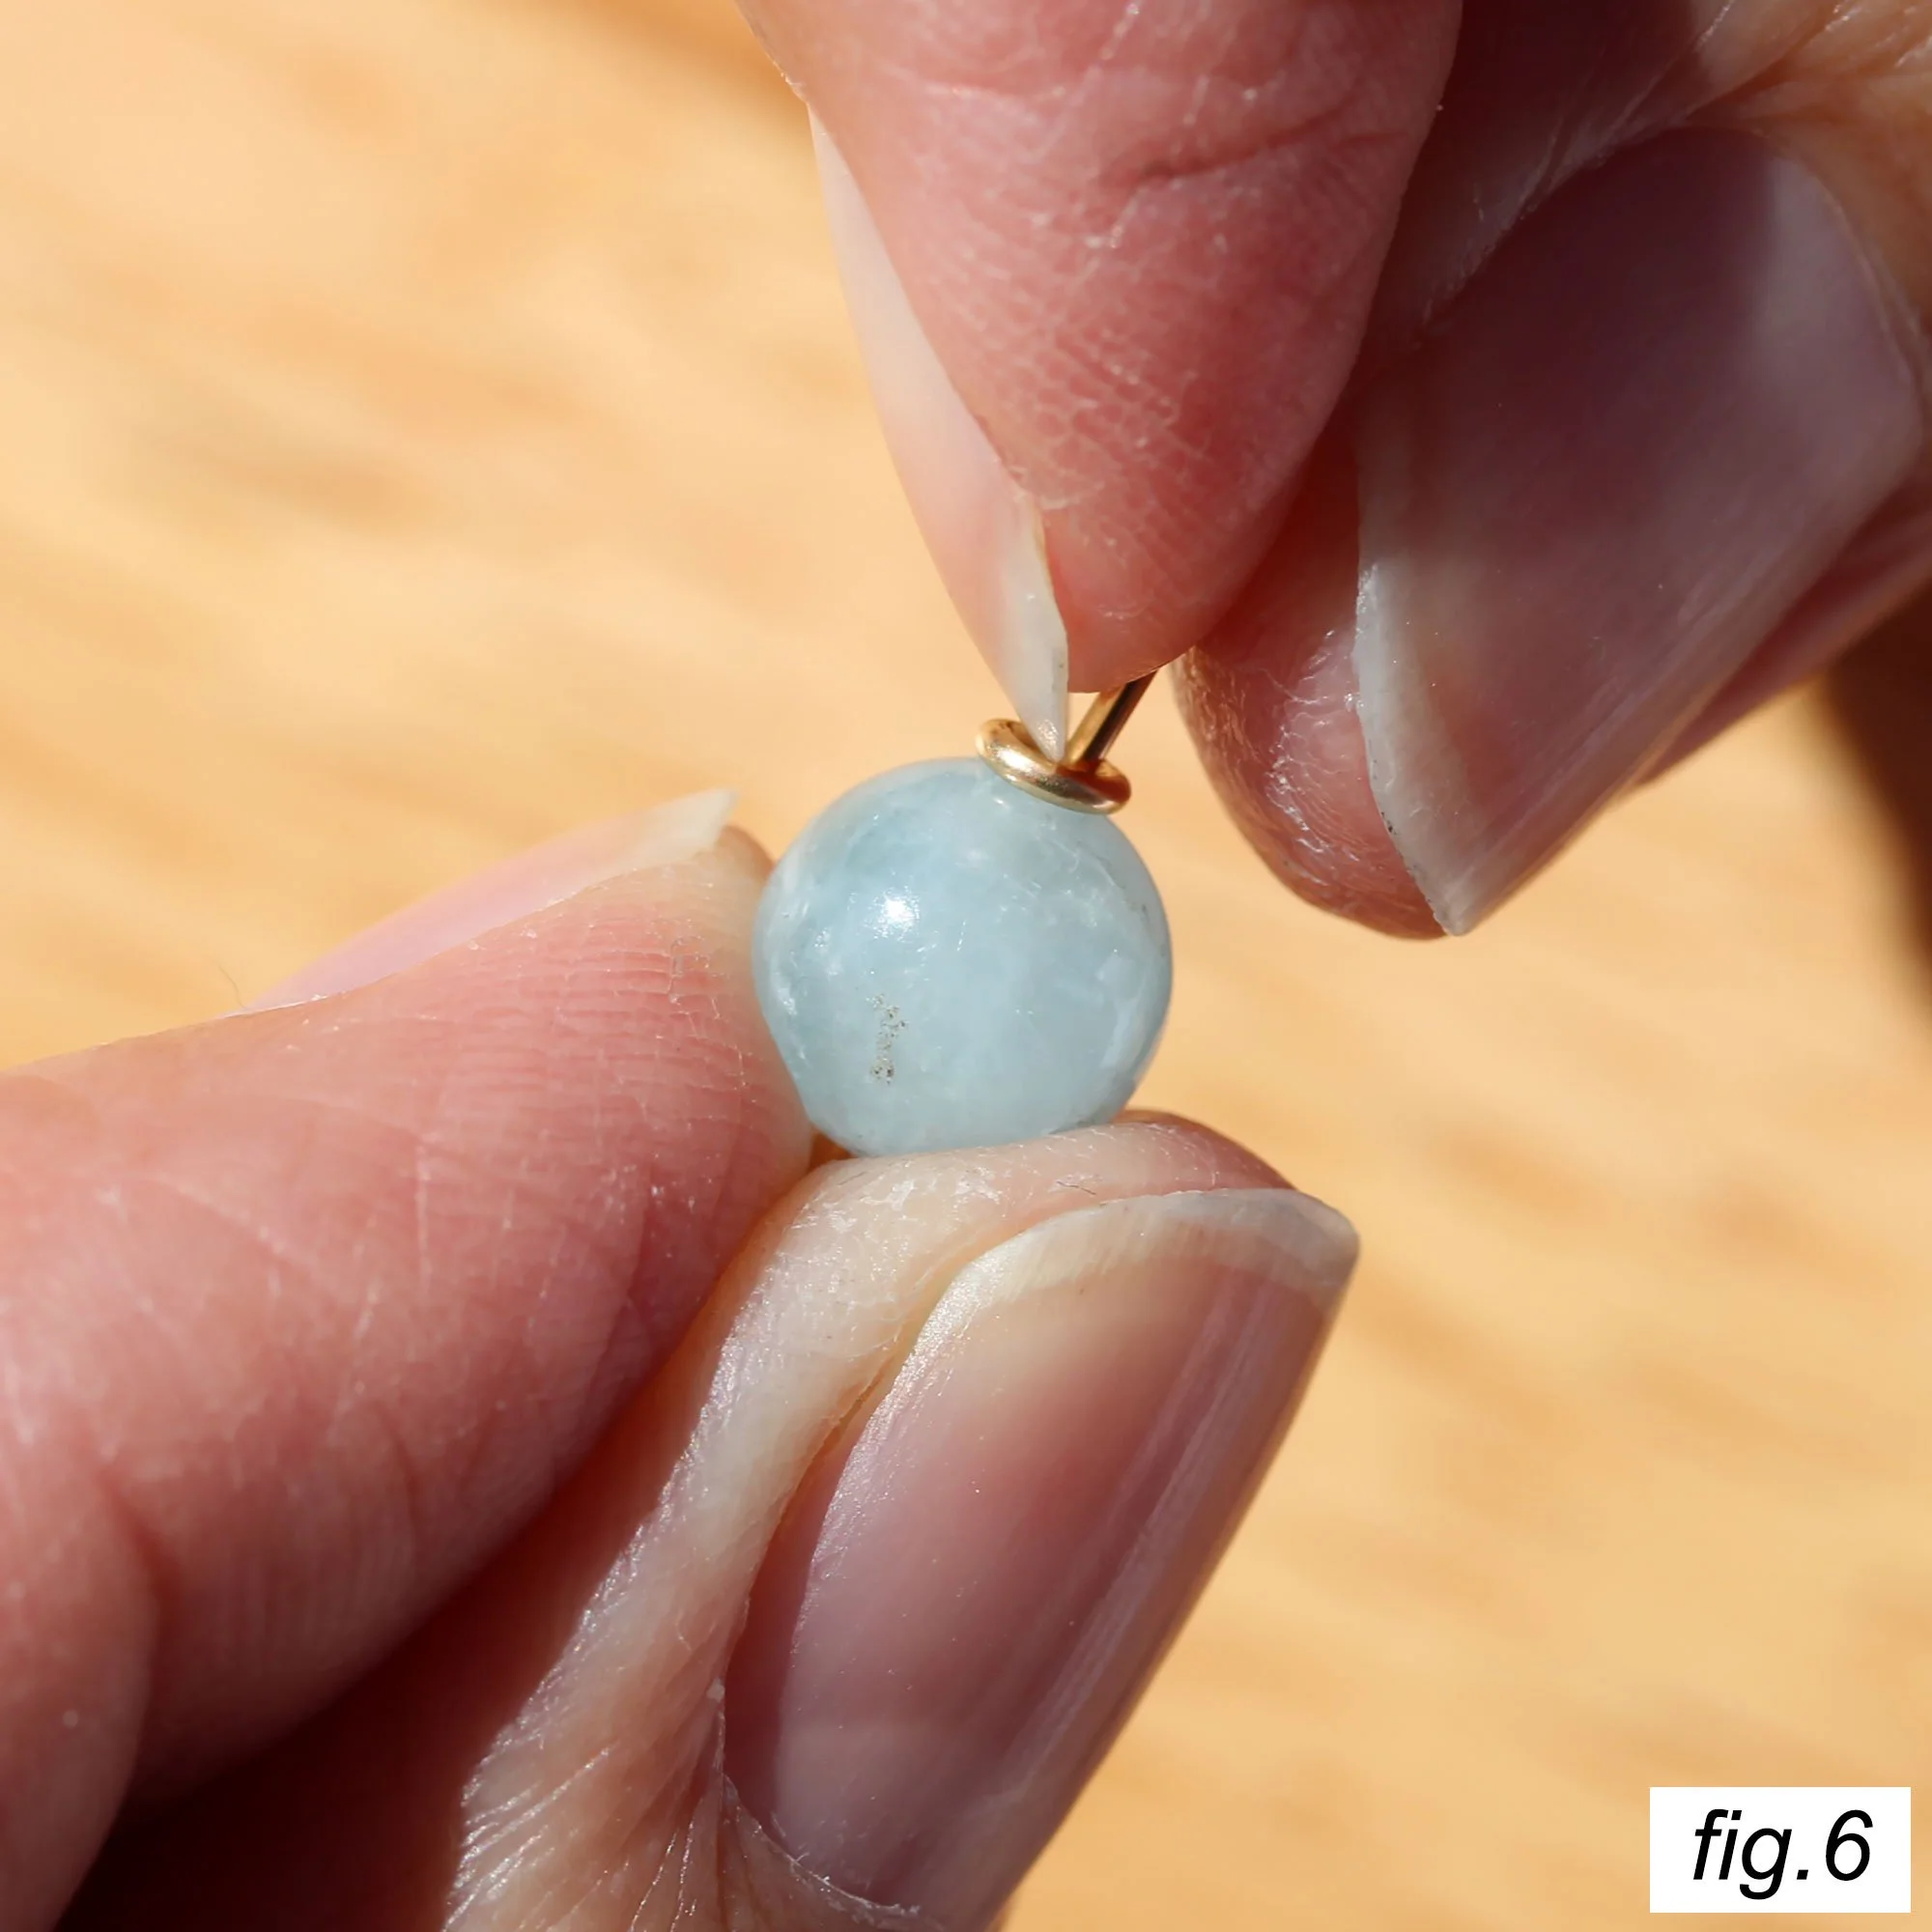
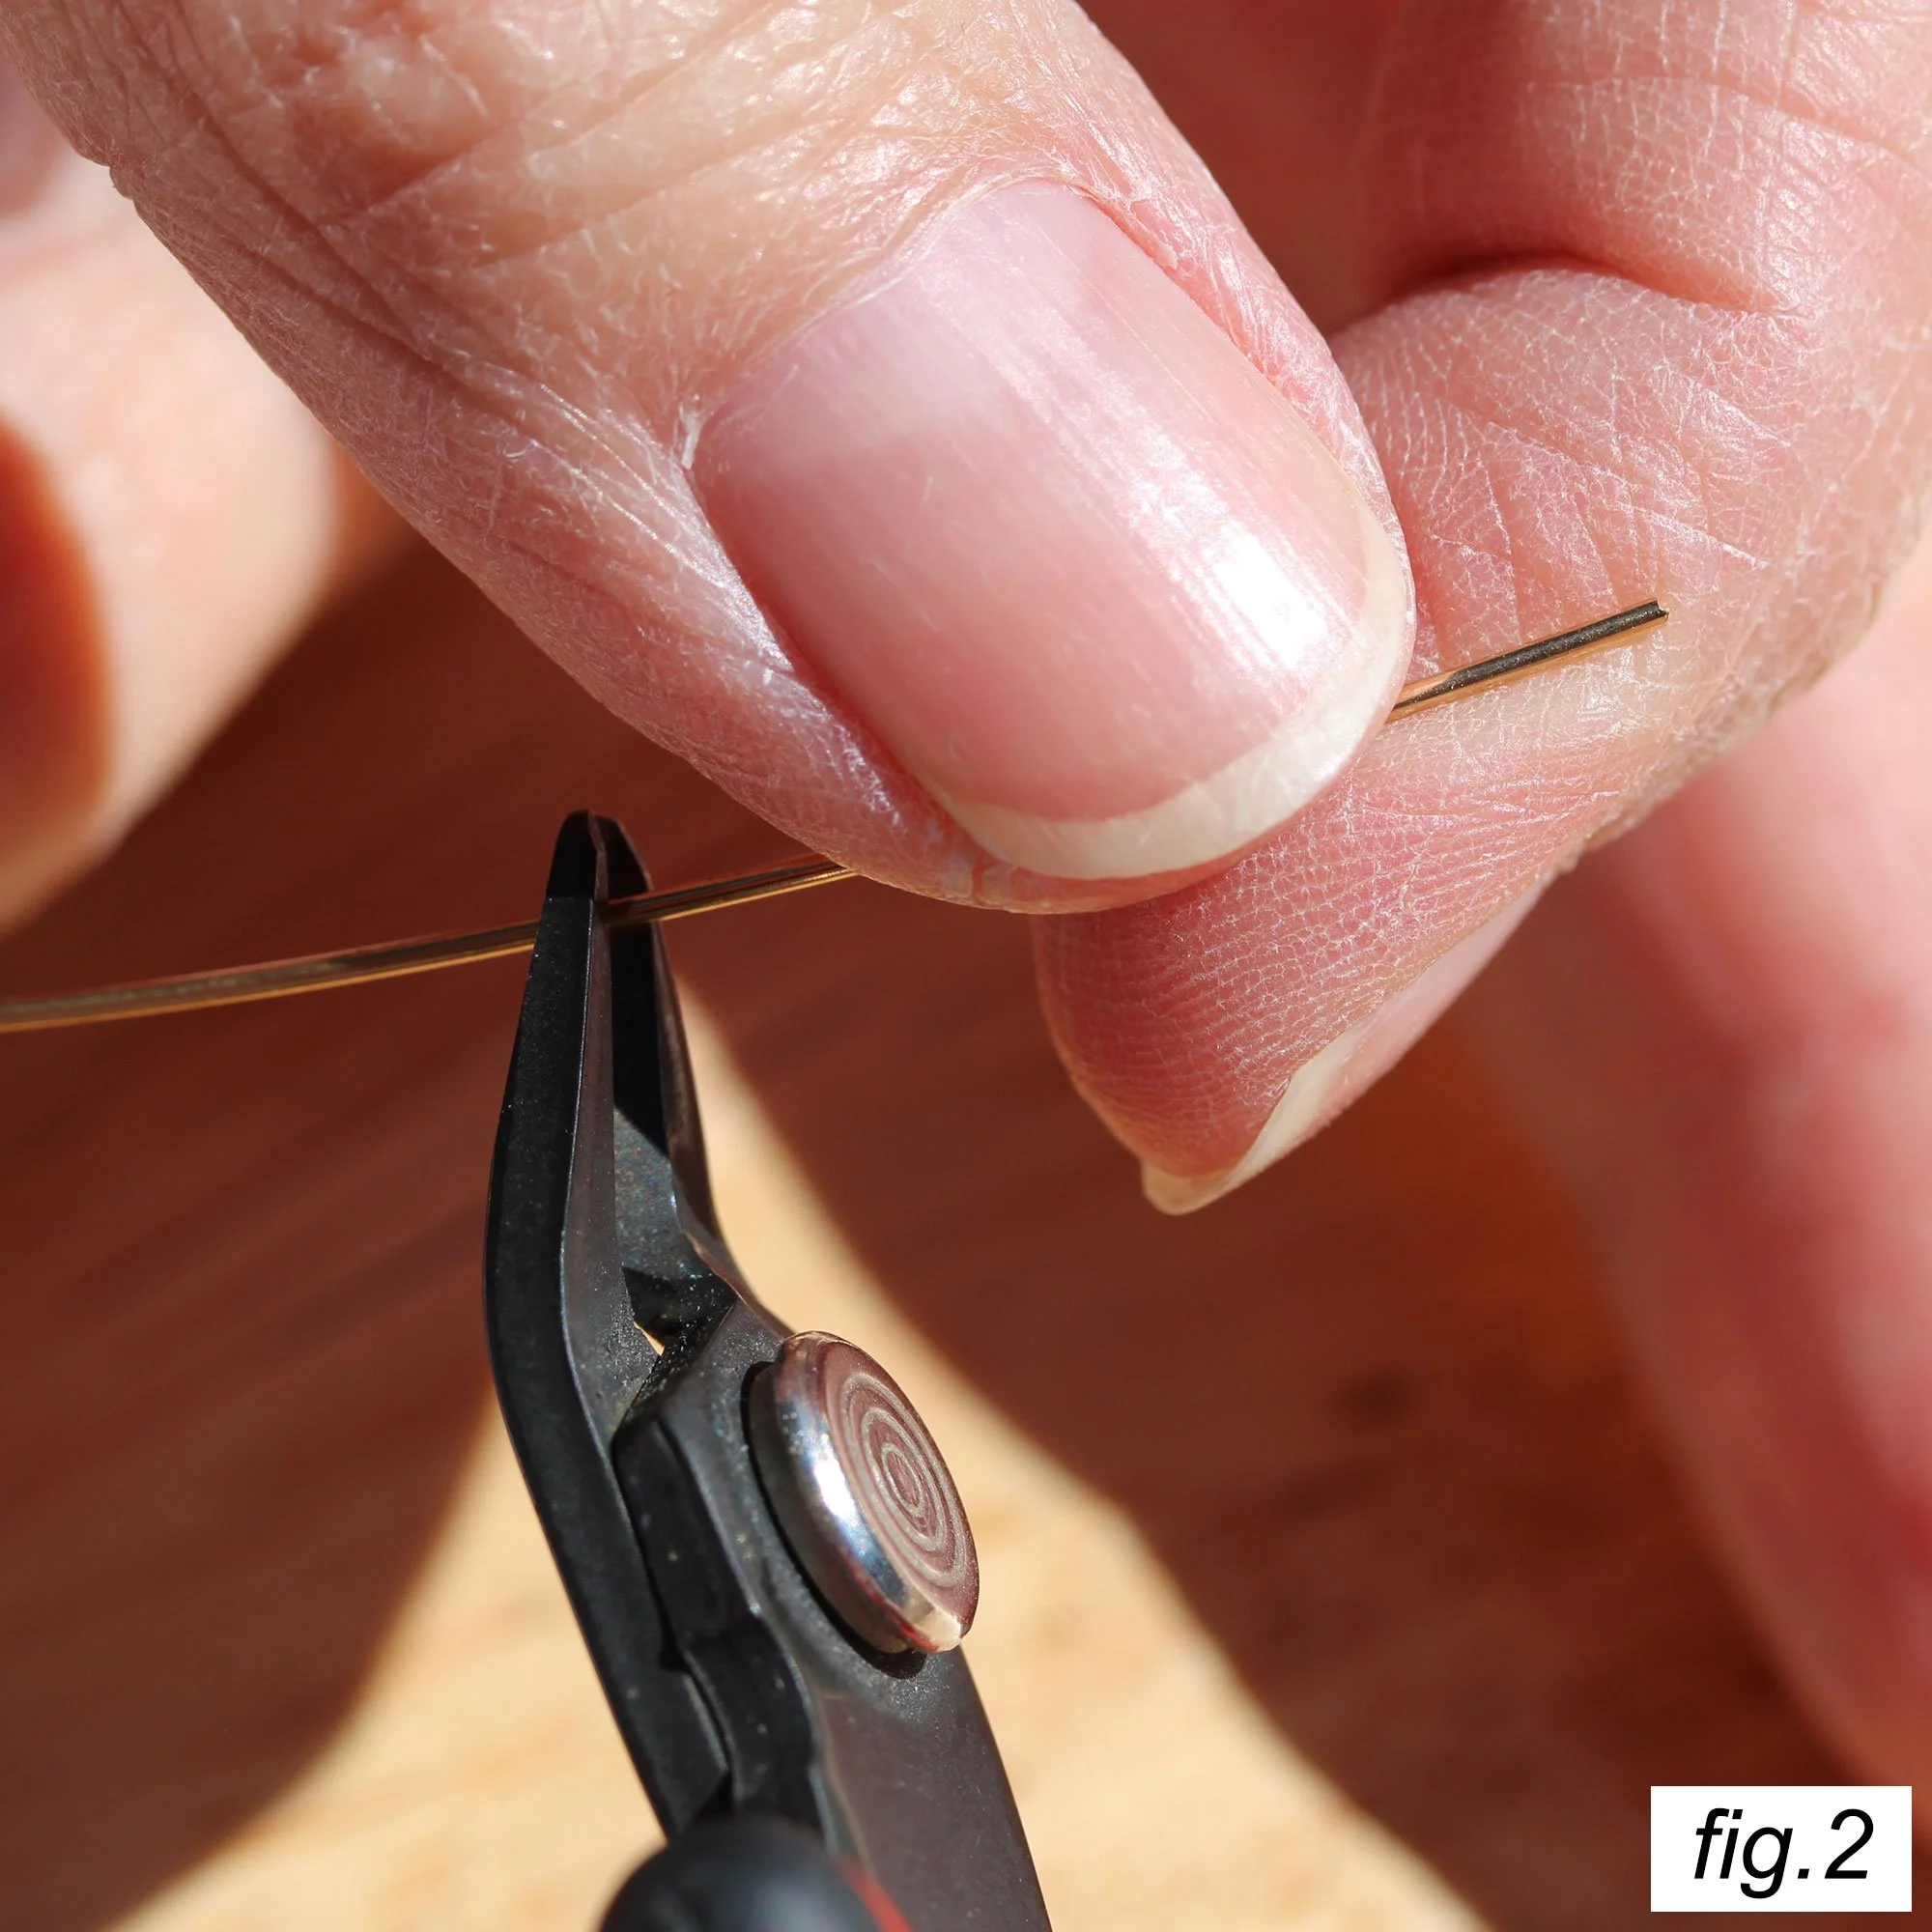
Hold the bottom threaded wire steady with your left thumb and index finger. Place your right index fingernail where the wire meets the jump ring and bead.
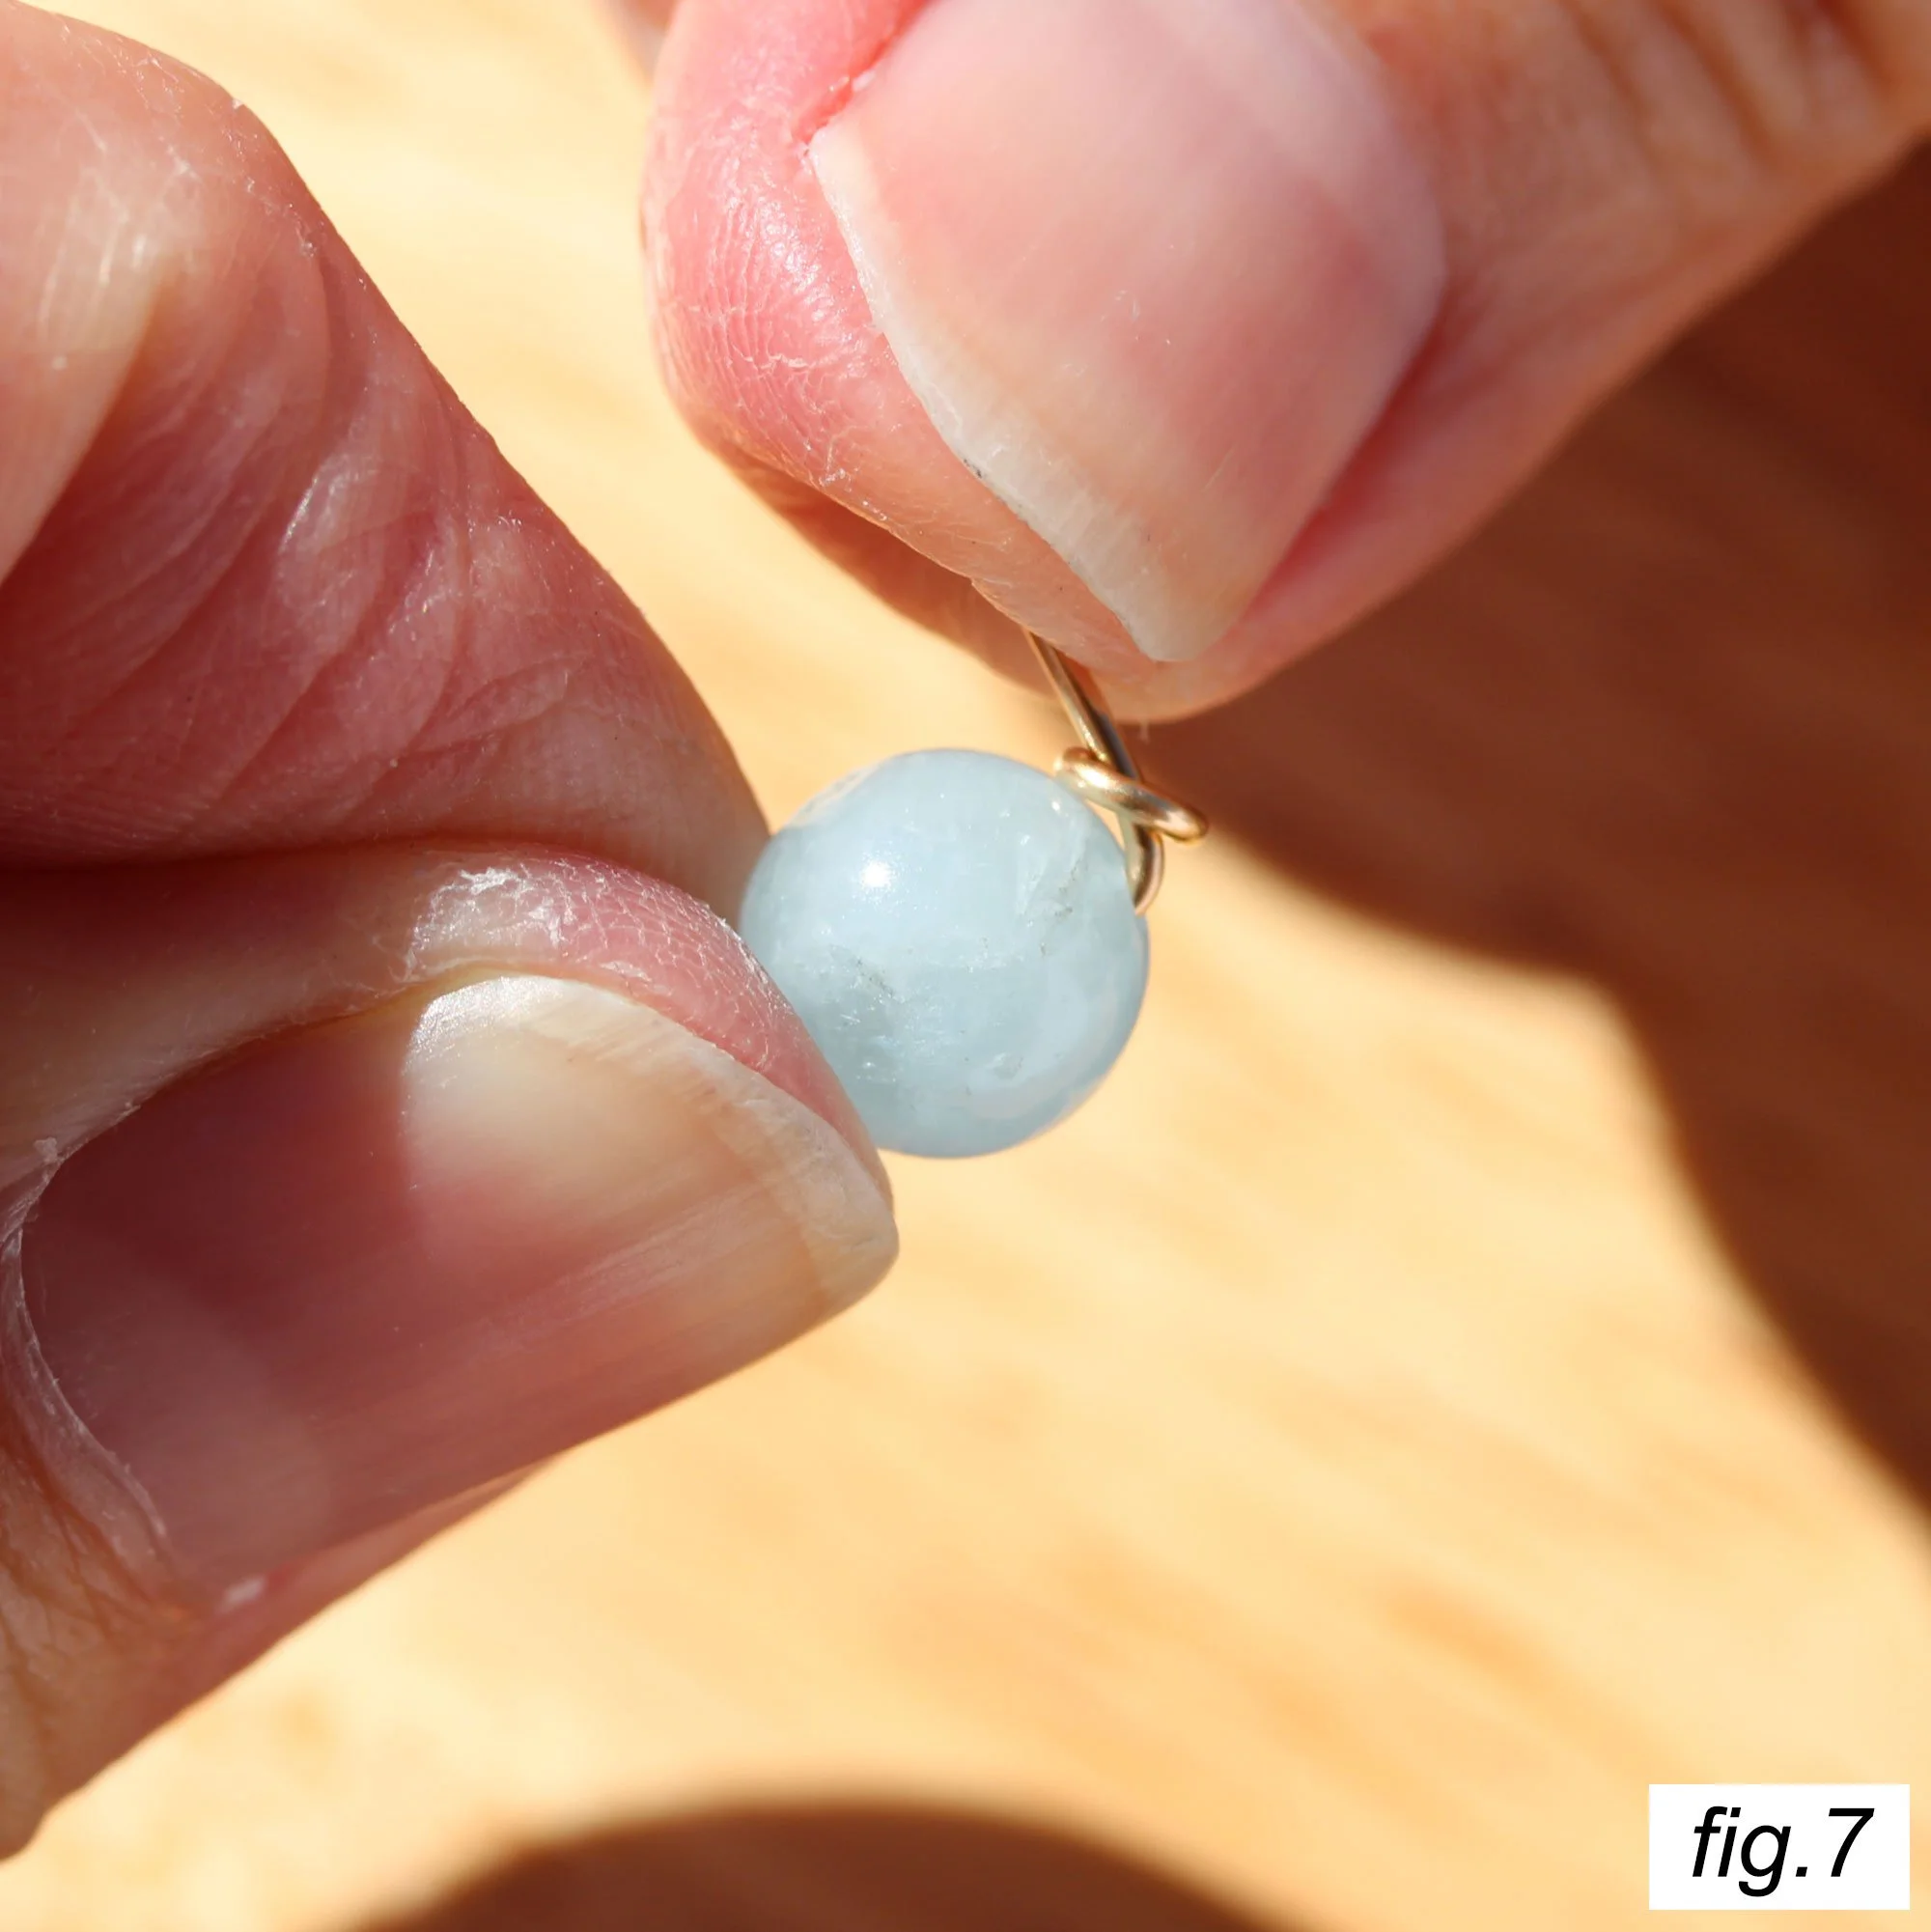
While pushing against the bead with your left thumb and forefinger, make a sharp 90 degree bend against the jump ring.
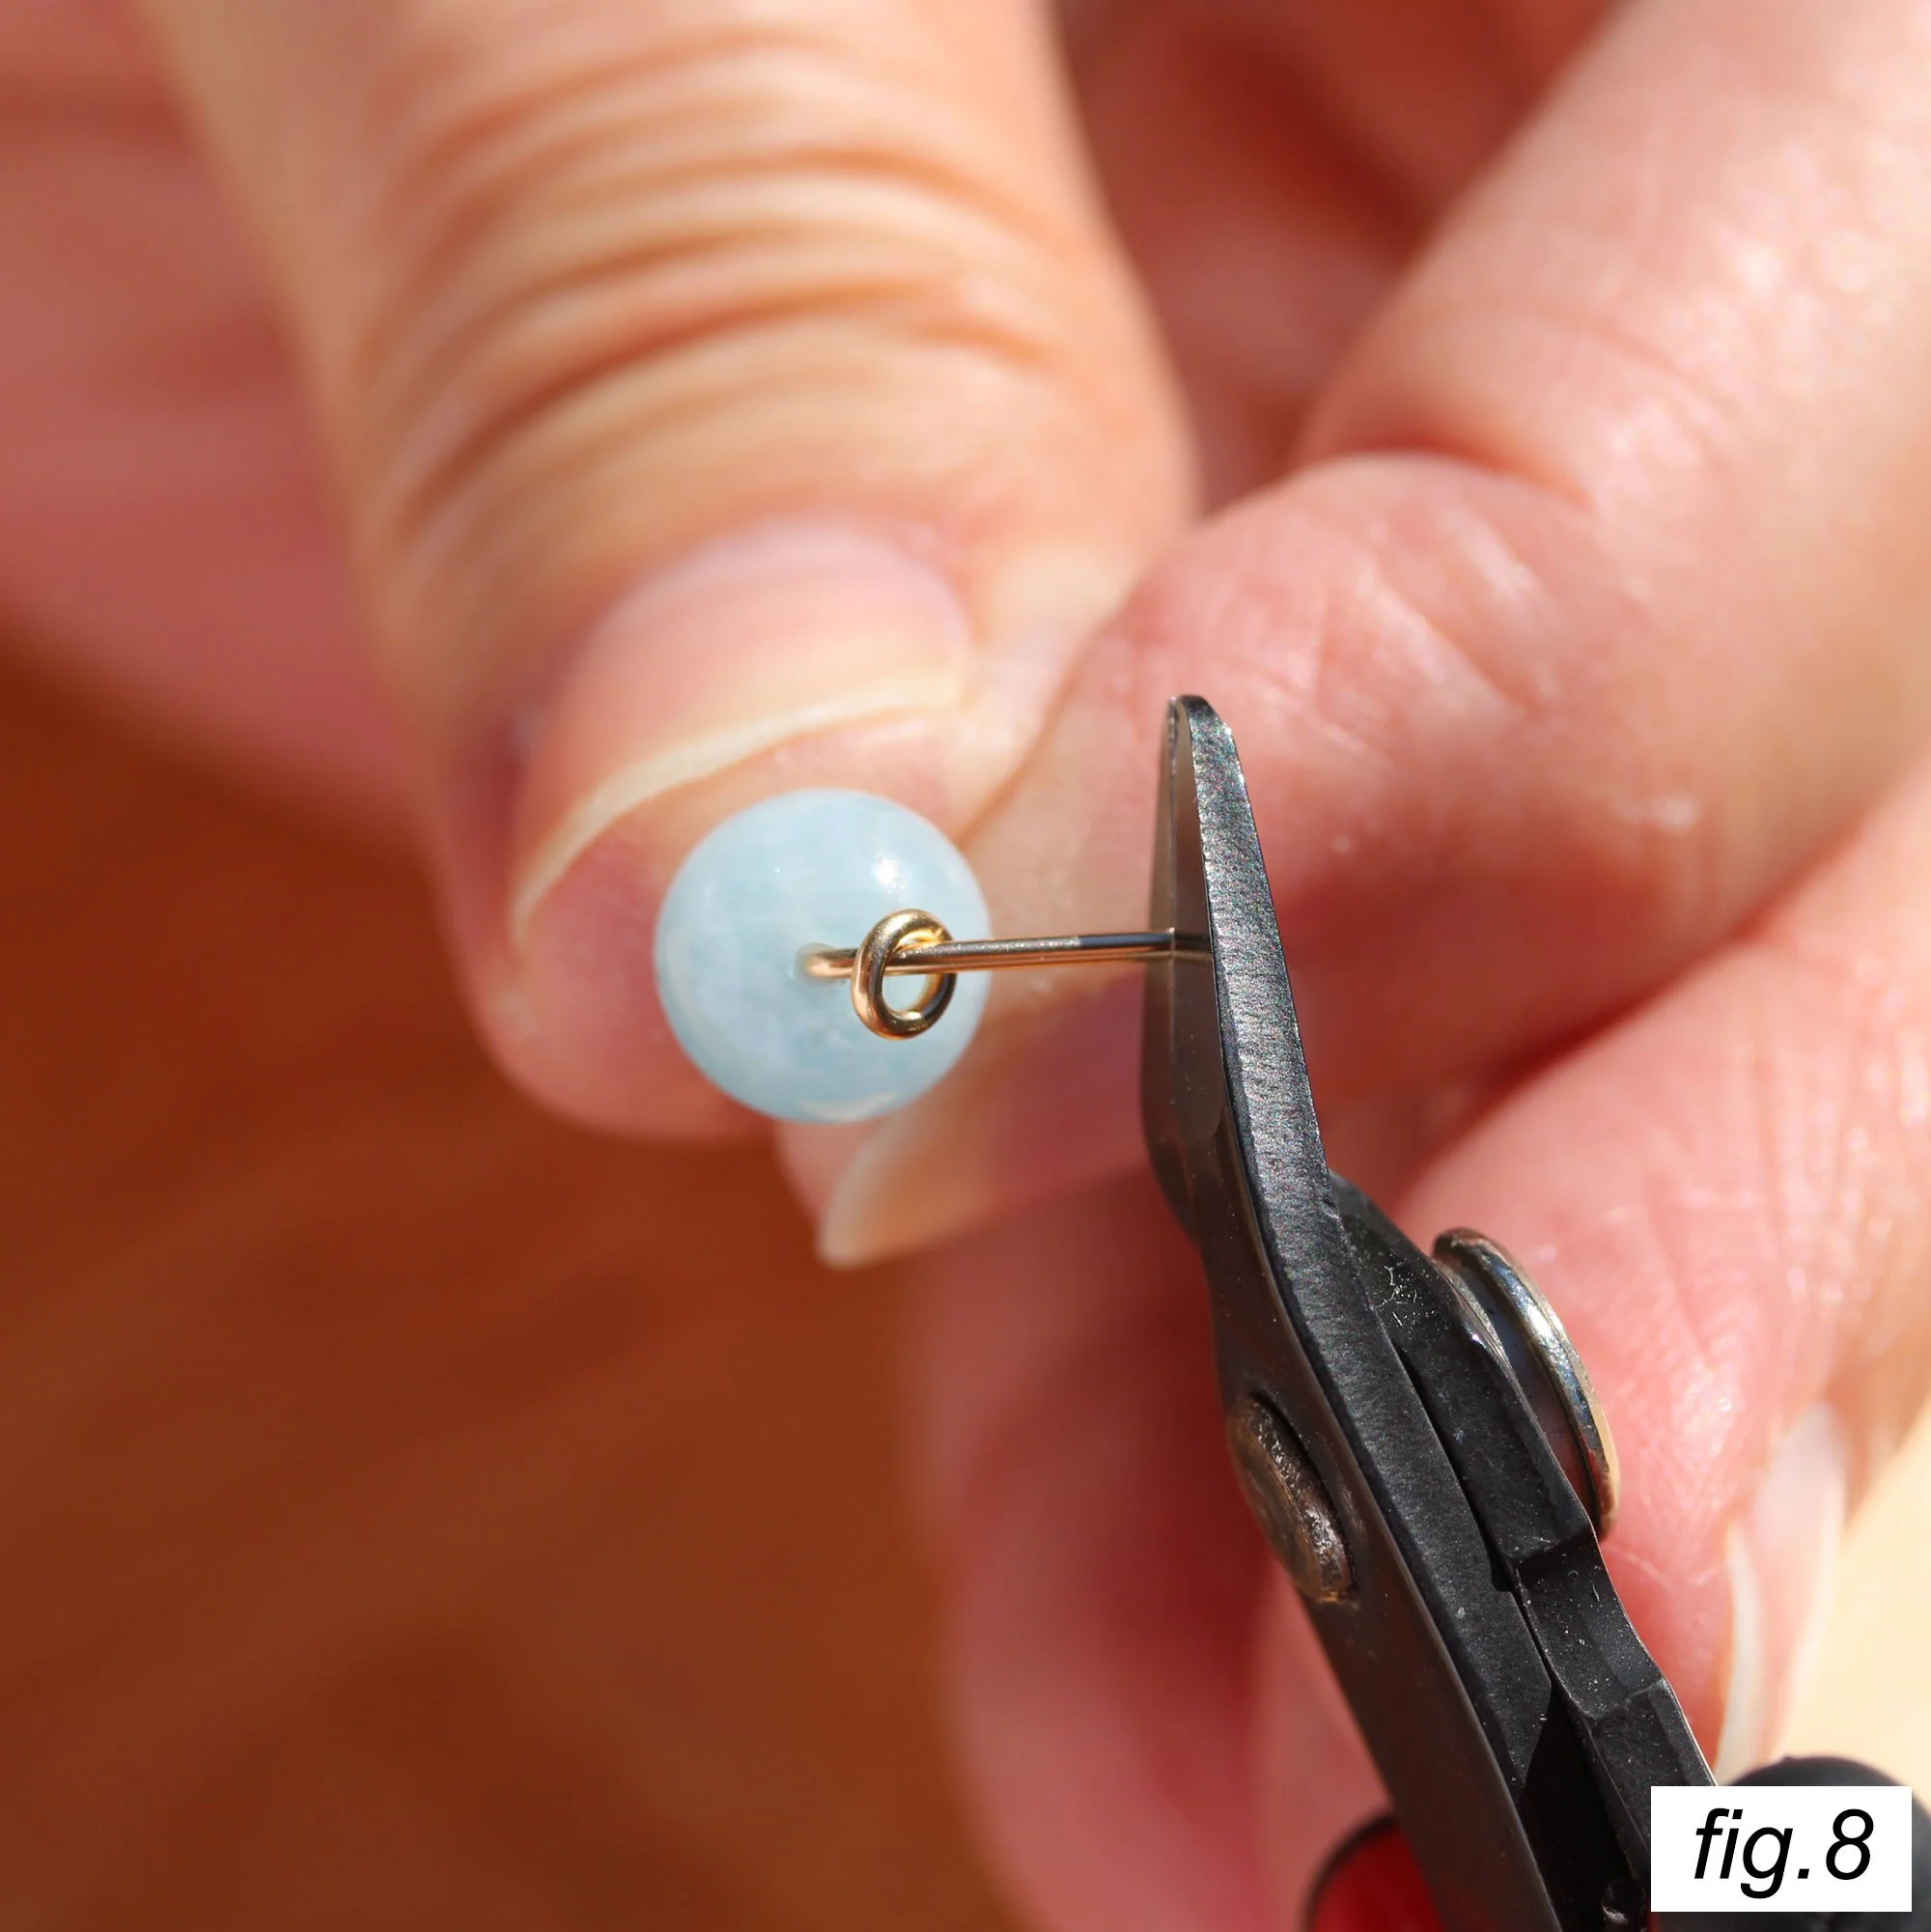
After you’ve formed the bend, there will be excess wire that you don’t need in order to form your first loop. You should trim this to about 3/8” (about 9.5mm). Here is where your artistry will come into play, and lots of practice: how much you trim will depend upon how big your round nose pliers are and what gauge your wire is.
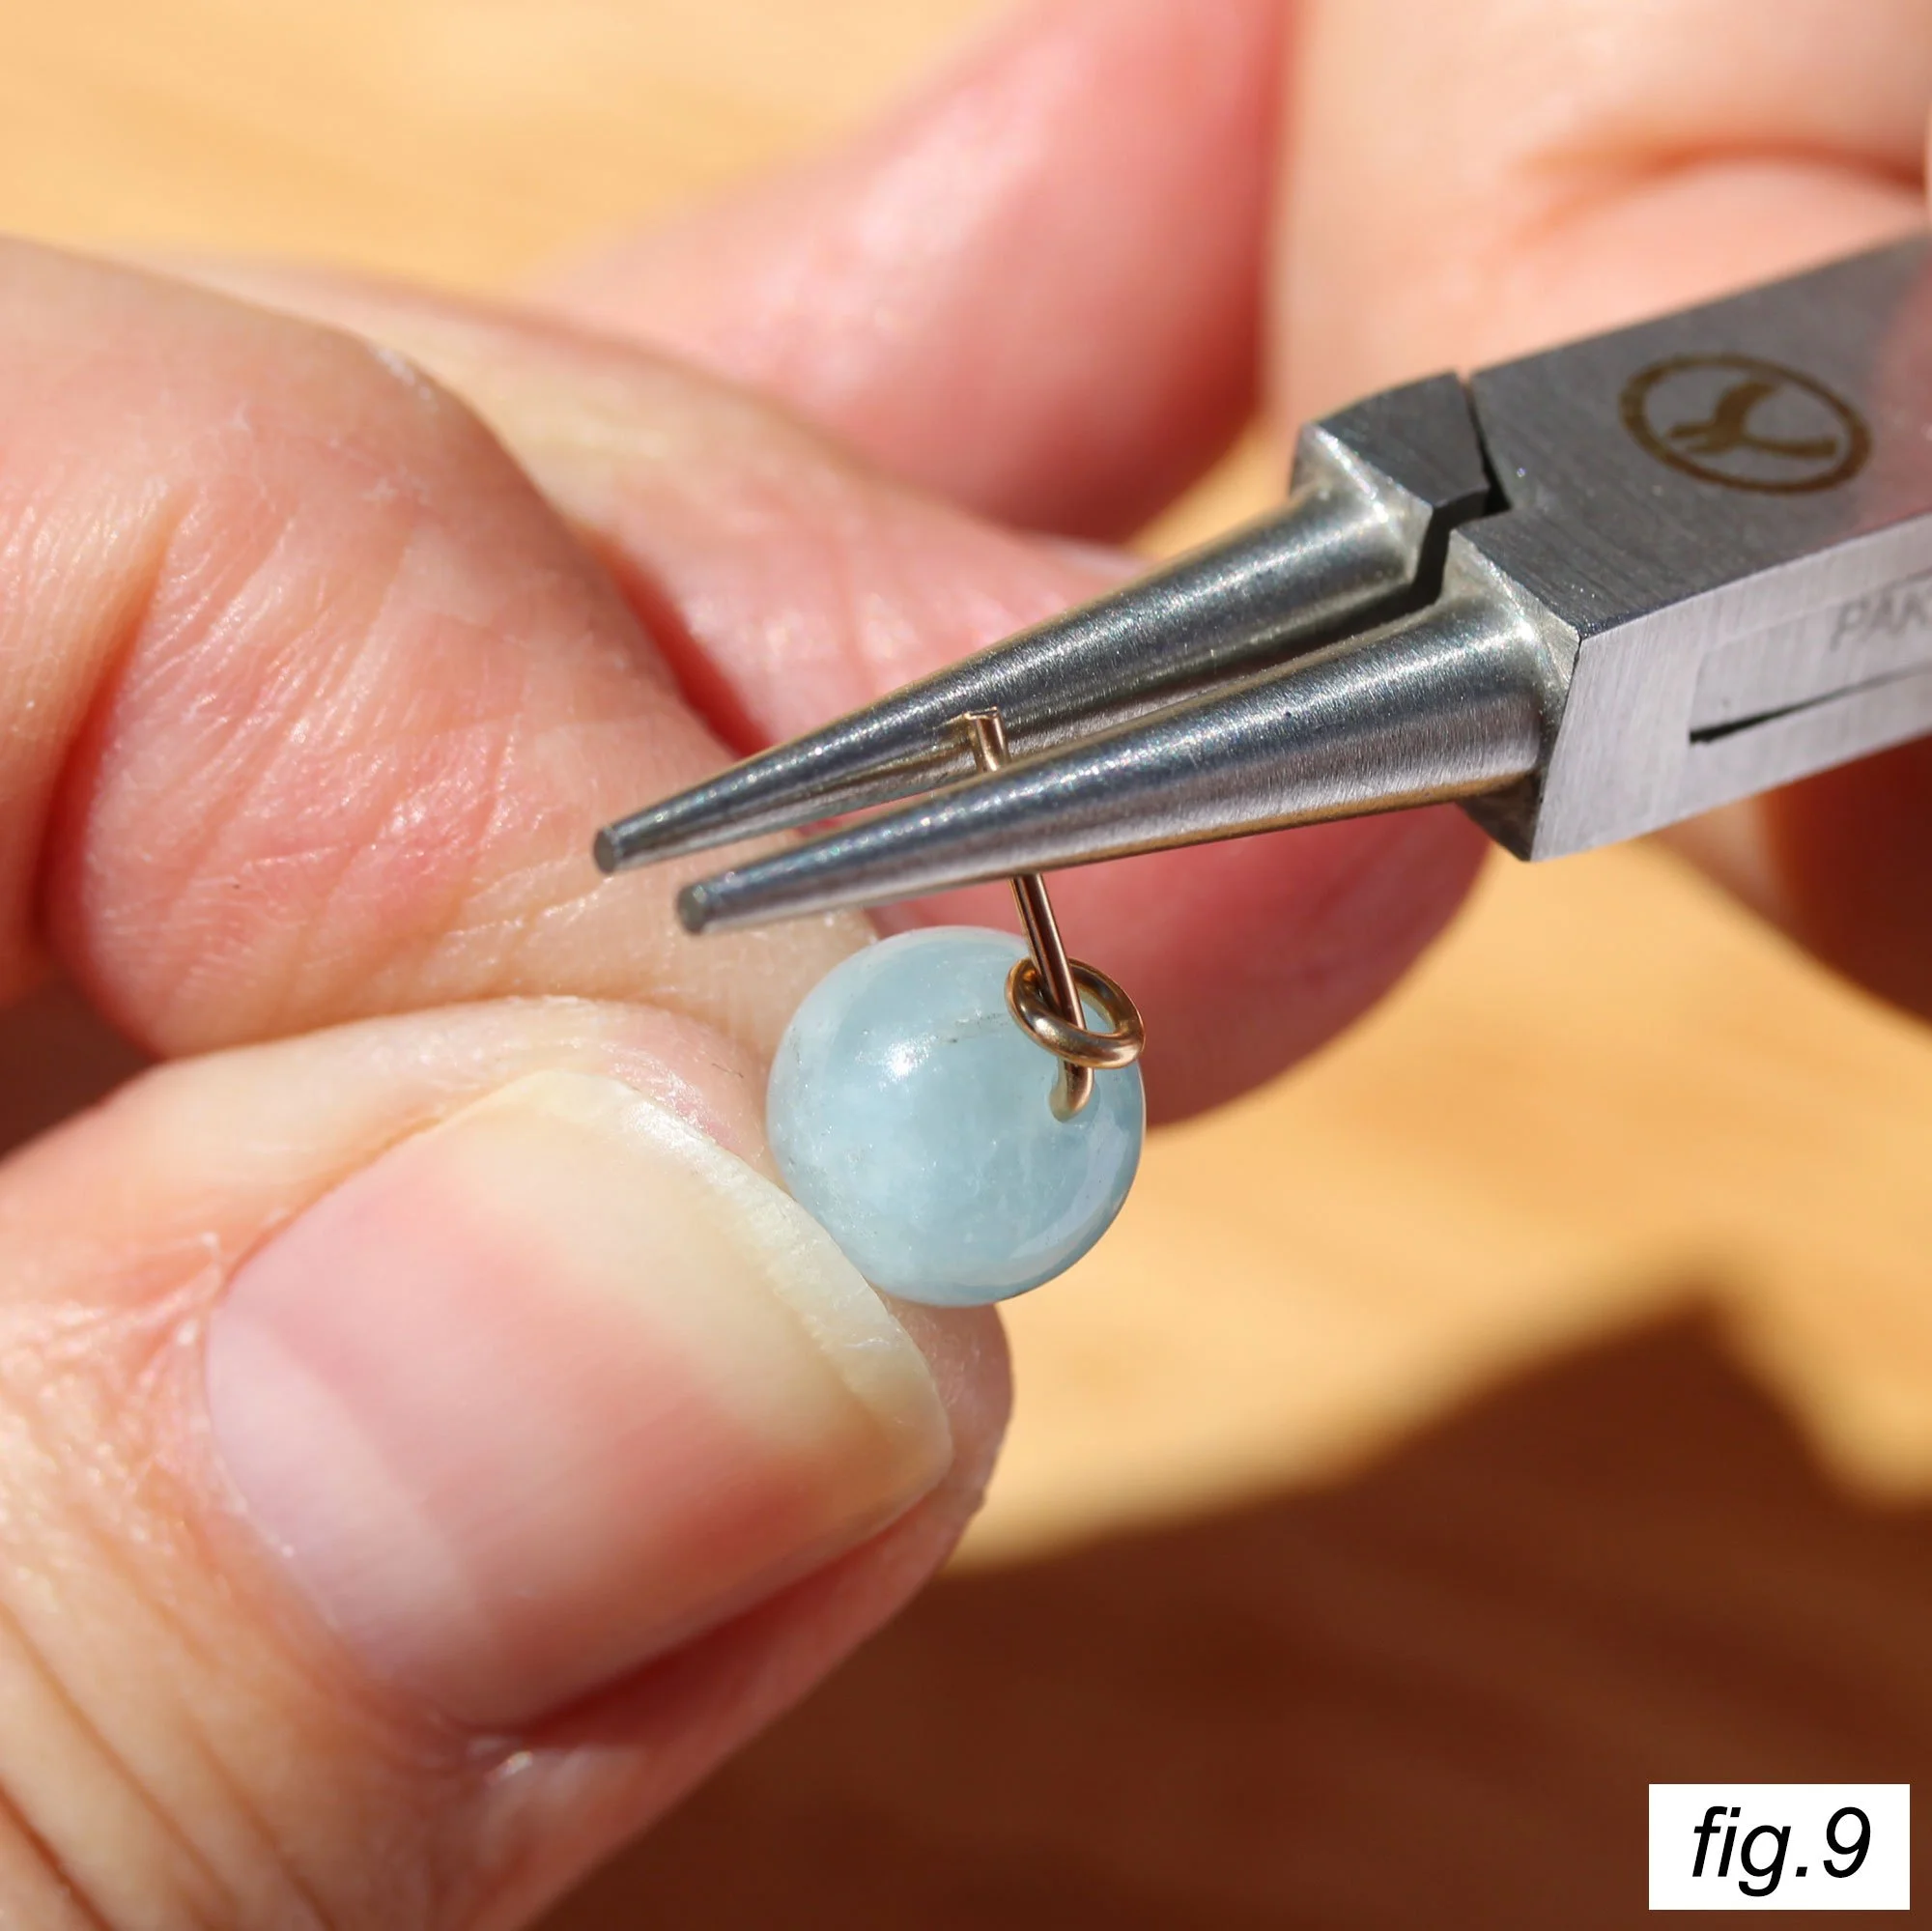
Grasp the trimmed bent wire in your round nose pliers very close to the cut end. You don’t want a long tail of wire to show above your pliers.
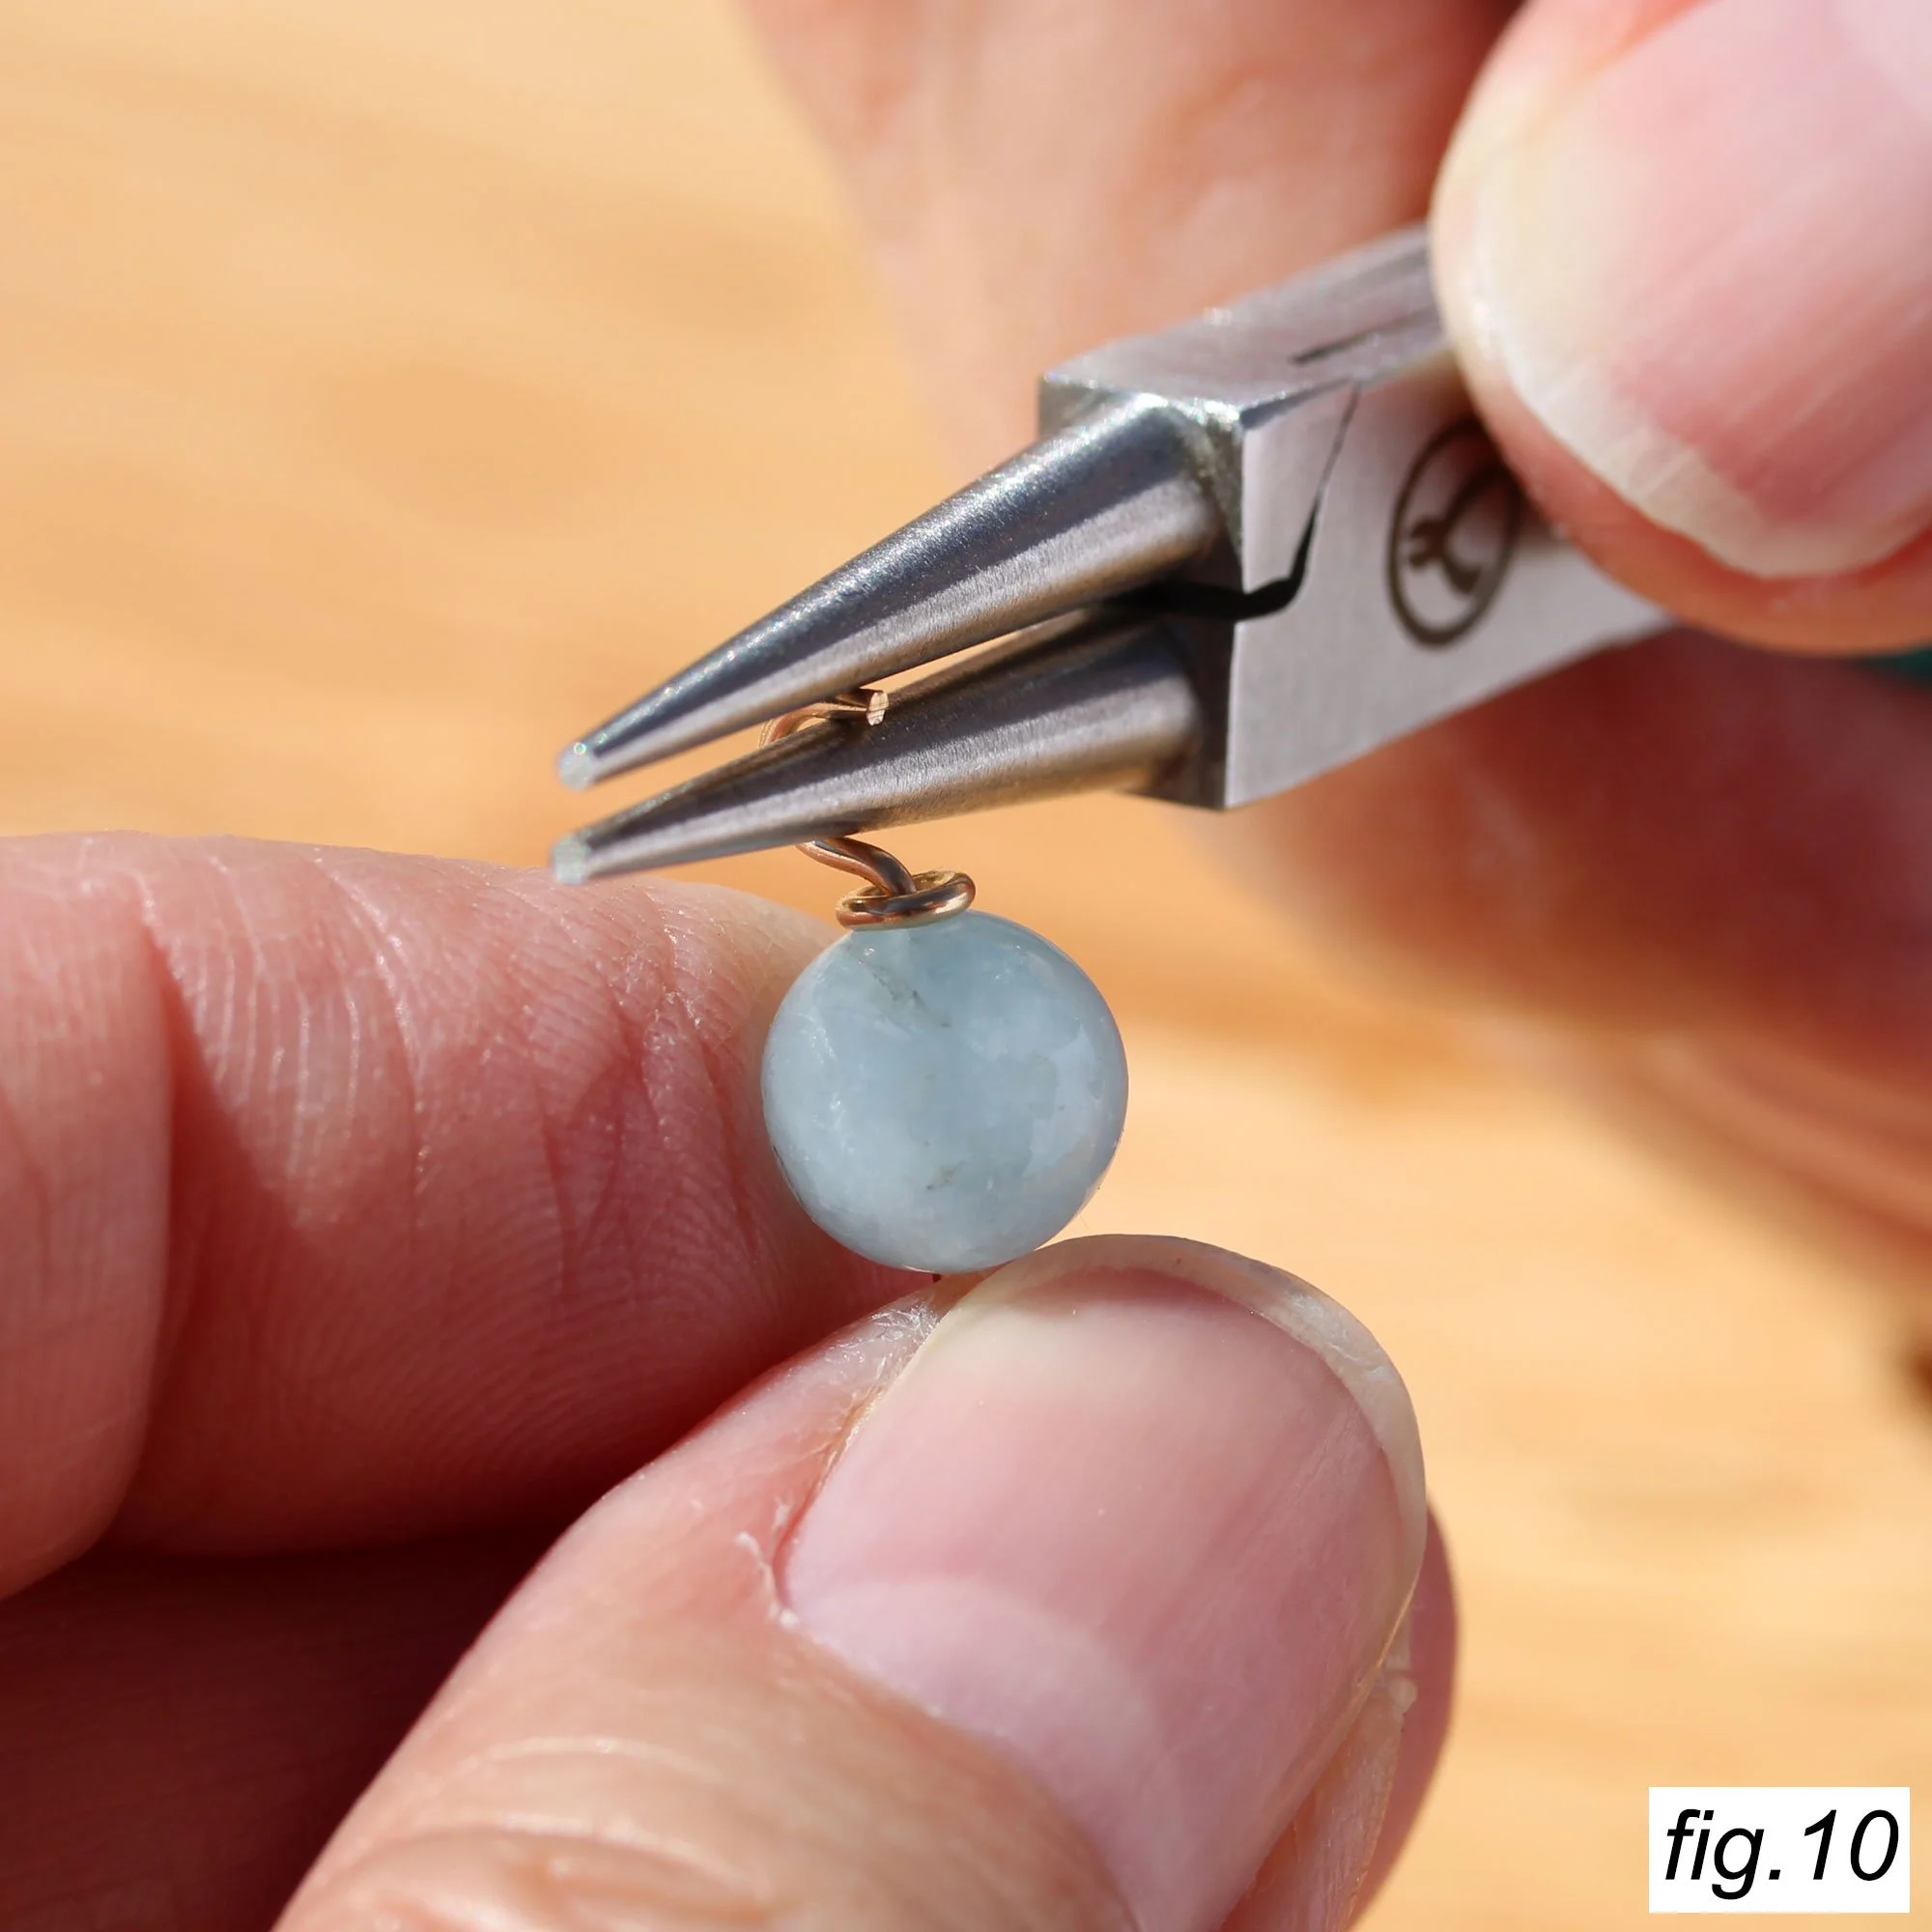
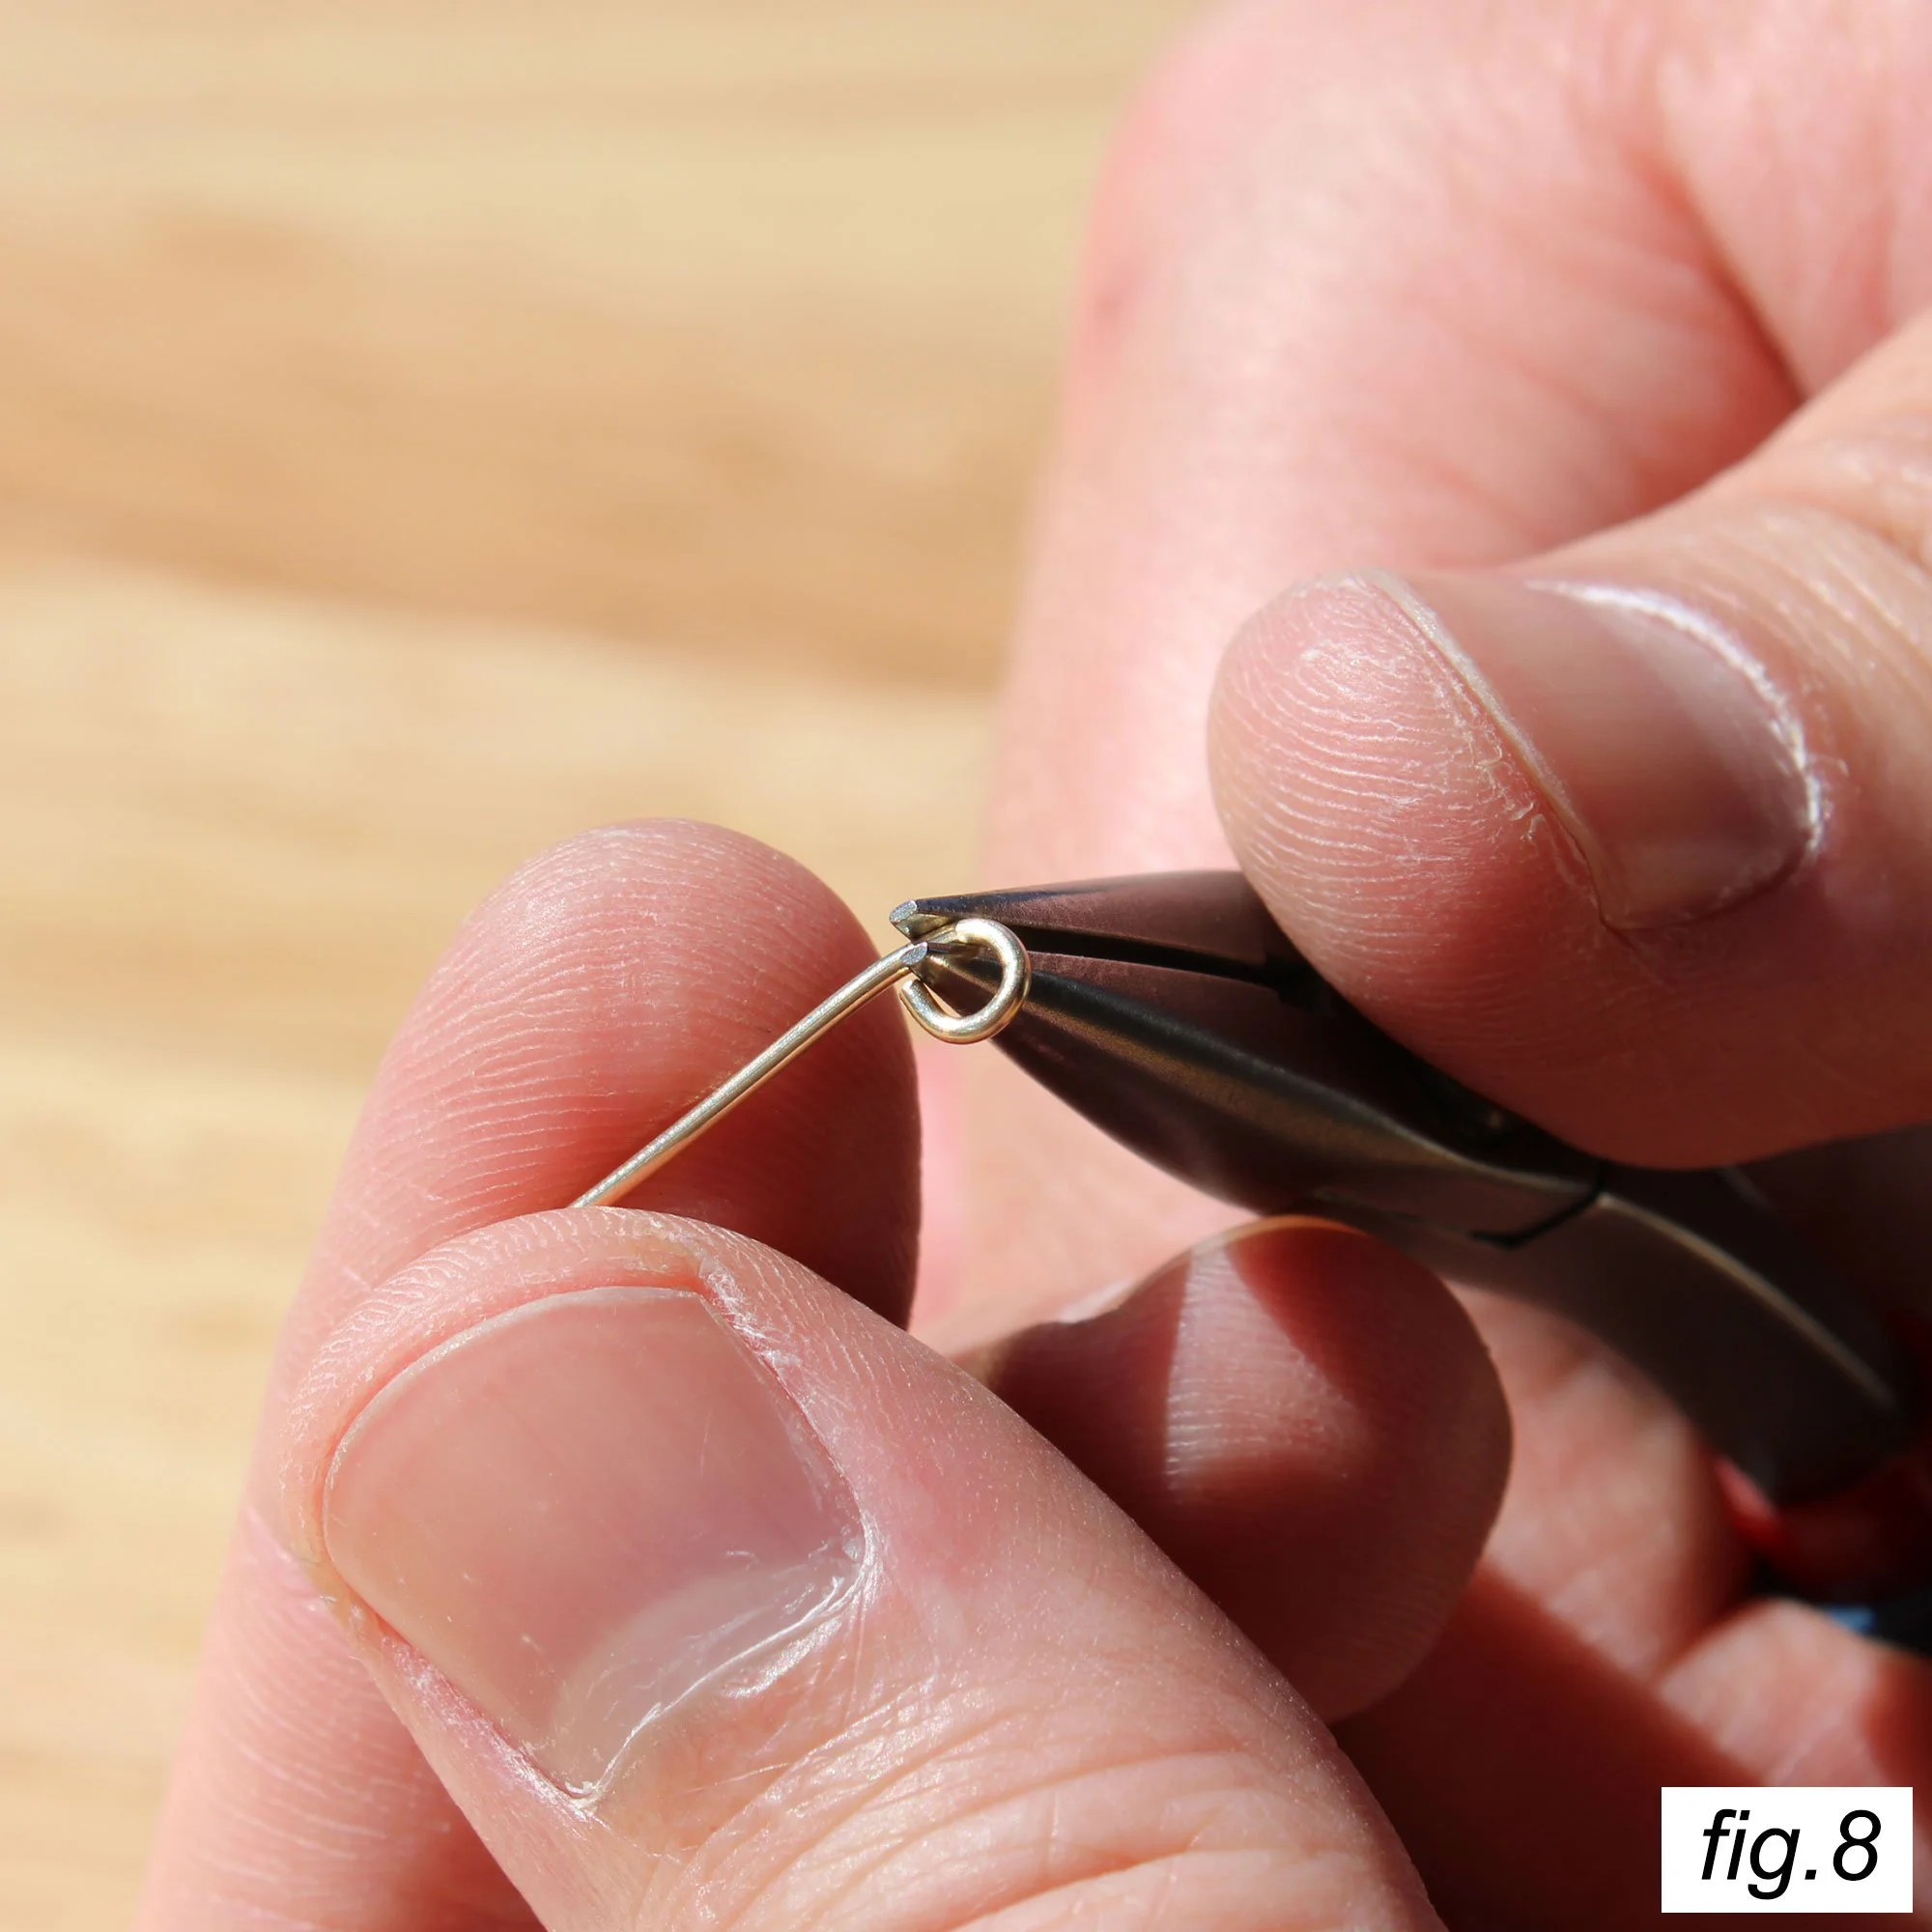
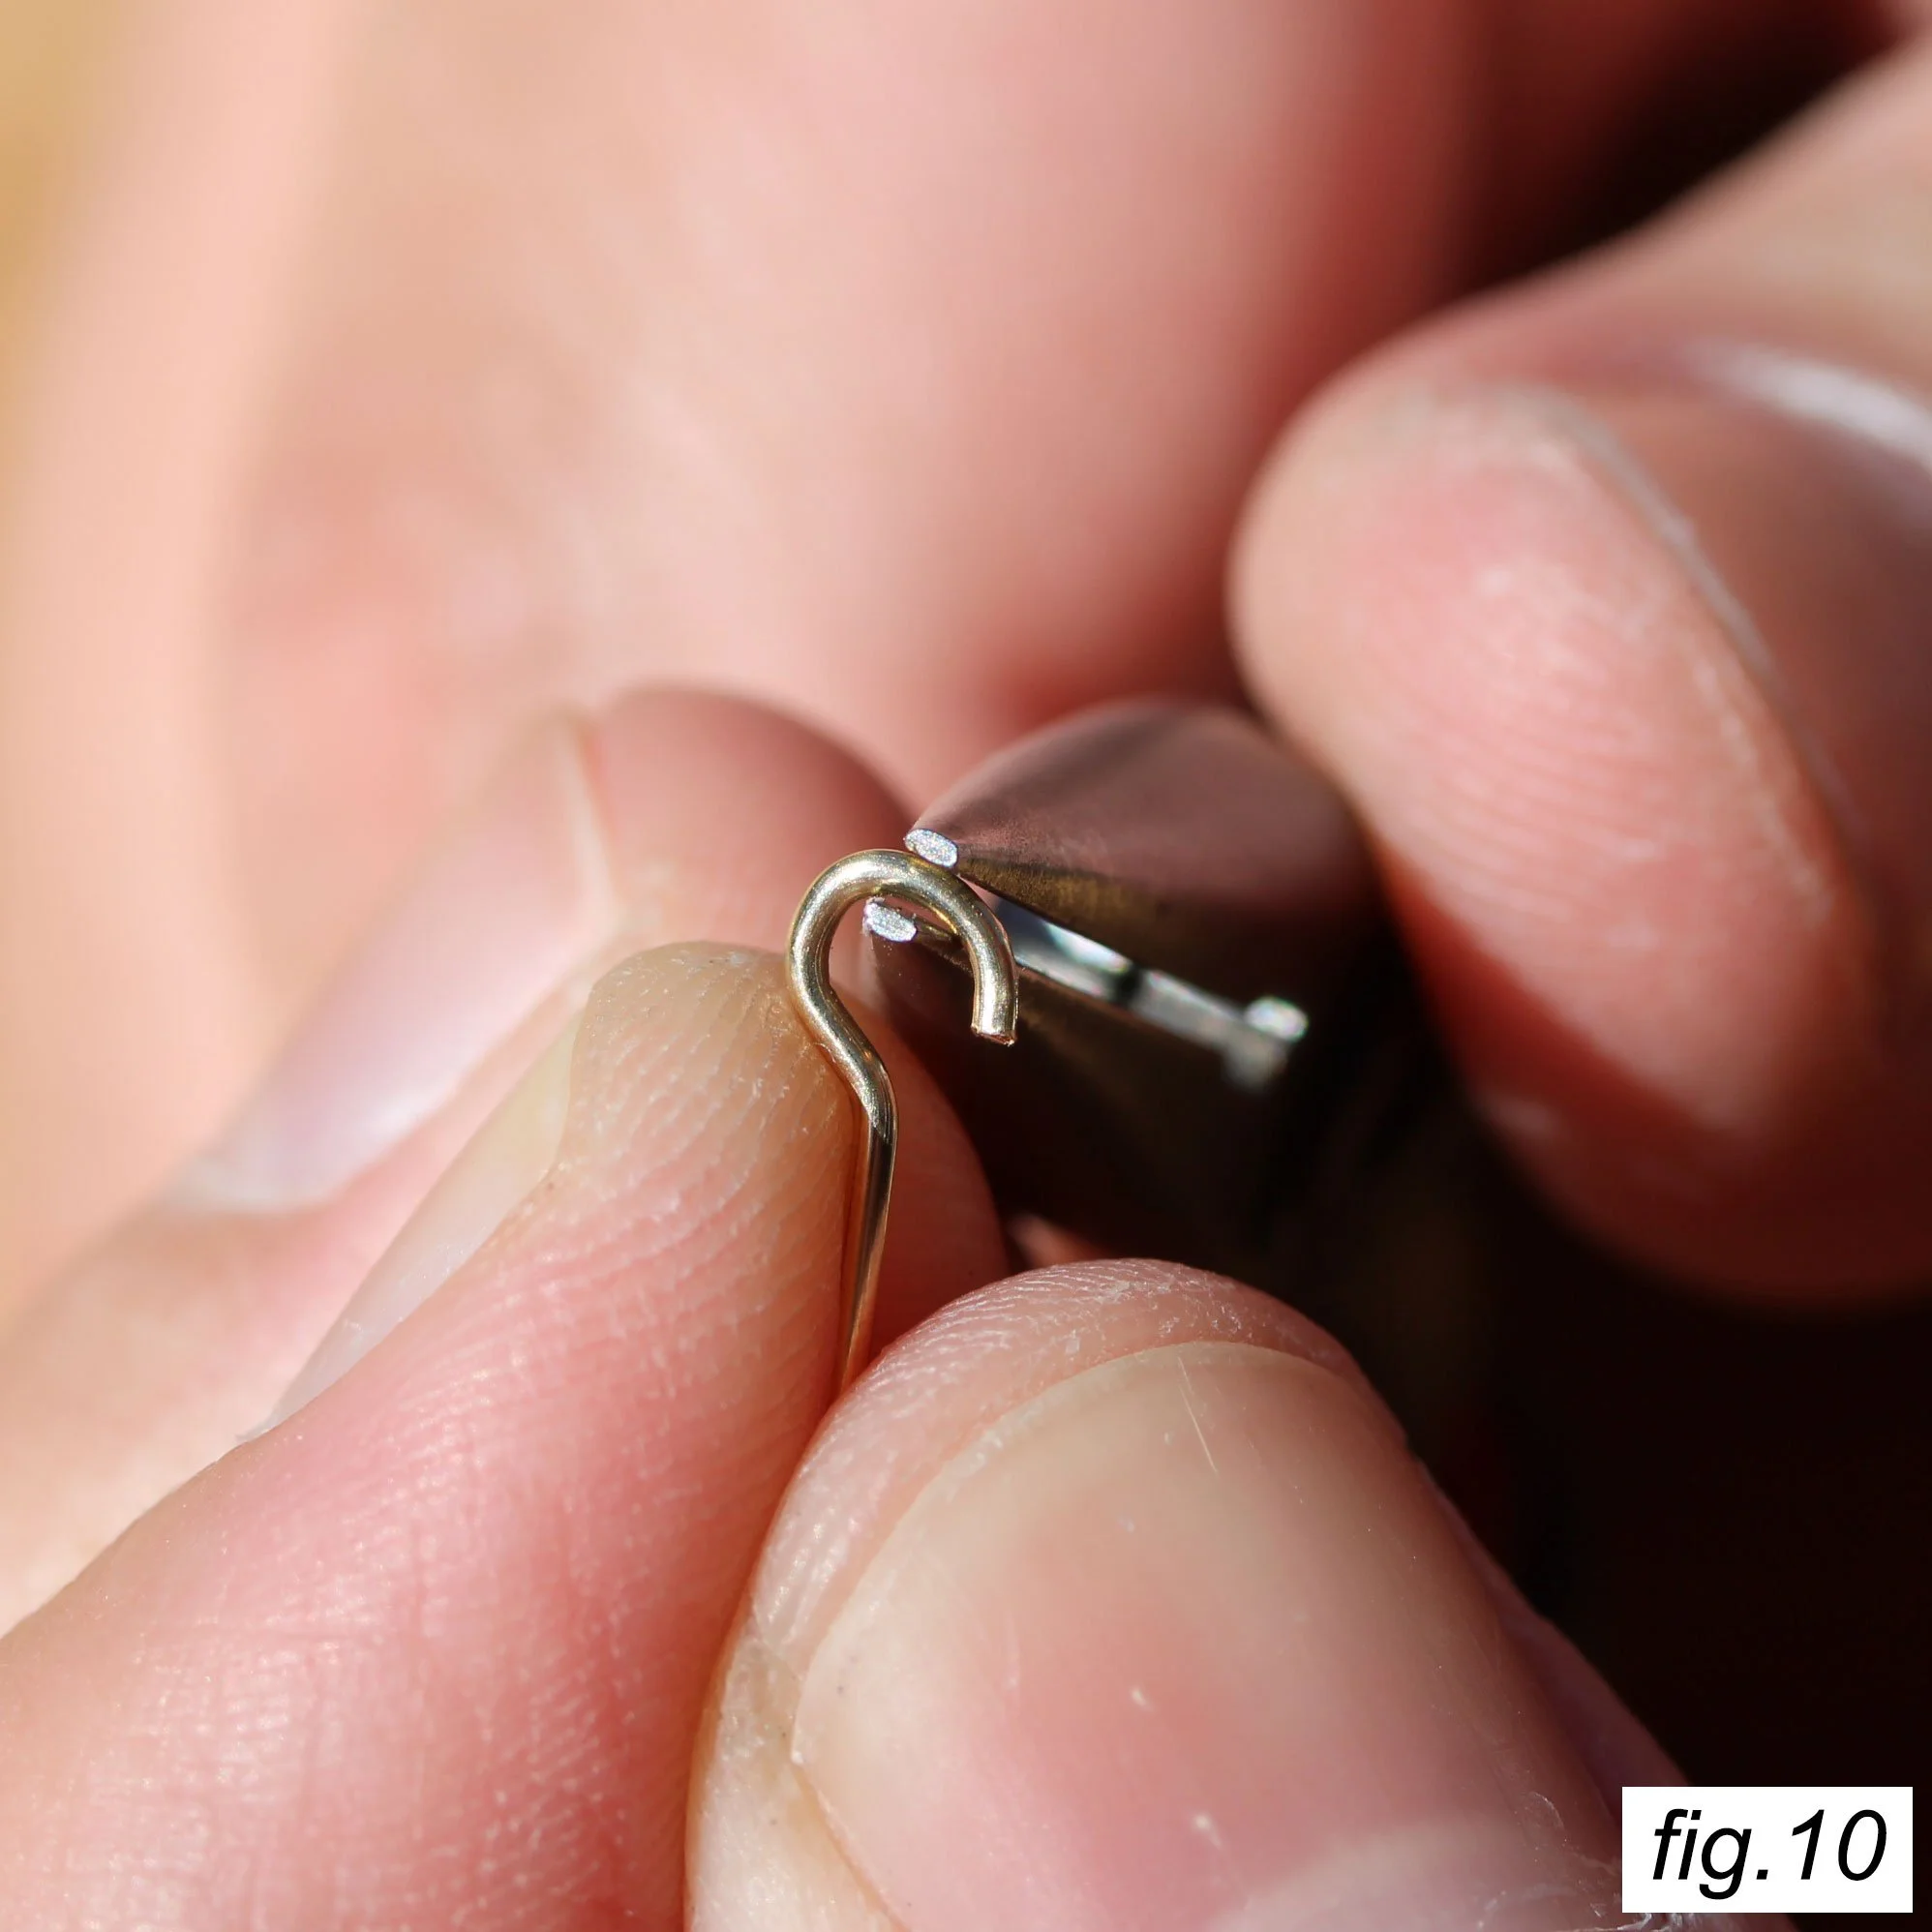
Holding the cut end of the wire firmly with your round nose pliers, begin your first loop. Push away from you with the bottom jaw of the plier as you slowly curl the top jaw of the plier toward you. Your wrist should curl for about 3/4 of a turn. This first portion of the loop should look like fig. 10, like a question mark. You will now need to let go of the wire and reposition your hand to make the second part of the loop.
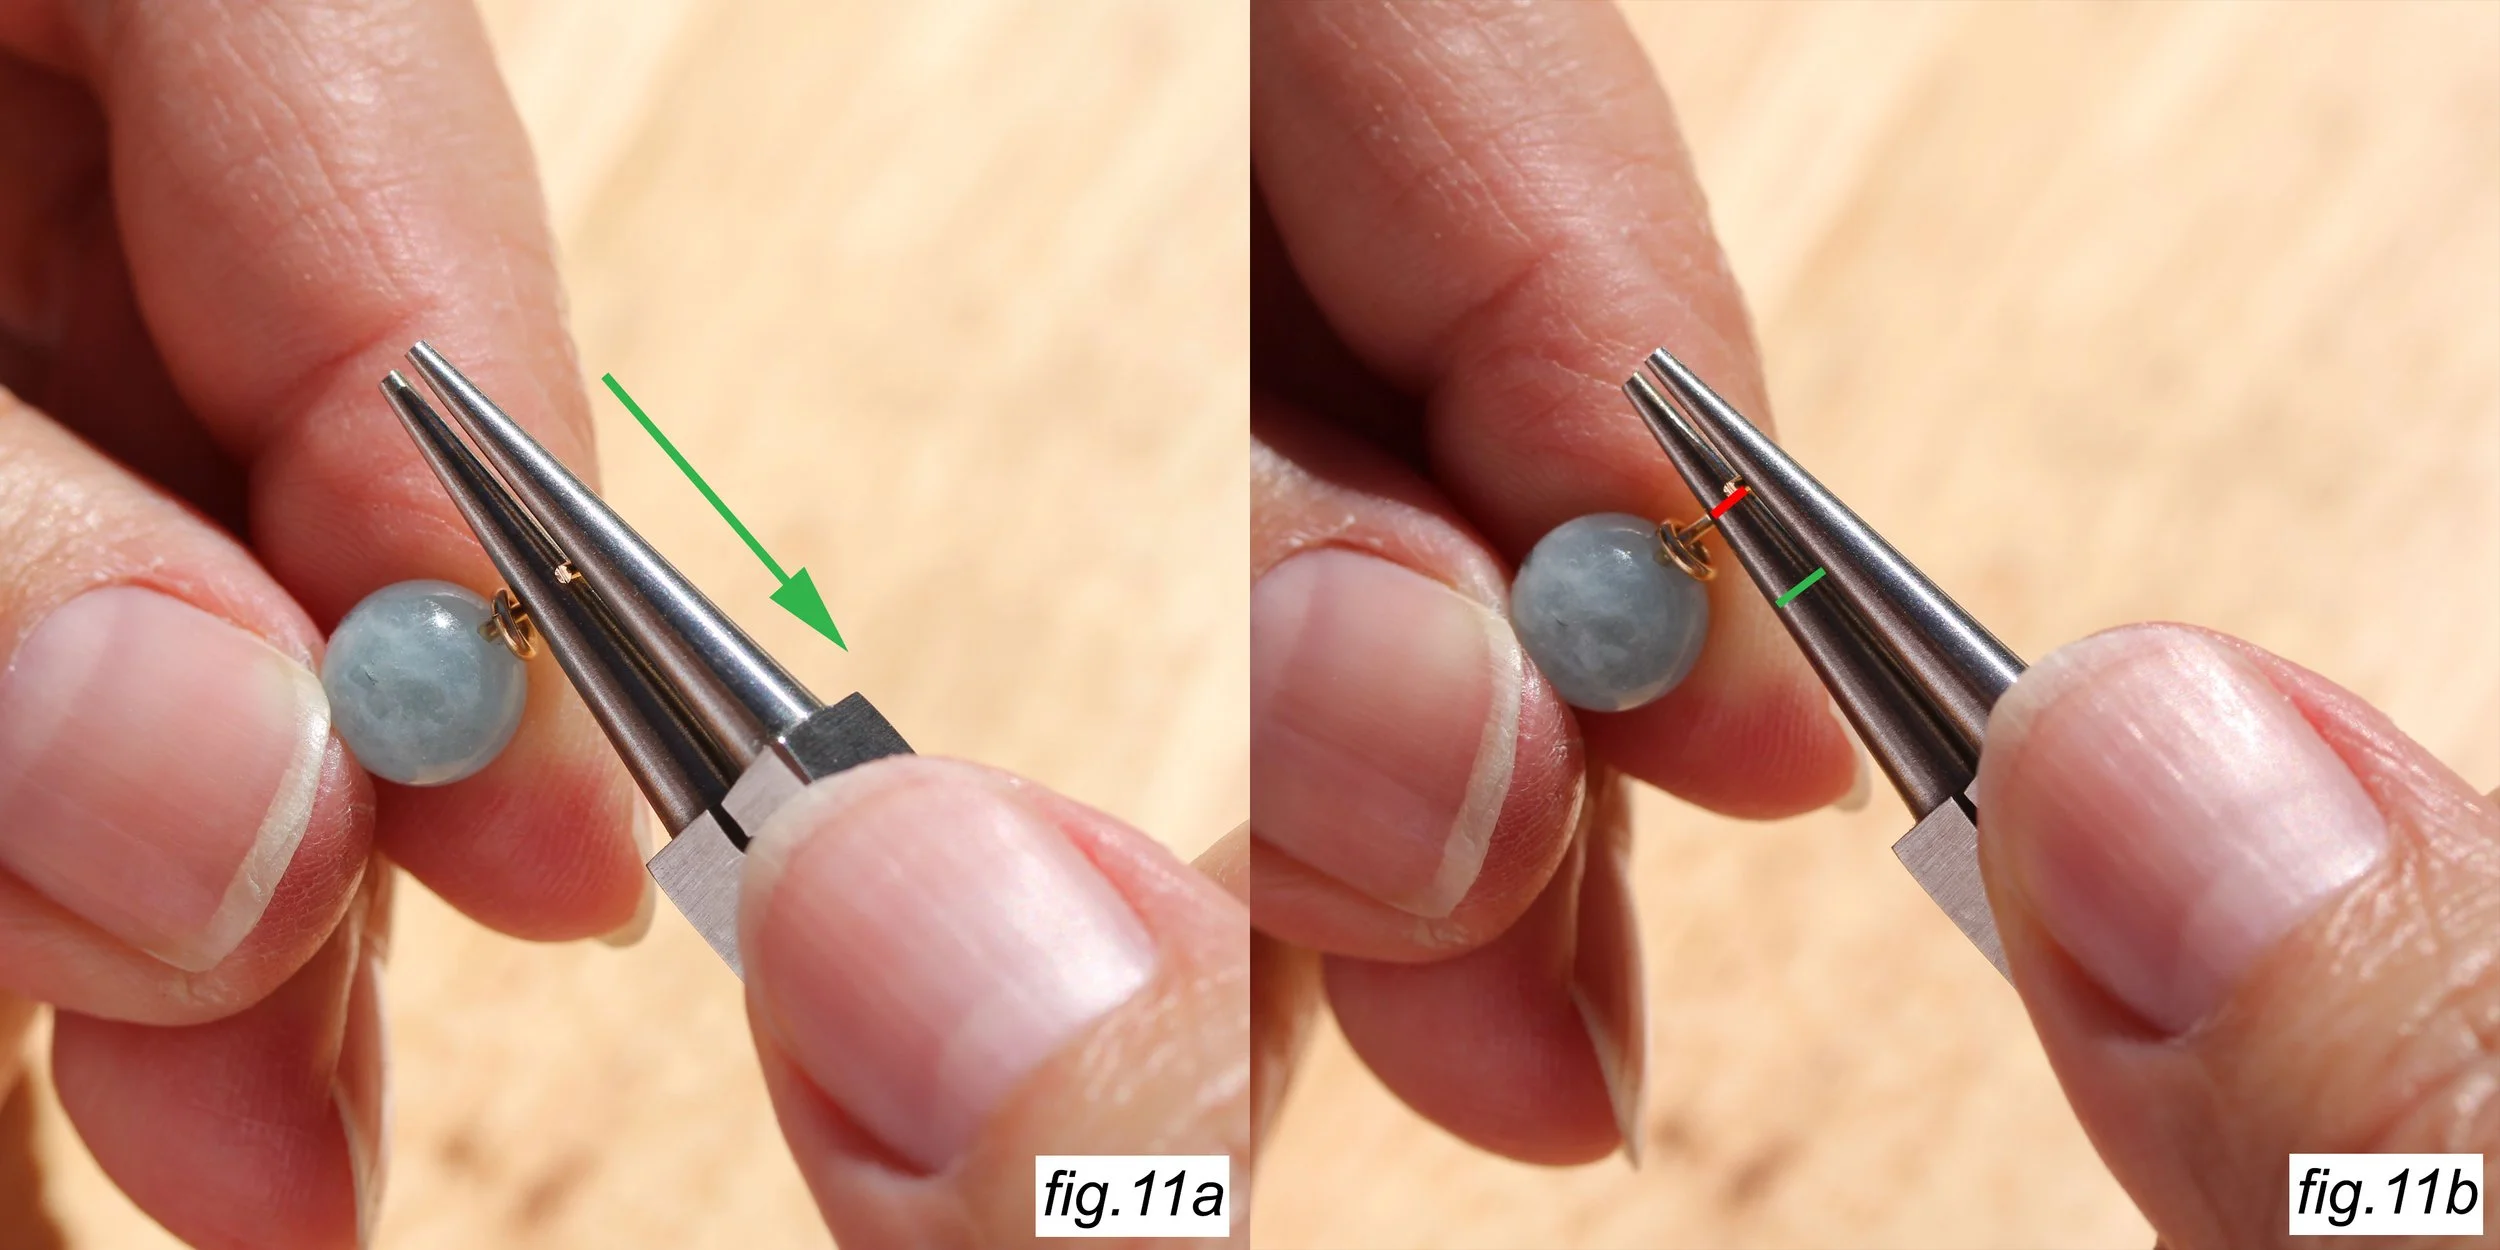
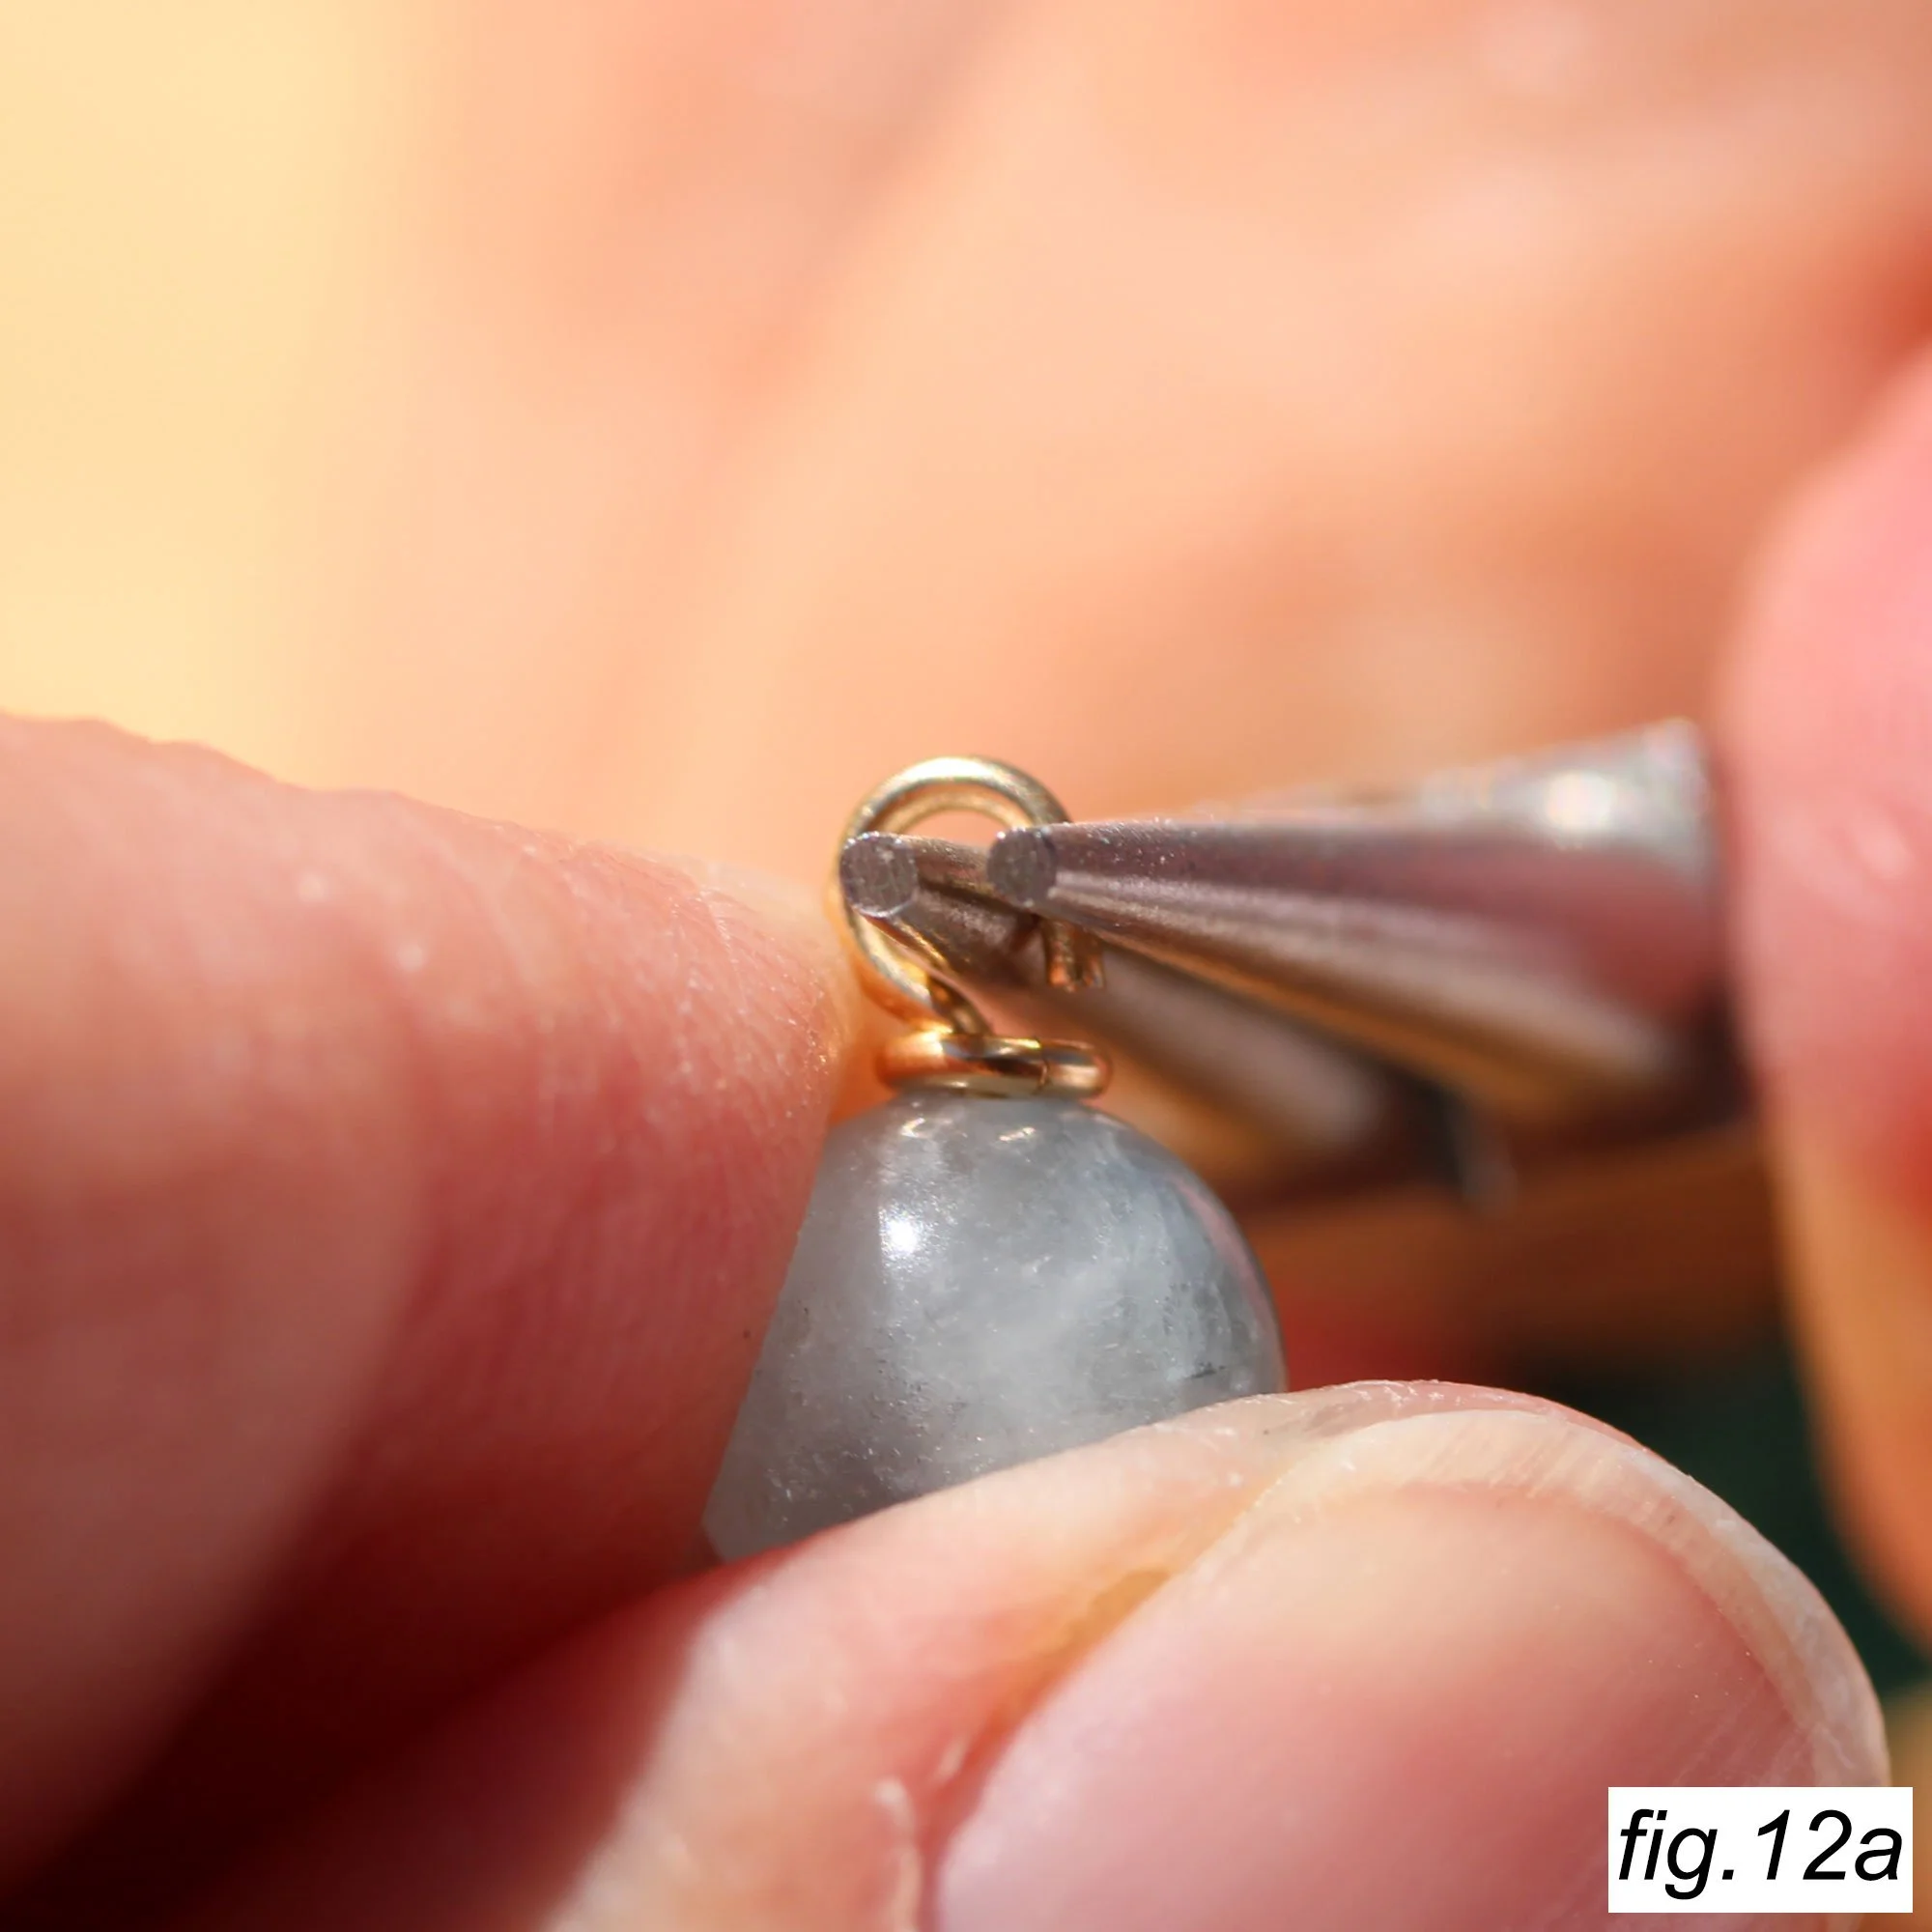
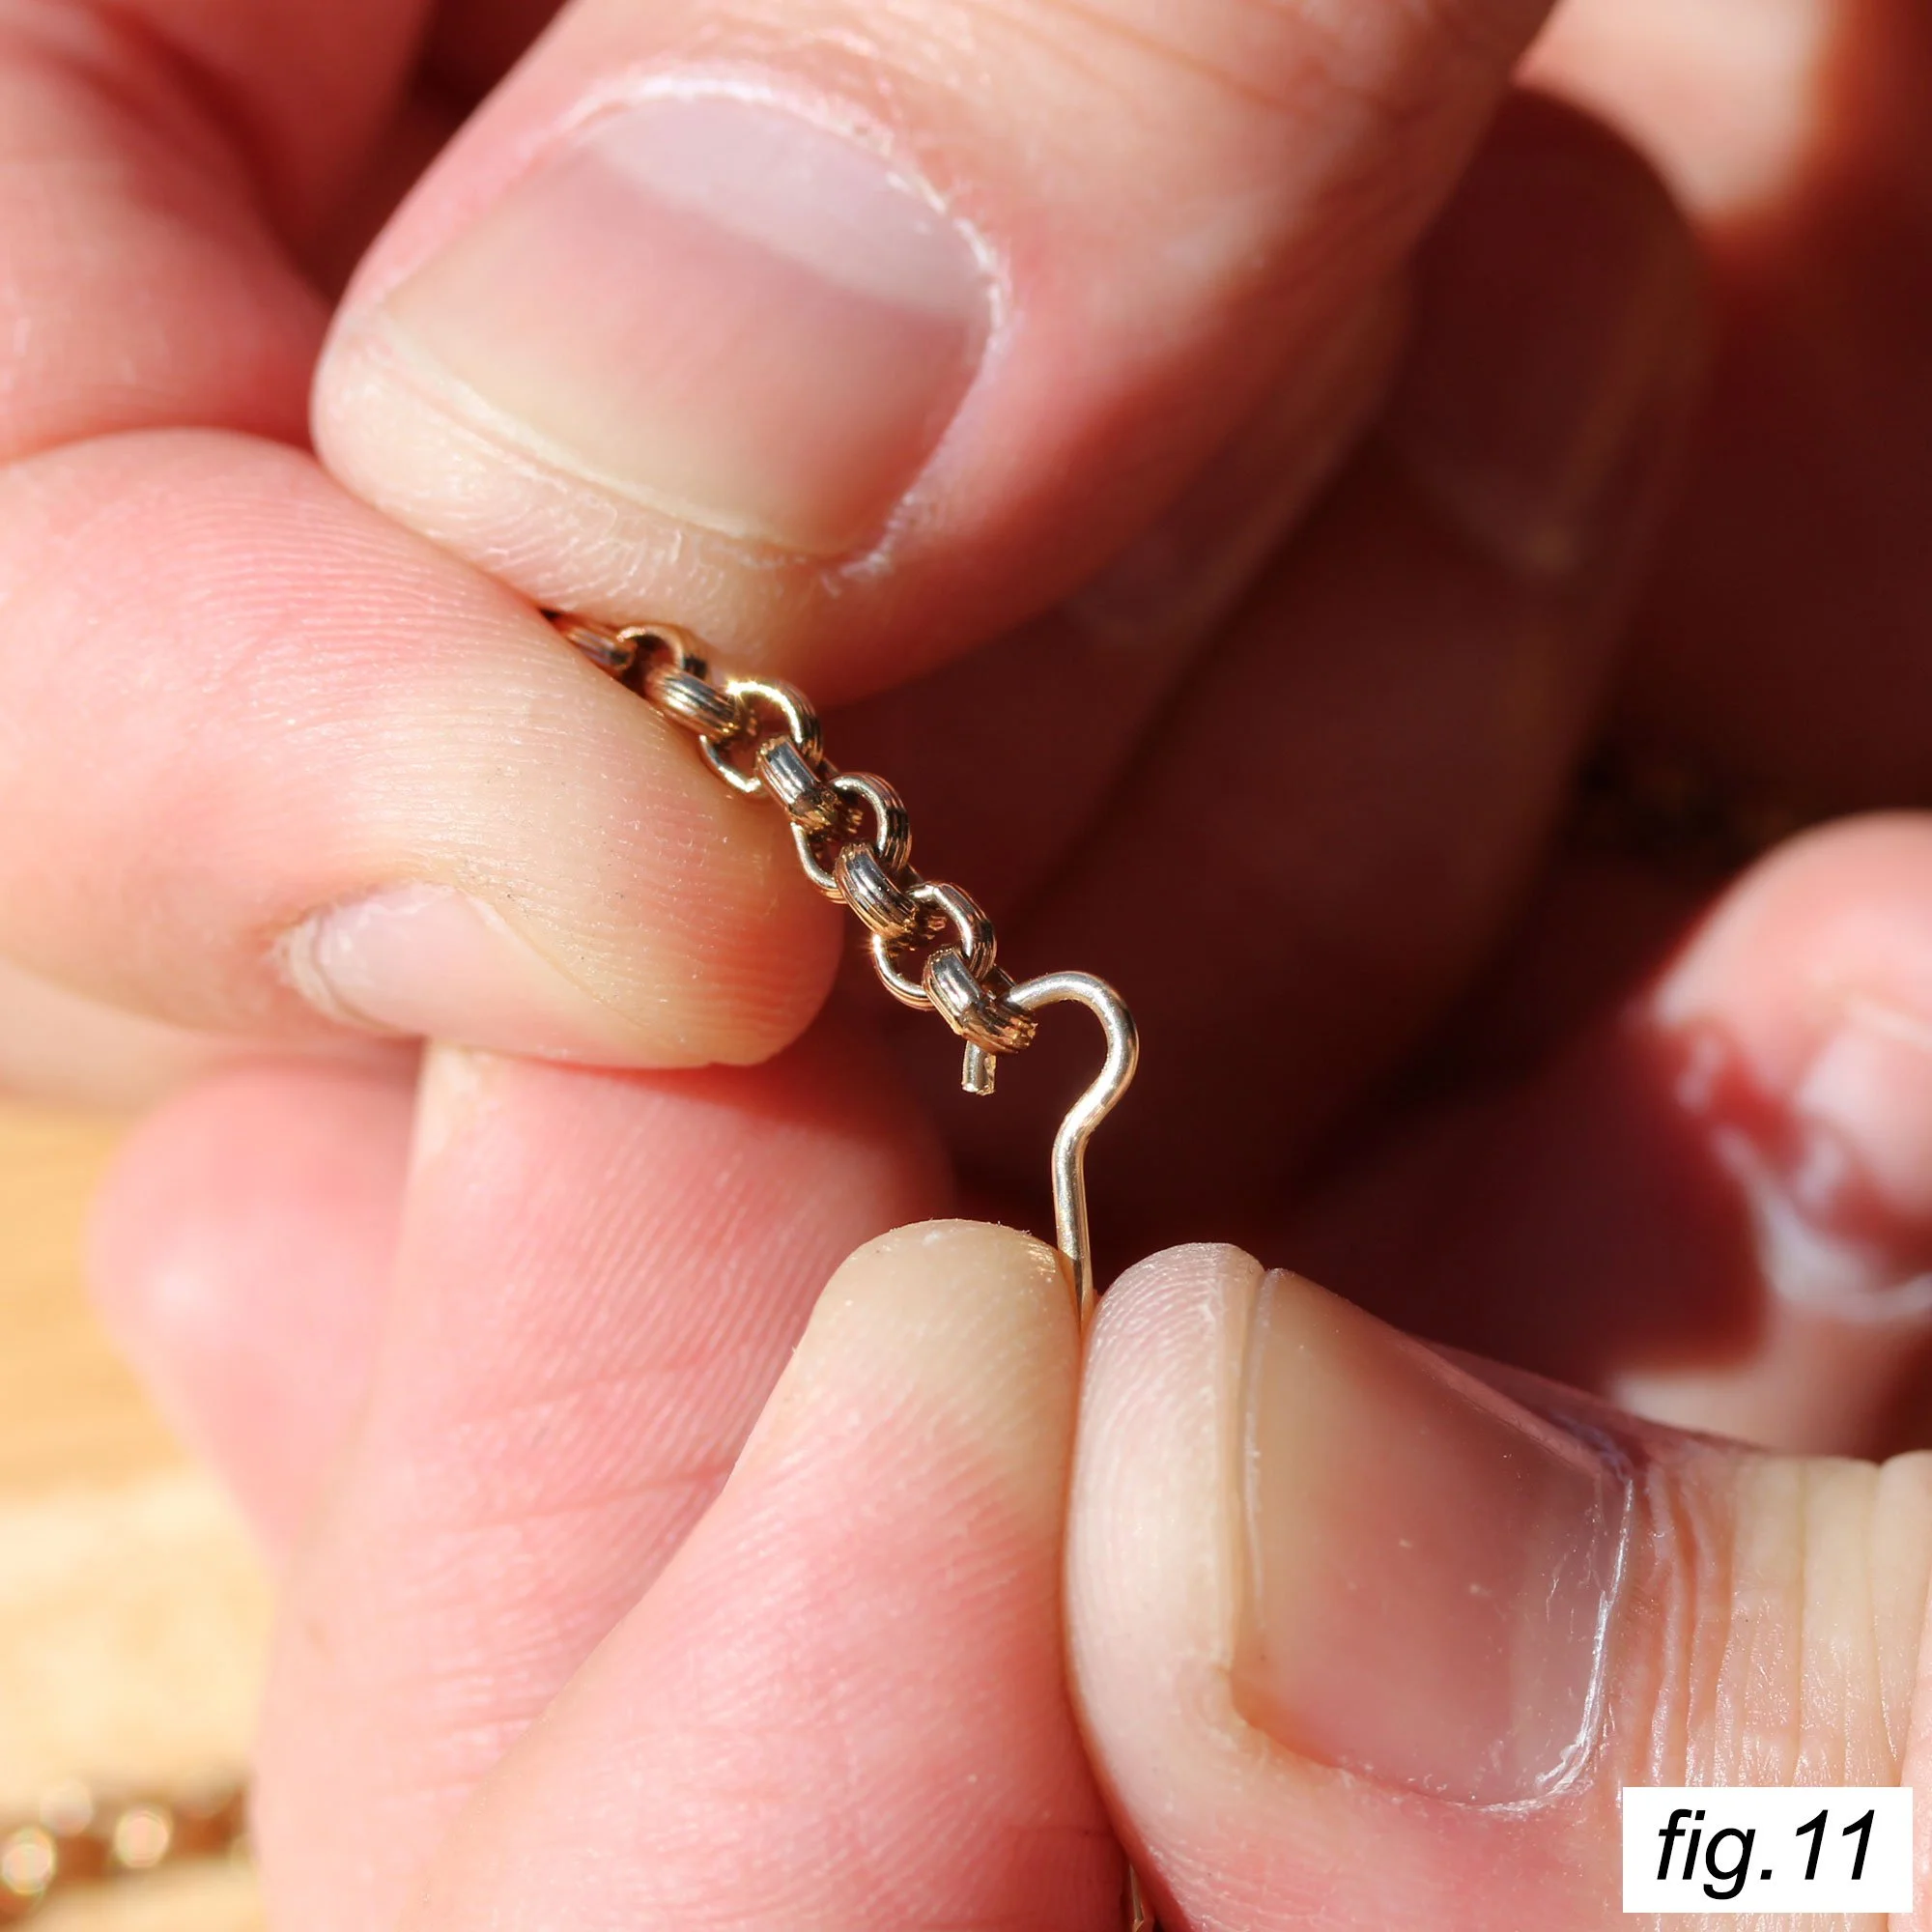
Grasp the end of the wire again, fitting it on the round nose where you previously released it. Now, with the pliers inside the 3/4 turn, SLIDE the pliers down until you are closer to the tip of the plier jaws. The green line in figure 11b shows where you grasped for the 3/4 turn; the red line shows the new position where you will hold the wire to complete the loop. This is a very important step, because this is how you will create a horseshoe-shaped completed loop, perfect for tucking into the jump ring.


Simple Loop: Method 2 (Alex's Method)
I use a bit different a method then Ann does. I use a looping tool to make eye pins as a base, then work those pre-made pins into base loops, changing up their size as needed for the size of beads I am using. My method is a little bit more setup, but makes the actual wiring of the bead faster and easier. Having the loop already made means it is much easier to hold onto the bead and keep everything together while you are starting your loop, especially if you have big fingers like me!
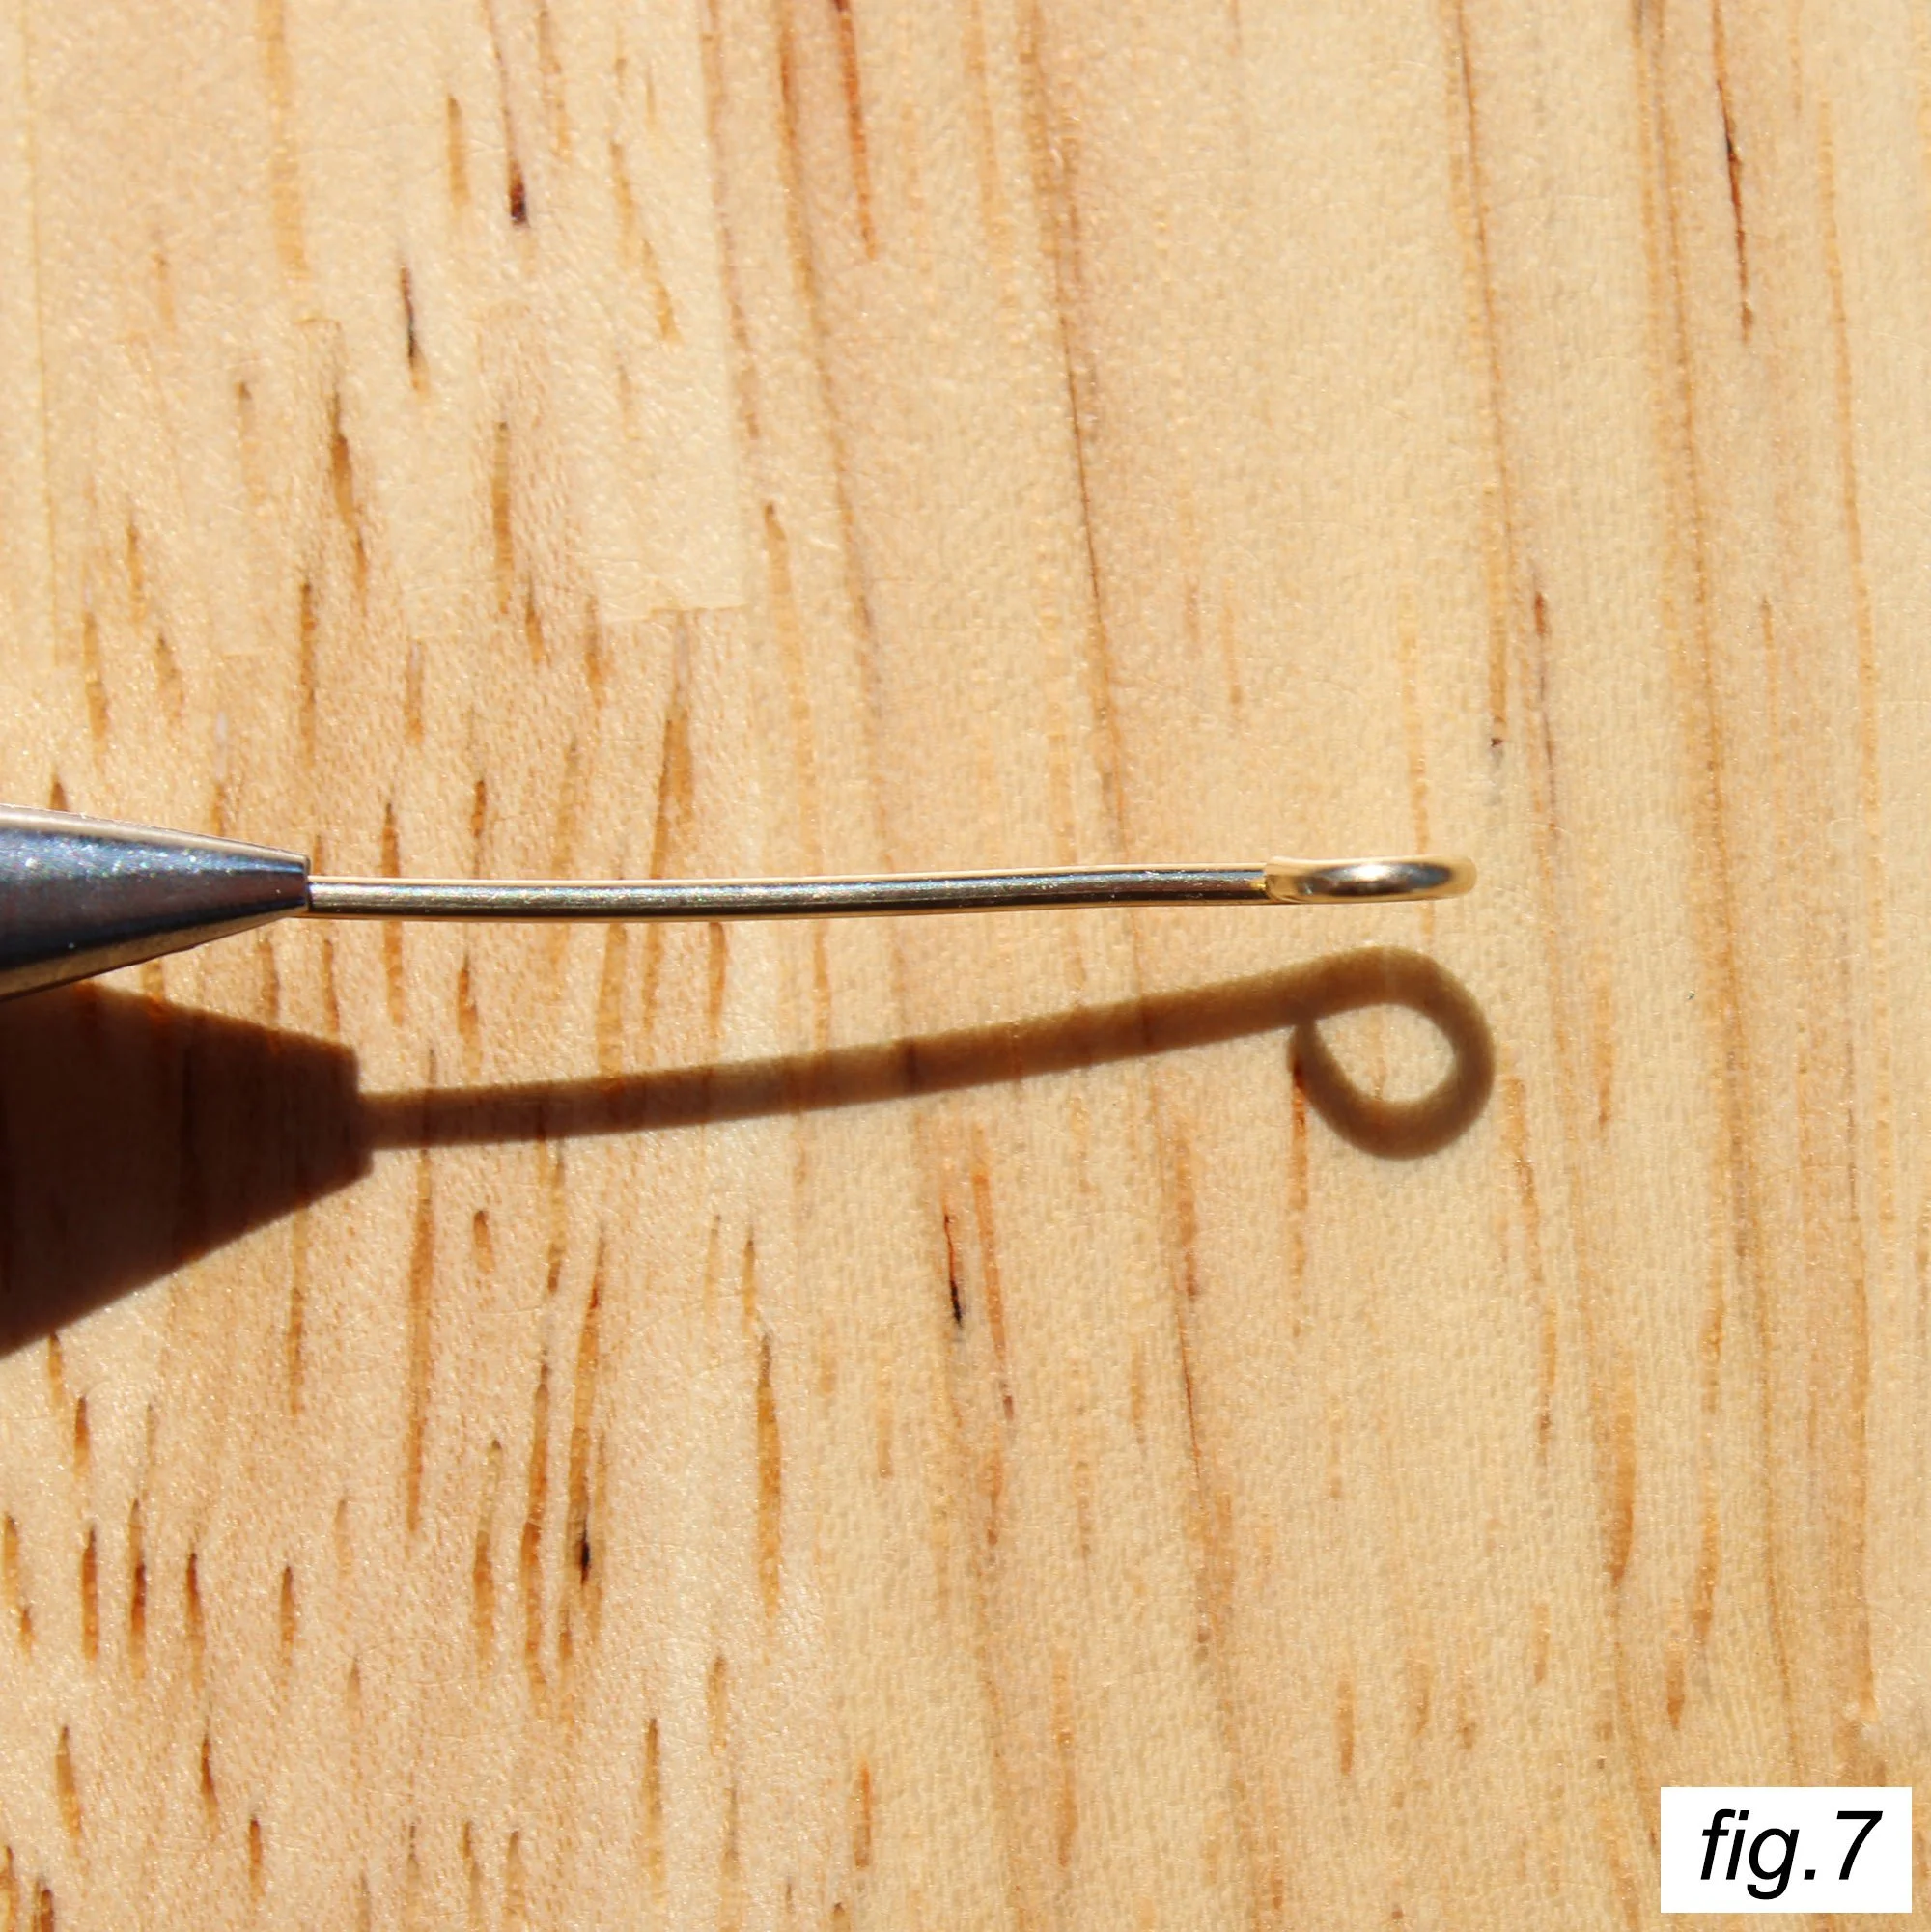
Unwind a length of wire off of your wire coil (don’t cut it yet). I like to unwind 6-10 inches at a time so I don’t have to unwind more all time but the length is still easy to manage. Put the wire into your looping tool, lining up the end with the point of the second “jaw” of the tool. If you go to far or to short, it might make your loop to big/misshaped, or incomplete. Important: make sure the end of your wire is flat or your loop will not form all the way, and you will lose some strength on the loop. Your flush cutters have a flat and angled size, the flat side will leave a flat cut and the angled side will leave a pinch.
Gentle squeeze the looping tool shut while holding the wire in place. You don’t need much force, if something feels like its stopping you then check to make sure your wire is positioned properly and there is no debris jamming your tool.
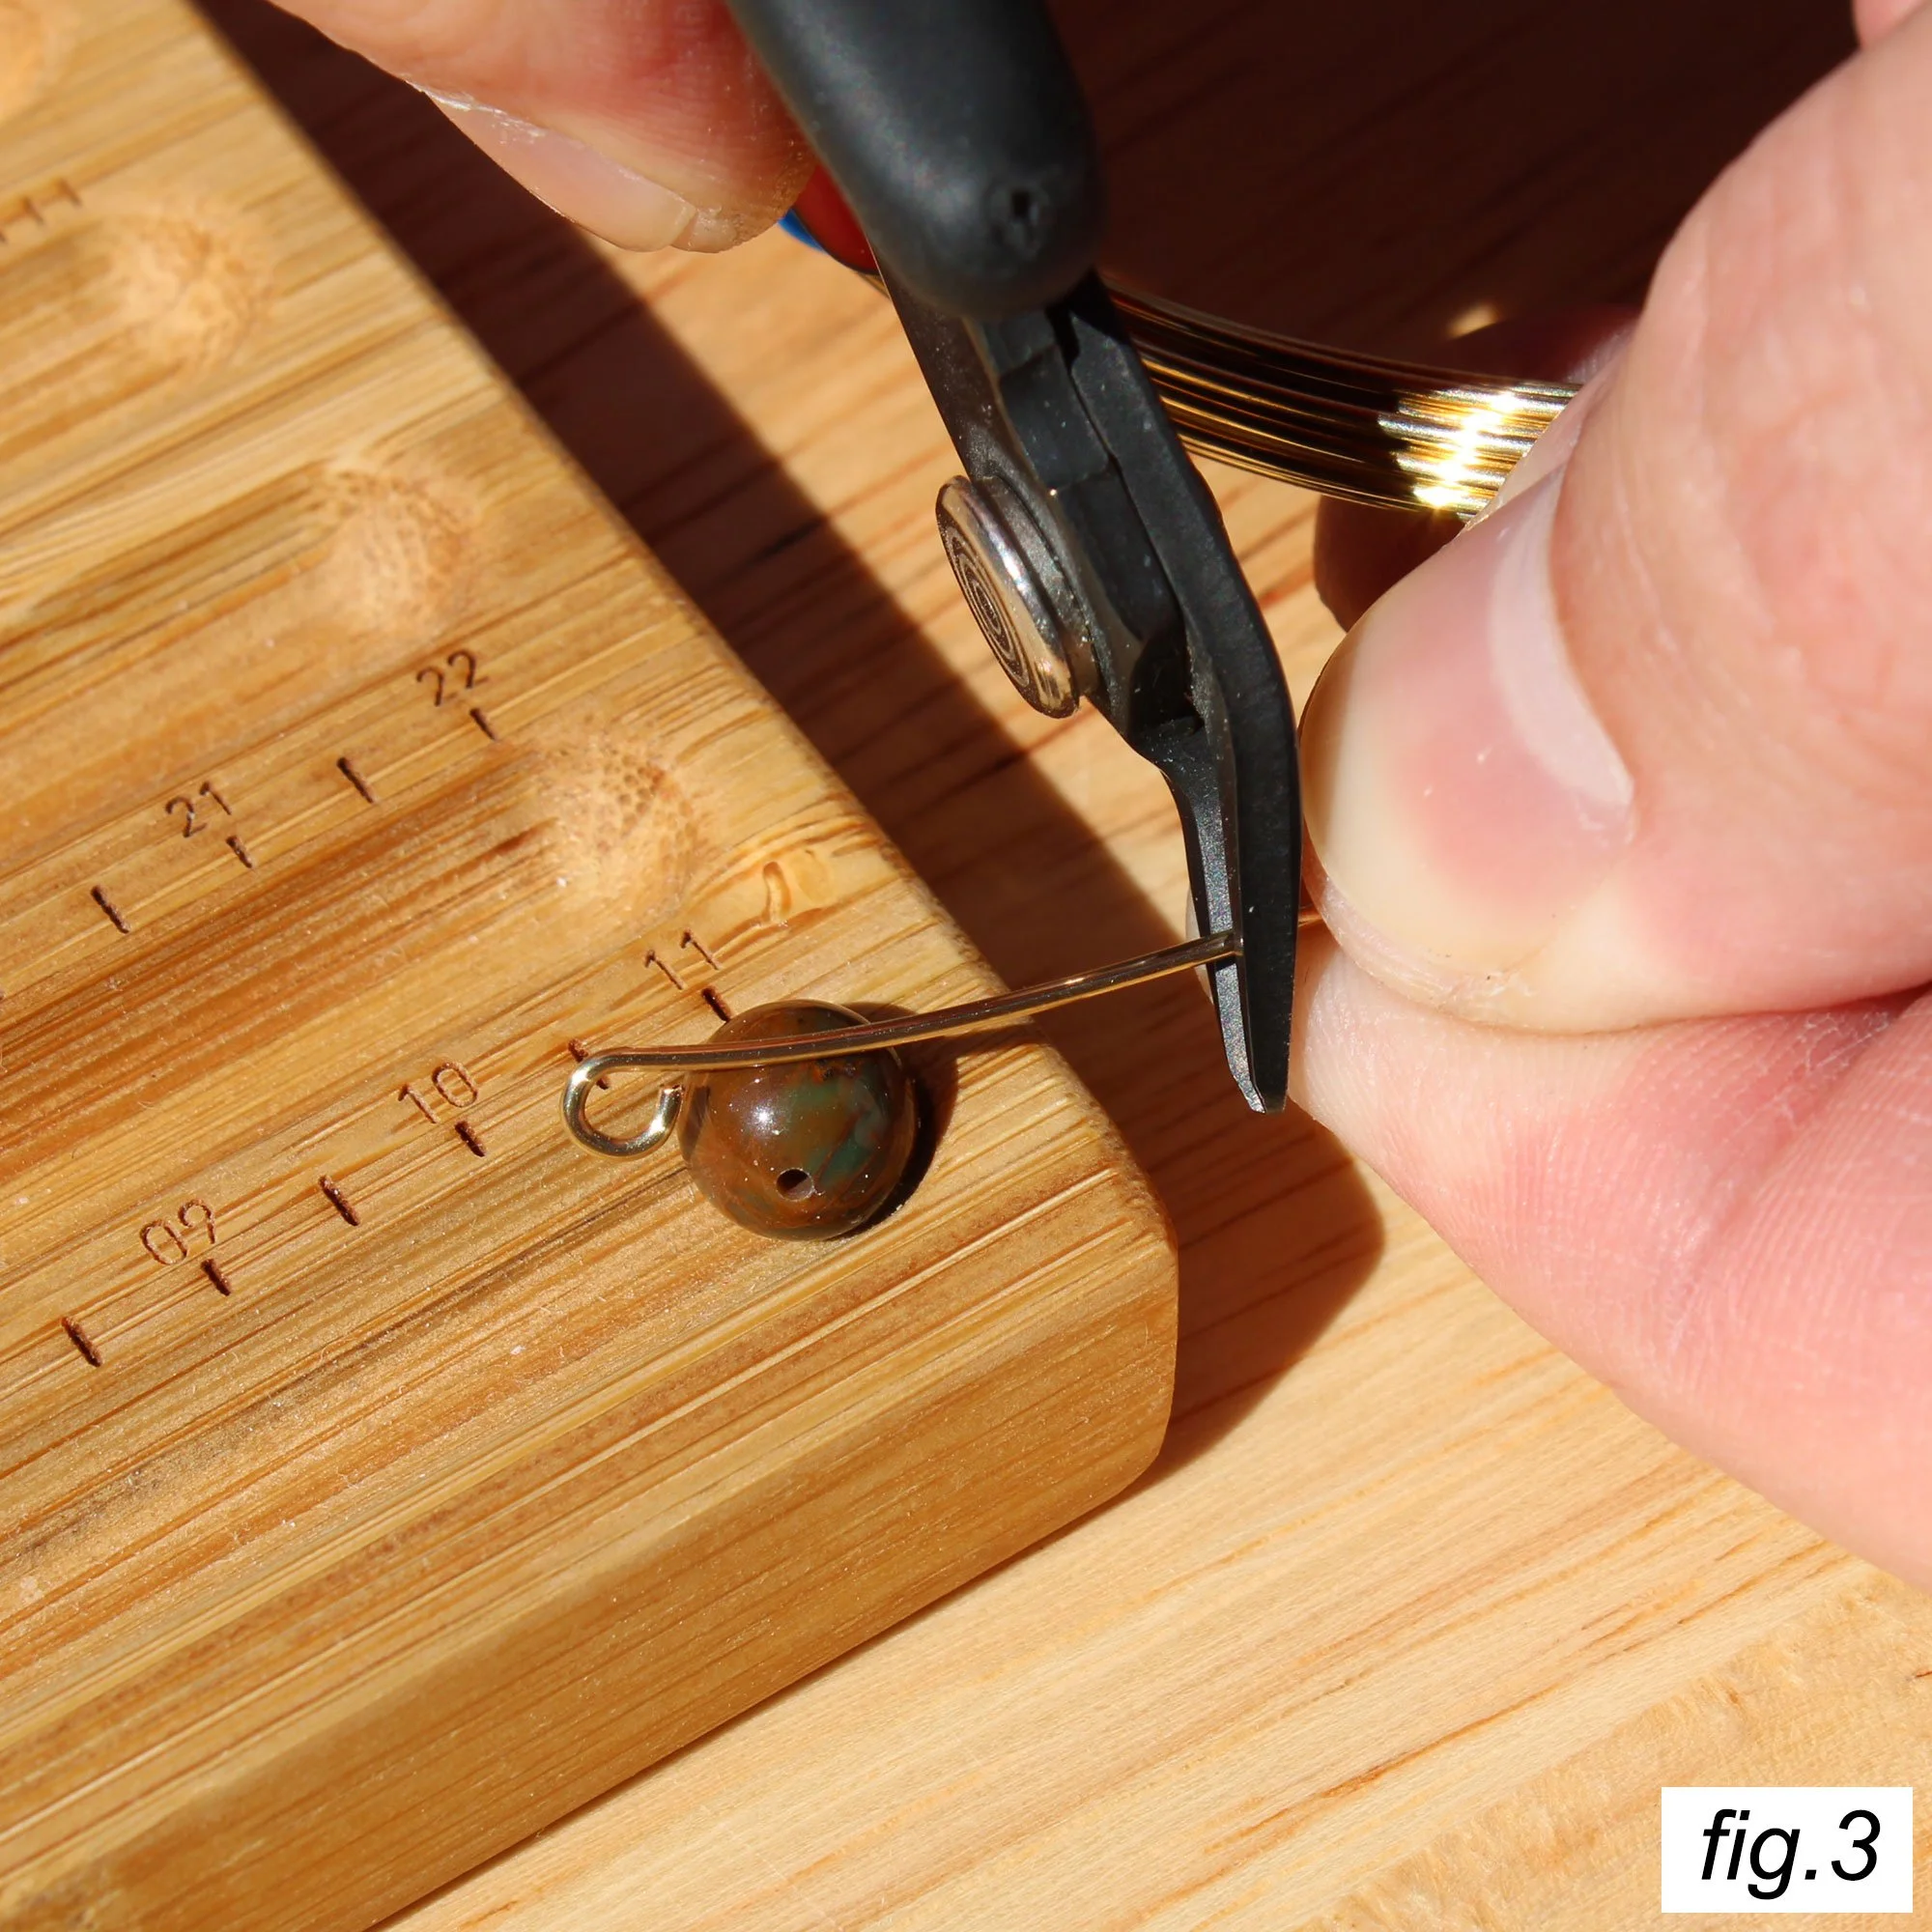
Once your loop is made, its time to size the length of wire you will need. Pick out a bead that you’ll be using for your rosary. I like to grab one on the larger side to avoid problems down the road (we’ll cover those a bit later). Line up the wire over the center of the bead, aligning the point where the loop meets with the side of the bead.
With your eyes, measure out approximately one extra bead length worth of wire next to the bead, and cut it off there. Important: make sure to keep the flat side of your flush cutters away from the bead, or your next loop in the chain will not be clean. The proper direction is shown in fig. 3.

Using the first eye pin you just made, make another loop as you did in step one and two, and measure the length to match that of the first one you made. Make sure you use the flush cutters in the right direction and it should be fast and easy.

Once you get used to the method, its very quick to make up a whole bunch of eye pins. I like to make enough for a whole rosary at once plus a few extras in case of a screwup while I’m constructing. If some seem oddly shaped or slightly crooked, just leave them for now, finishing them up comes next.
Once you have a bunch of eye pins made, its time to finish them up. Out of the loopers, a lot of them may be crooked as shown in fig. 6. Grip the loop with your chain nose pliers, and twist it to make the loop parallel to the wire when viewed from the side.
Sometimes it is easier to hold the wire still and twist on the loop, and sometimes it is easier to hold the pliers still and twist with the wire instead. Find the technique that works best for you, different methods can work better in different situations.
Now its time to size your loop. Hold the eye pin in your chain nose pliers with the side that has wire sticking out the end on “top”. Bend the wire straight, changing the shape from an eye pin to a “P” shape instead, as shown in fig. 8. Make sure any curve in your wire is straightened out here.
To make larger loops (8mm+ beads), position the tip of your chain nose as close as you can to where the loop meets itself. For slightly smaller loops (7mm beads) position the tip of your chain nose between where the loop meets and where the curve of the loop starts. For small loops (6mm beads) position your chain nose where the curve of the starts.

Holding the loop still where you want it with the chain nose, push the wire piece to re-shape the “P” pin into an eye pin again. This step might seem redundant, but it straightens everything up and allows you to change the size of the loop to better match your beads.
With your eye pin sized up, grip the eye pin with your chain nose on the belly of the loop (the lowest part of the loop) and gently pull the loop open a little bit, just enough that you can slip chain or another eye pin through. Be careful not to use to much force or grab your loop in the wrong place. This part takes time to learn right, but you will get there in time.
I like to complete this step as well the the previous few steps for every pin before I start wiring the rosary. It saves you time later, and helps keep your focus in the right place while you are constructing the rosary.
Time to start beading! To start off, take the chain you will be using and feed it over the loop.
Making sure the chain stays on, bend the eye pin closed. Grab the loop close to the open end with your chain nose pliers and gently push it closed. It can help to grab it with the thicker part of your pliers and use their shape as a sort of guide. Close it up as much as you can. Carefully squeezing the entire loop on either side with your chain nose can help get it tighter, but its very easy to make a mistake doing that so be careful if you try.
This part can take a while to get a good feel of, so just keep practicing. It will click for you eventually.
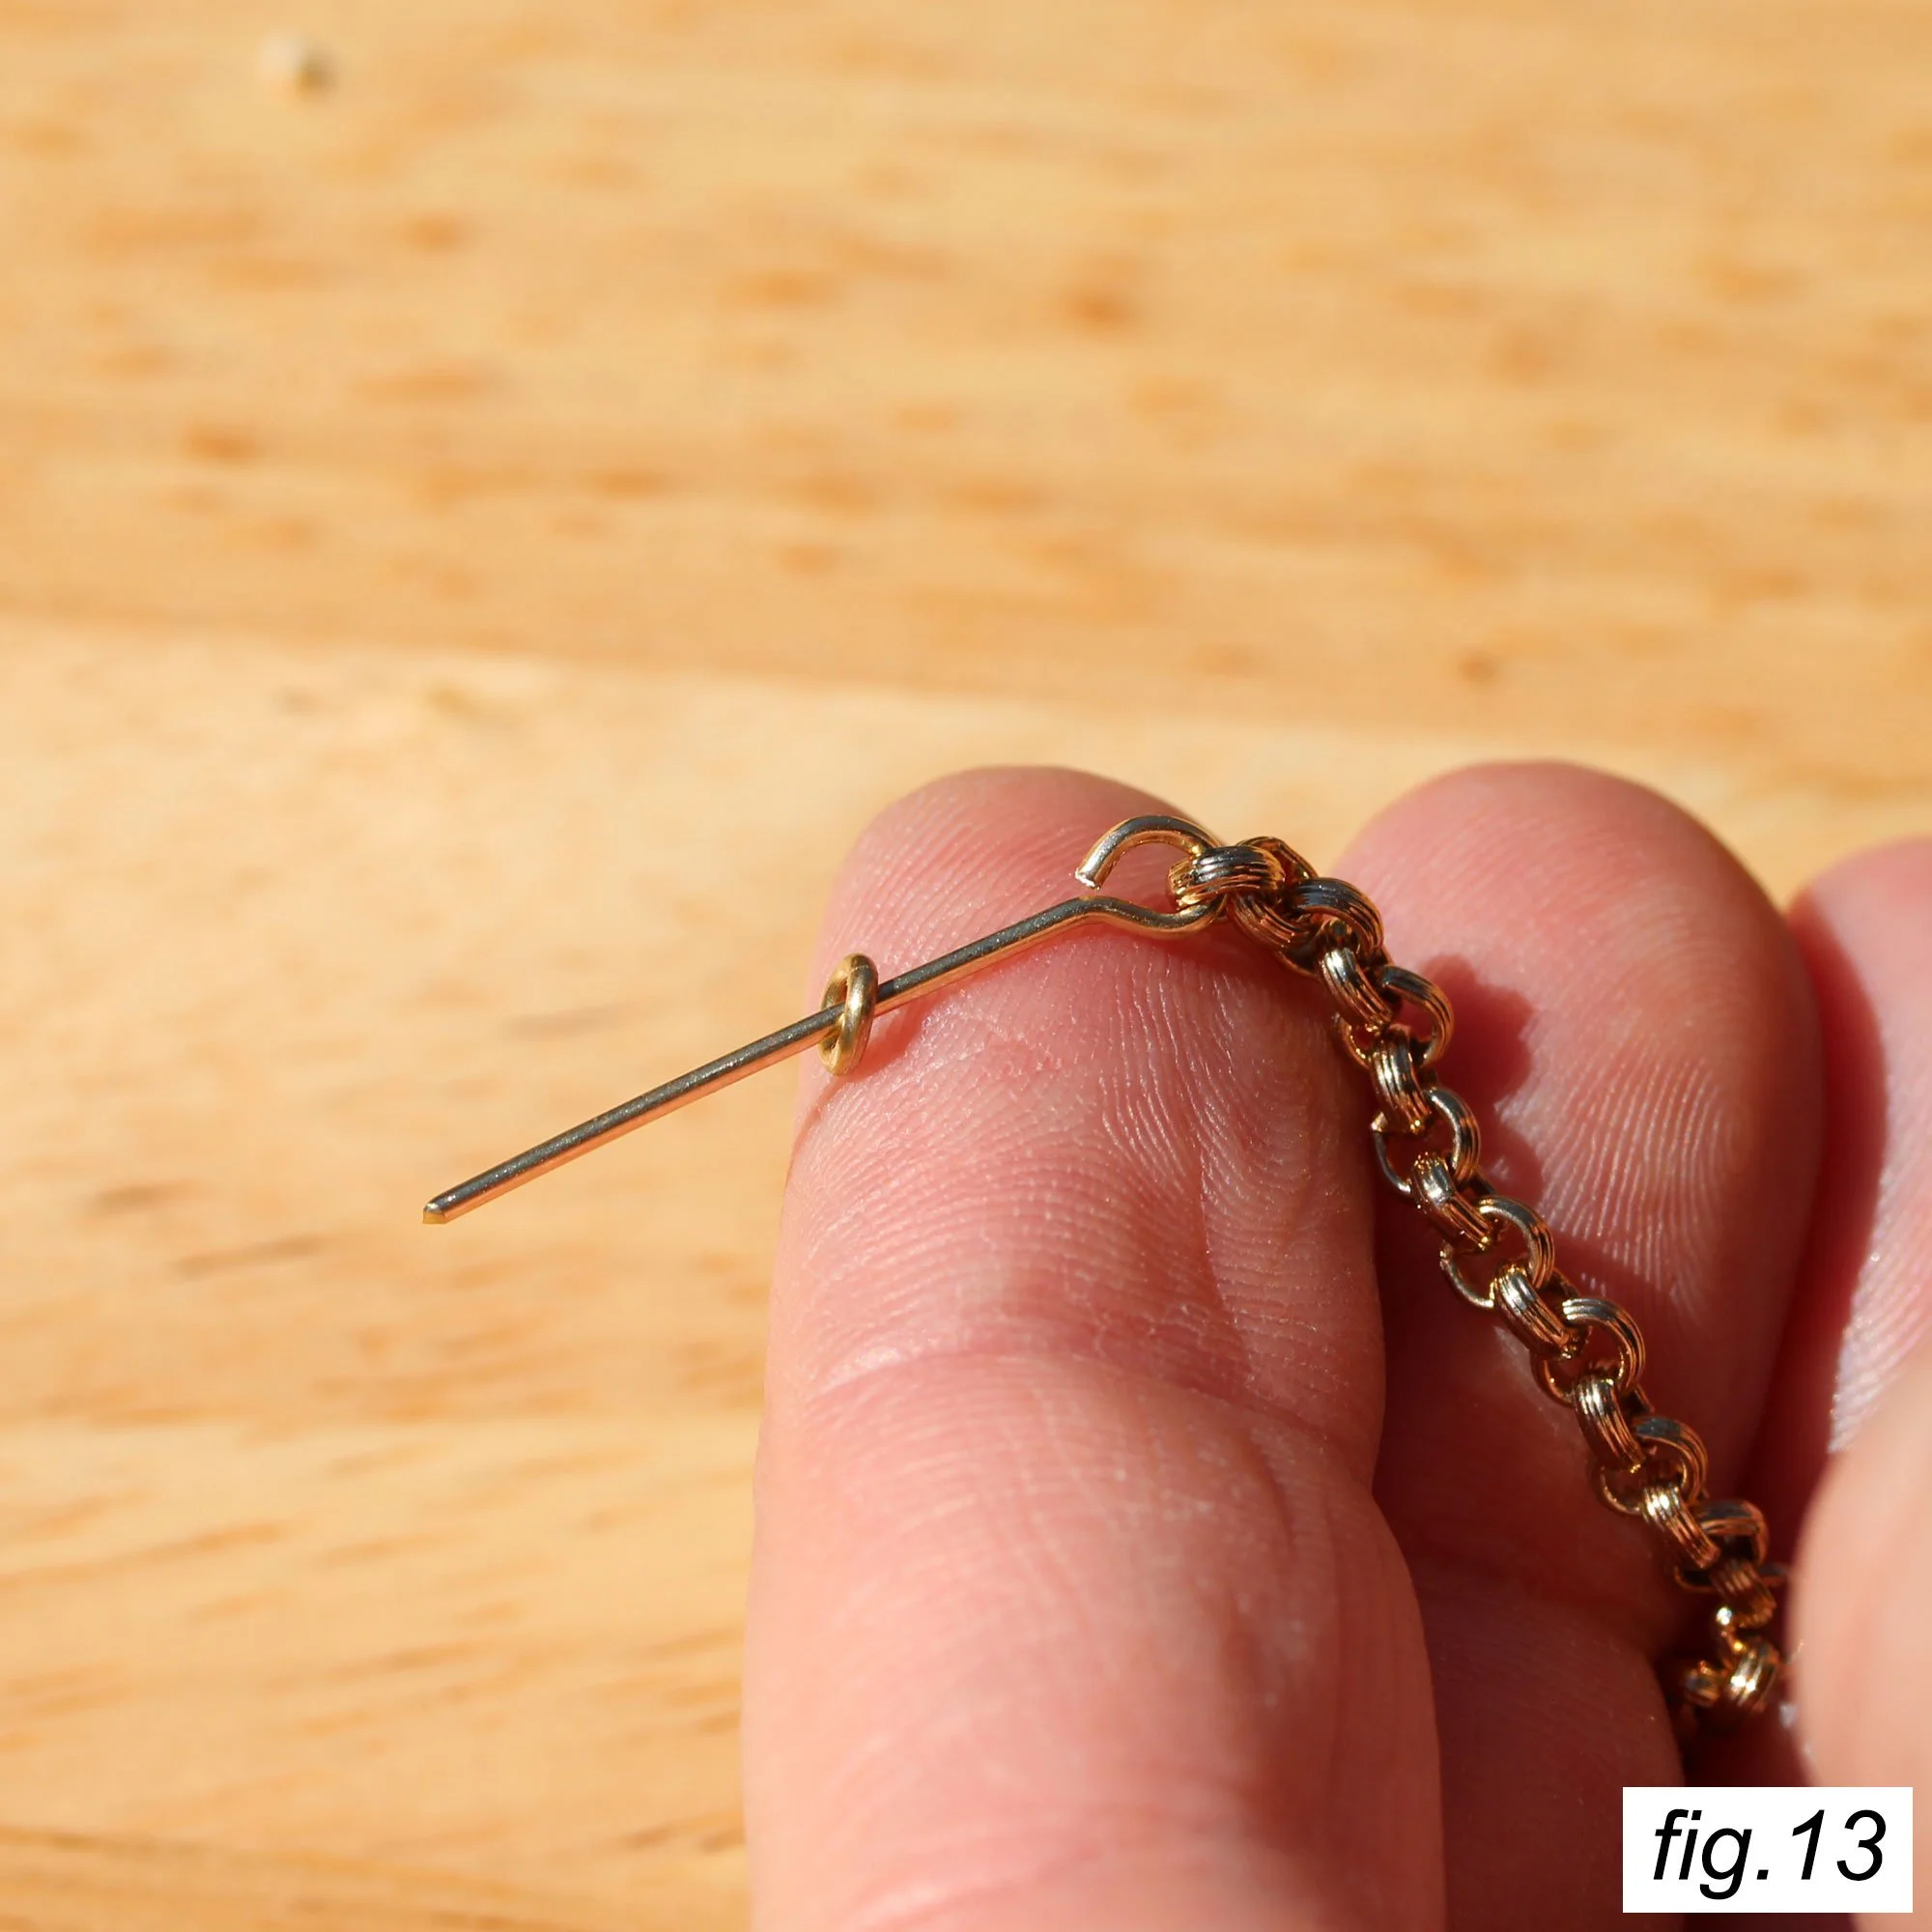
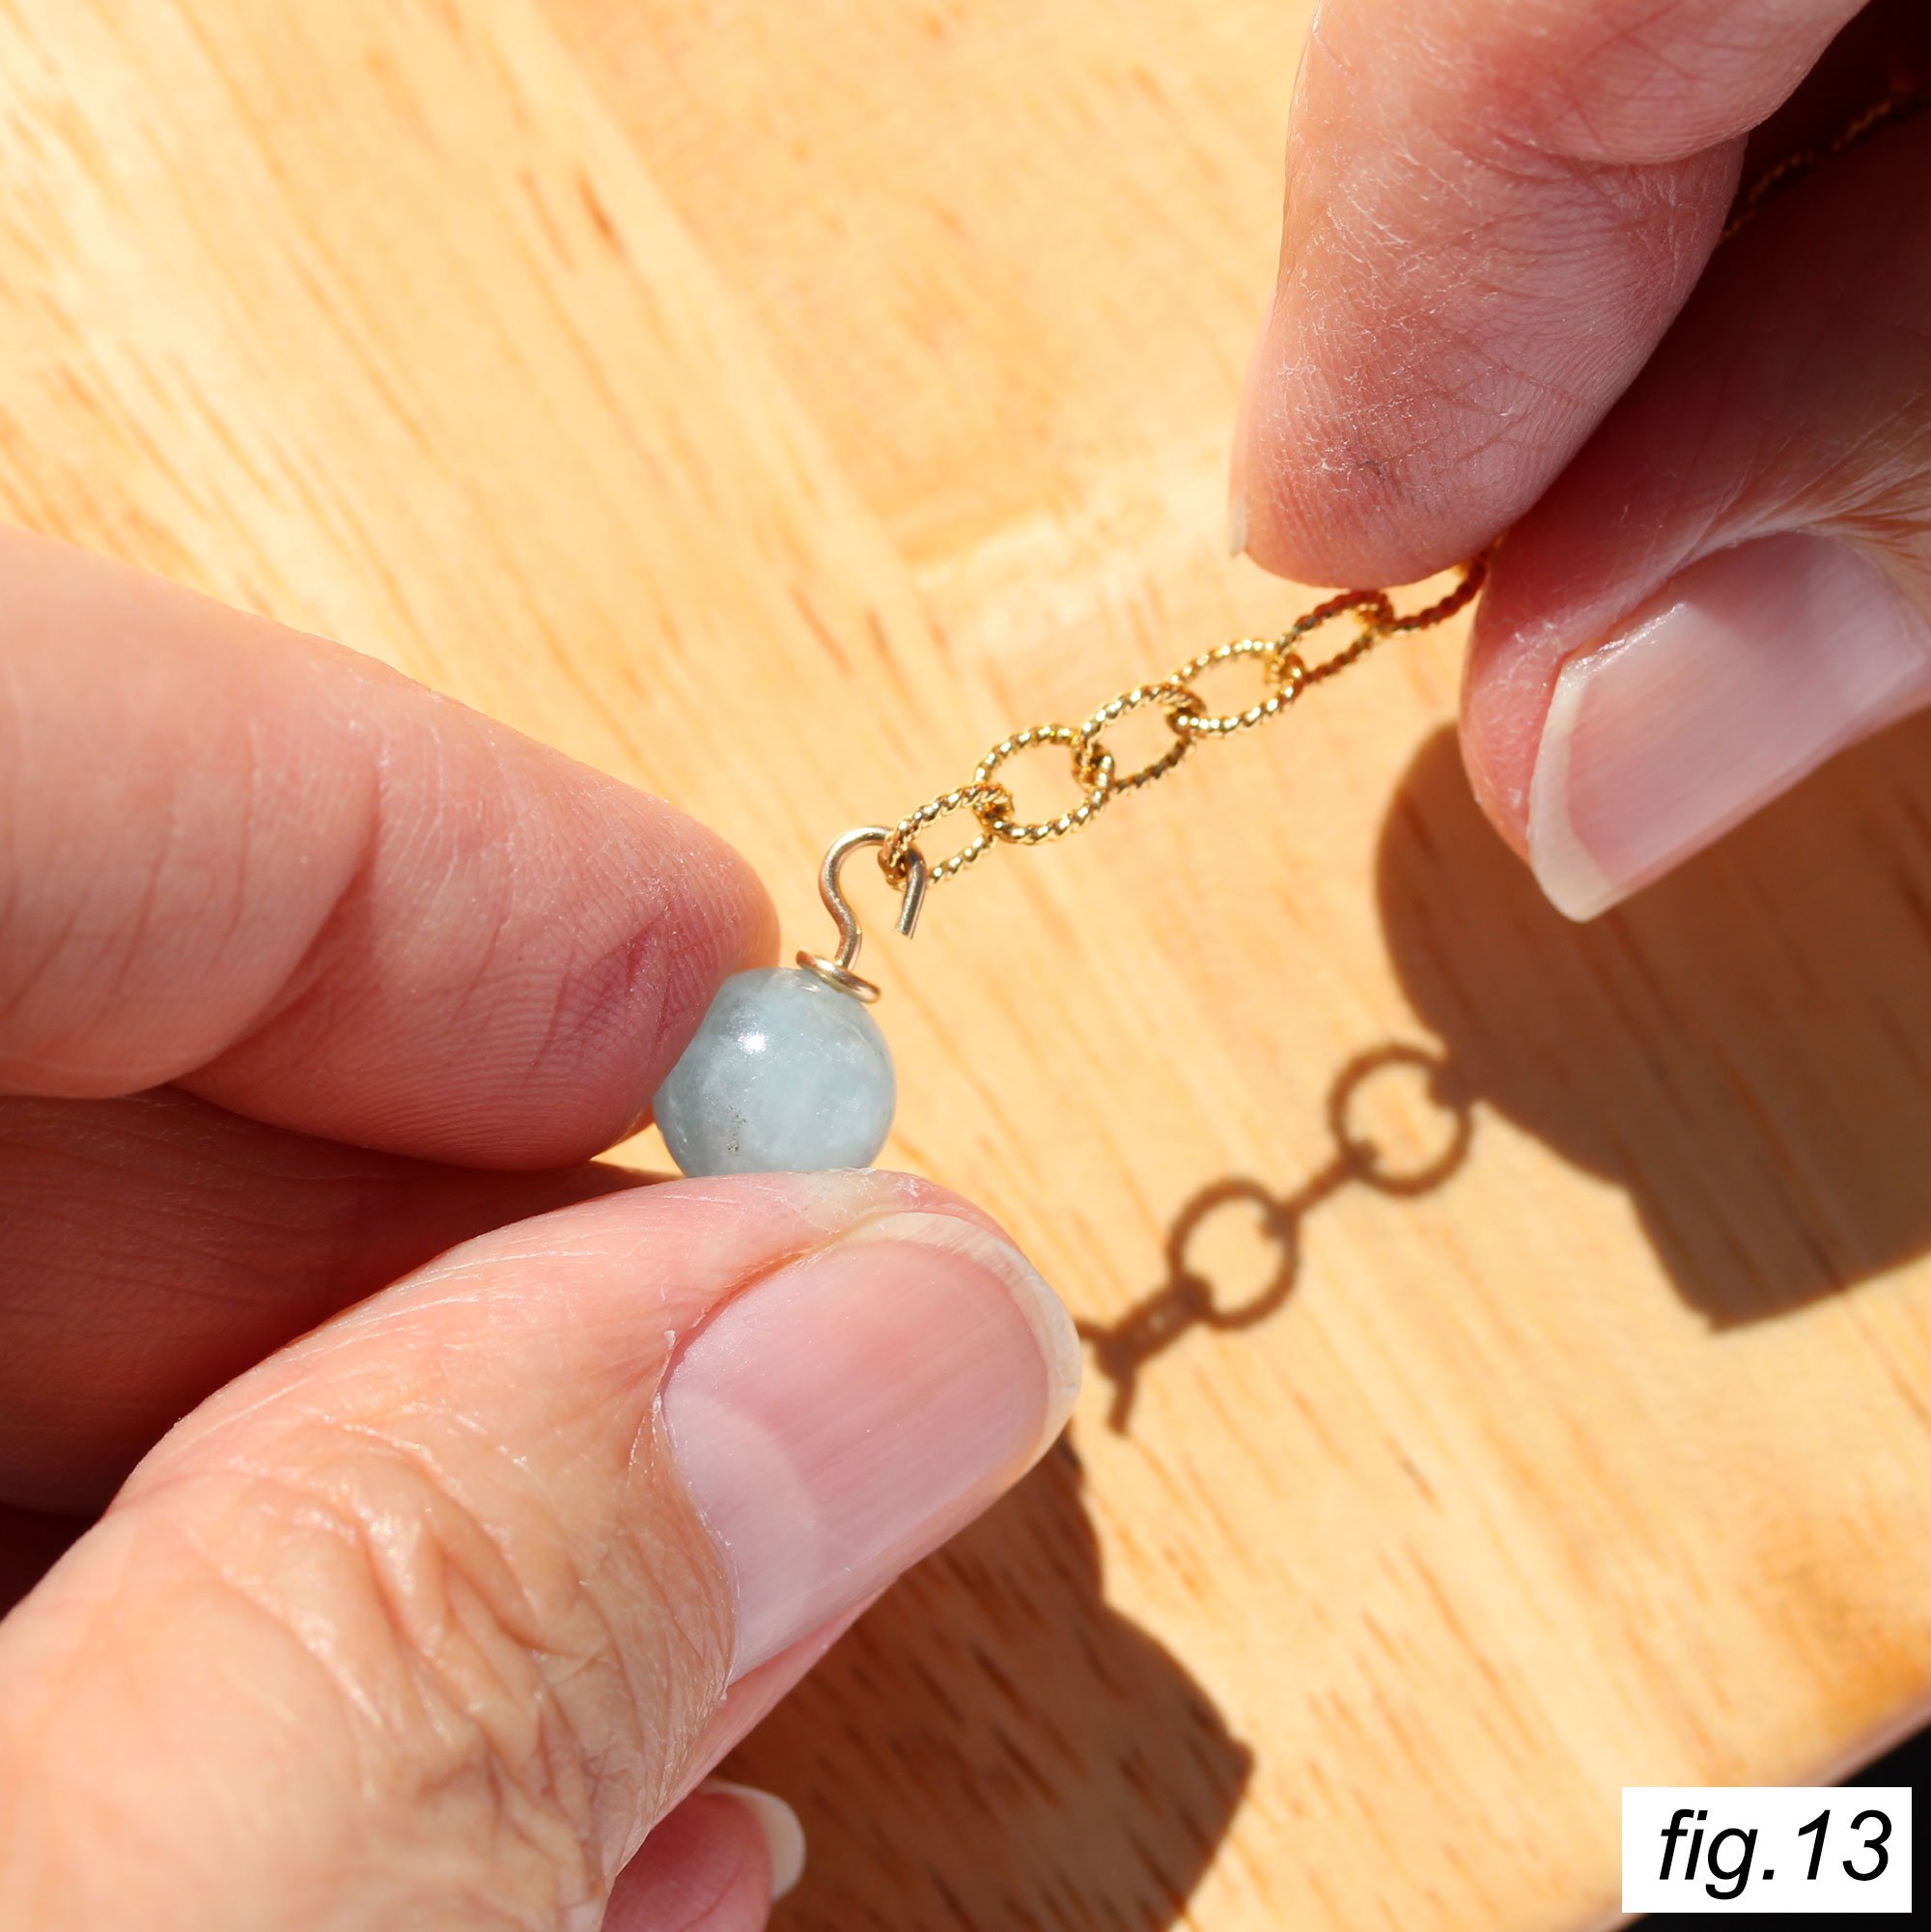
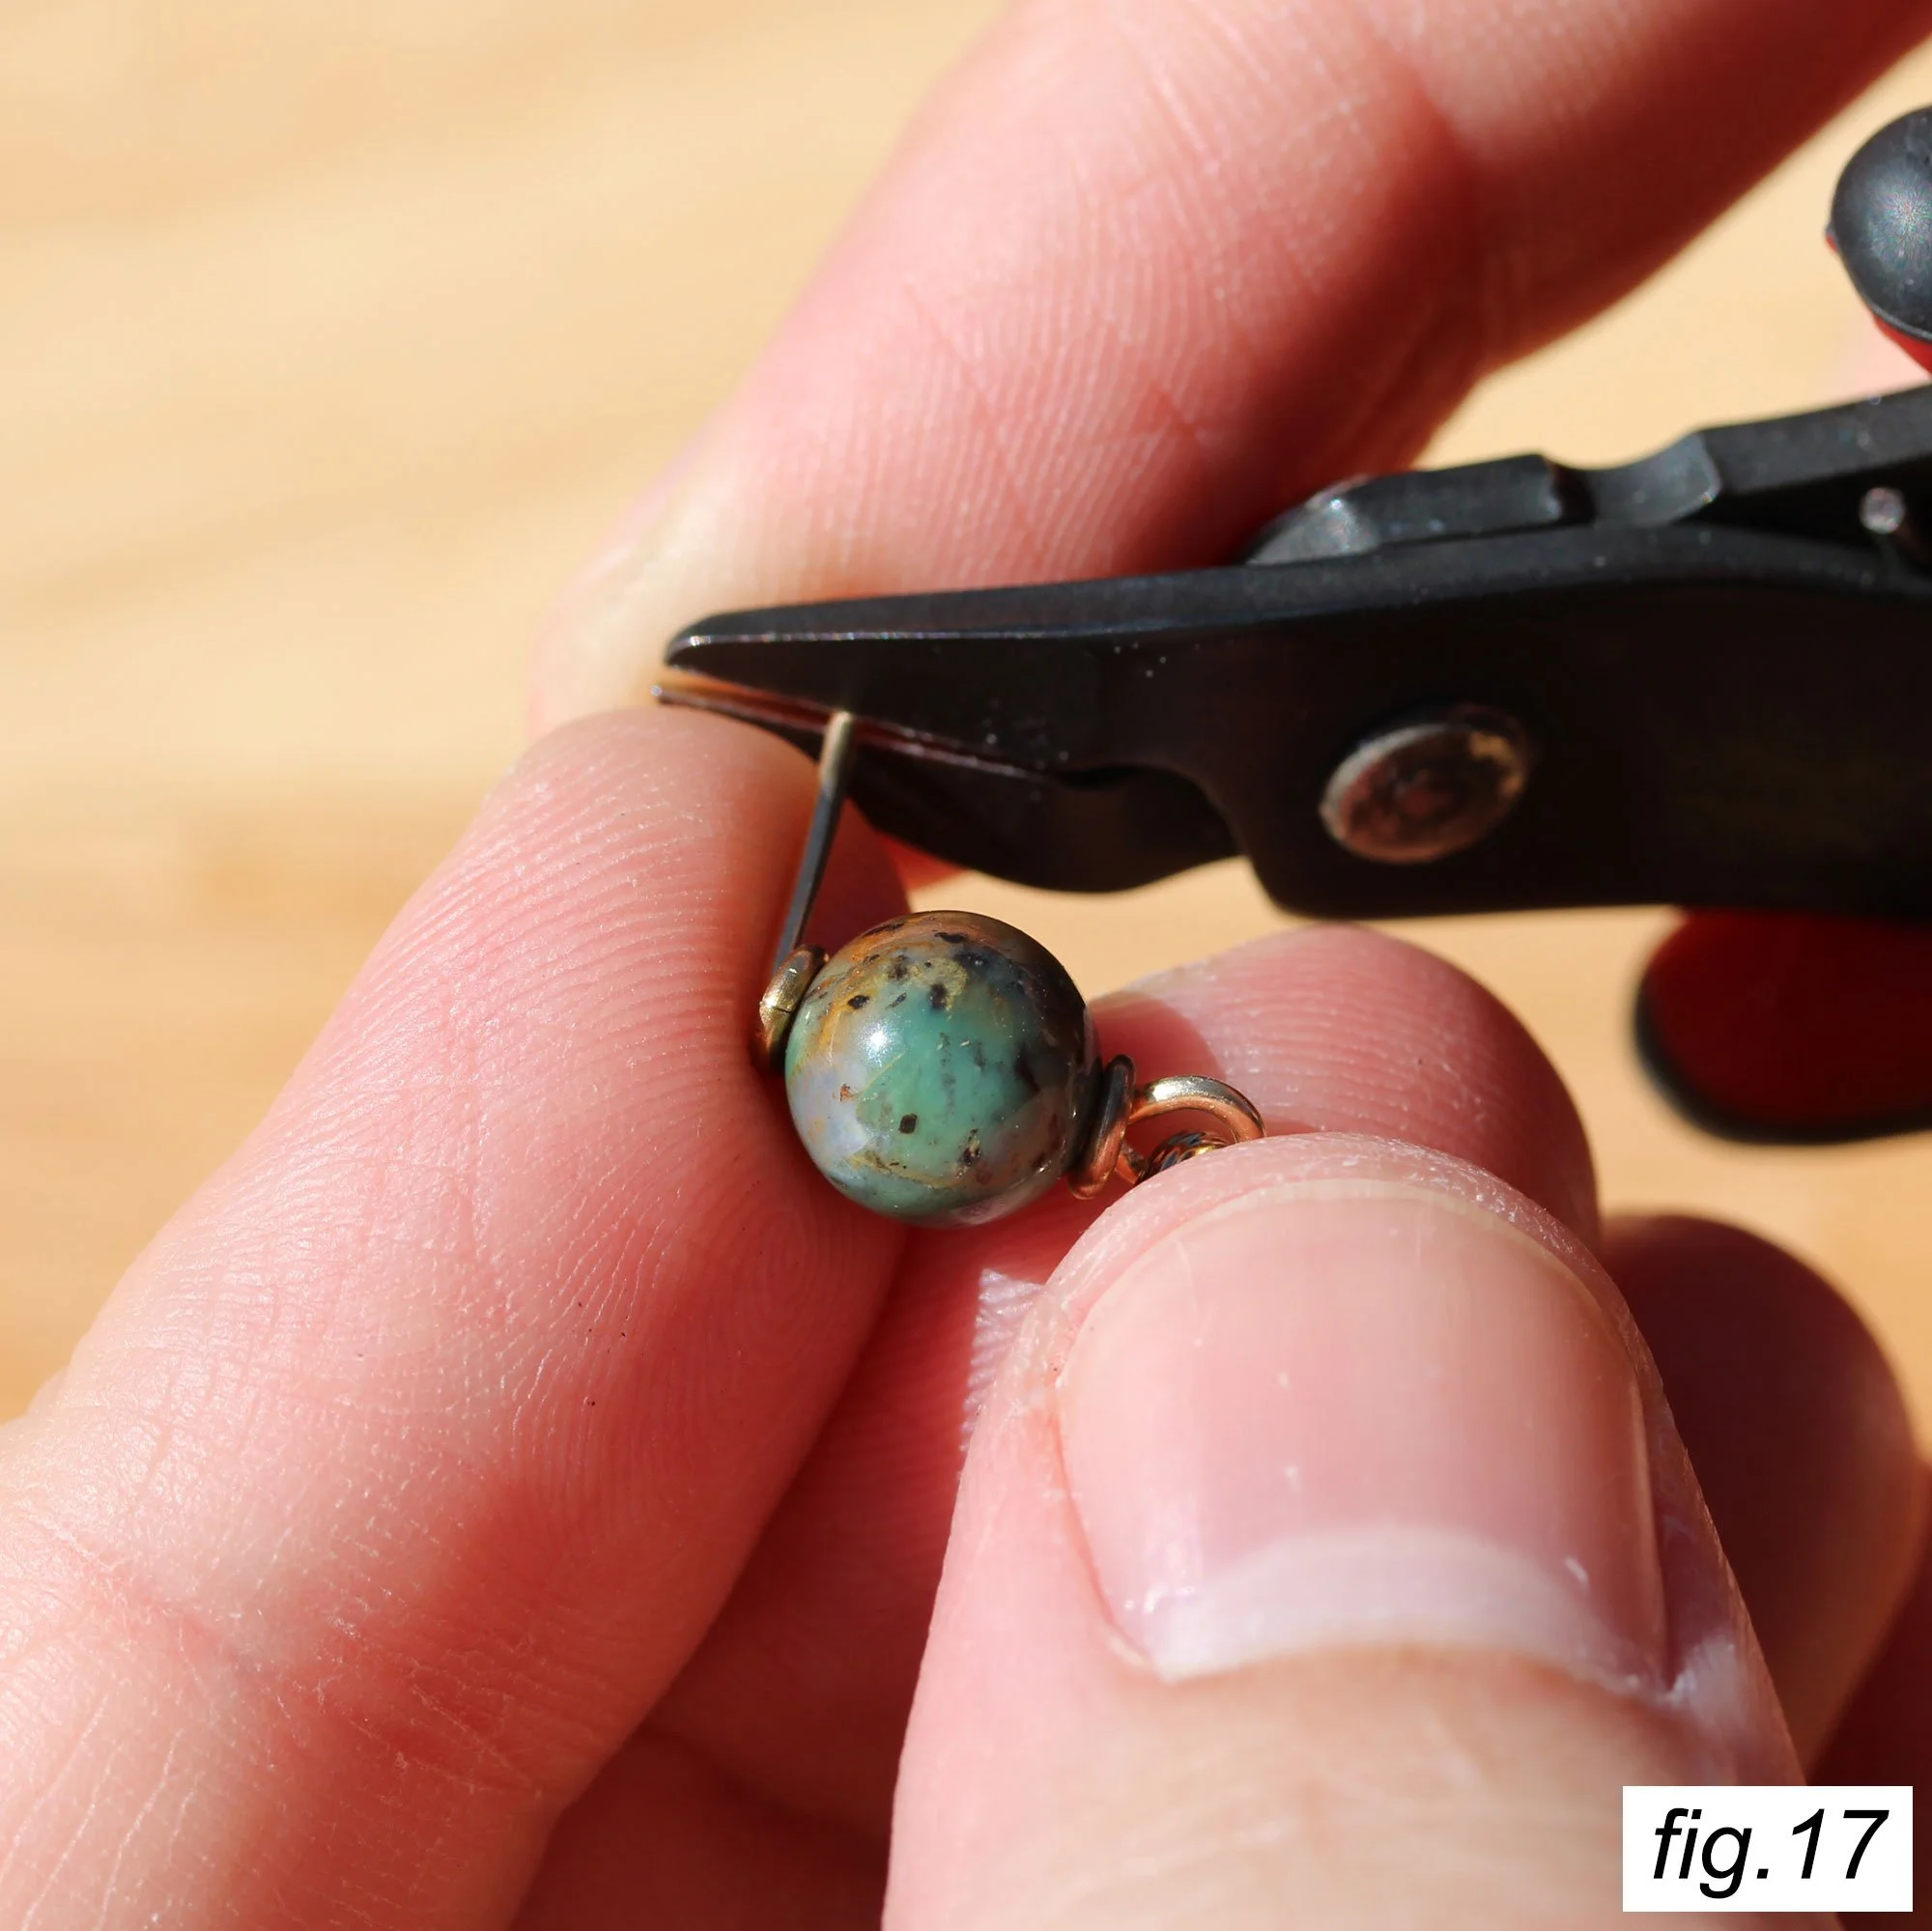
With your chain attached, put a jumpring on the wire.
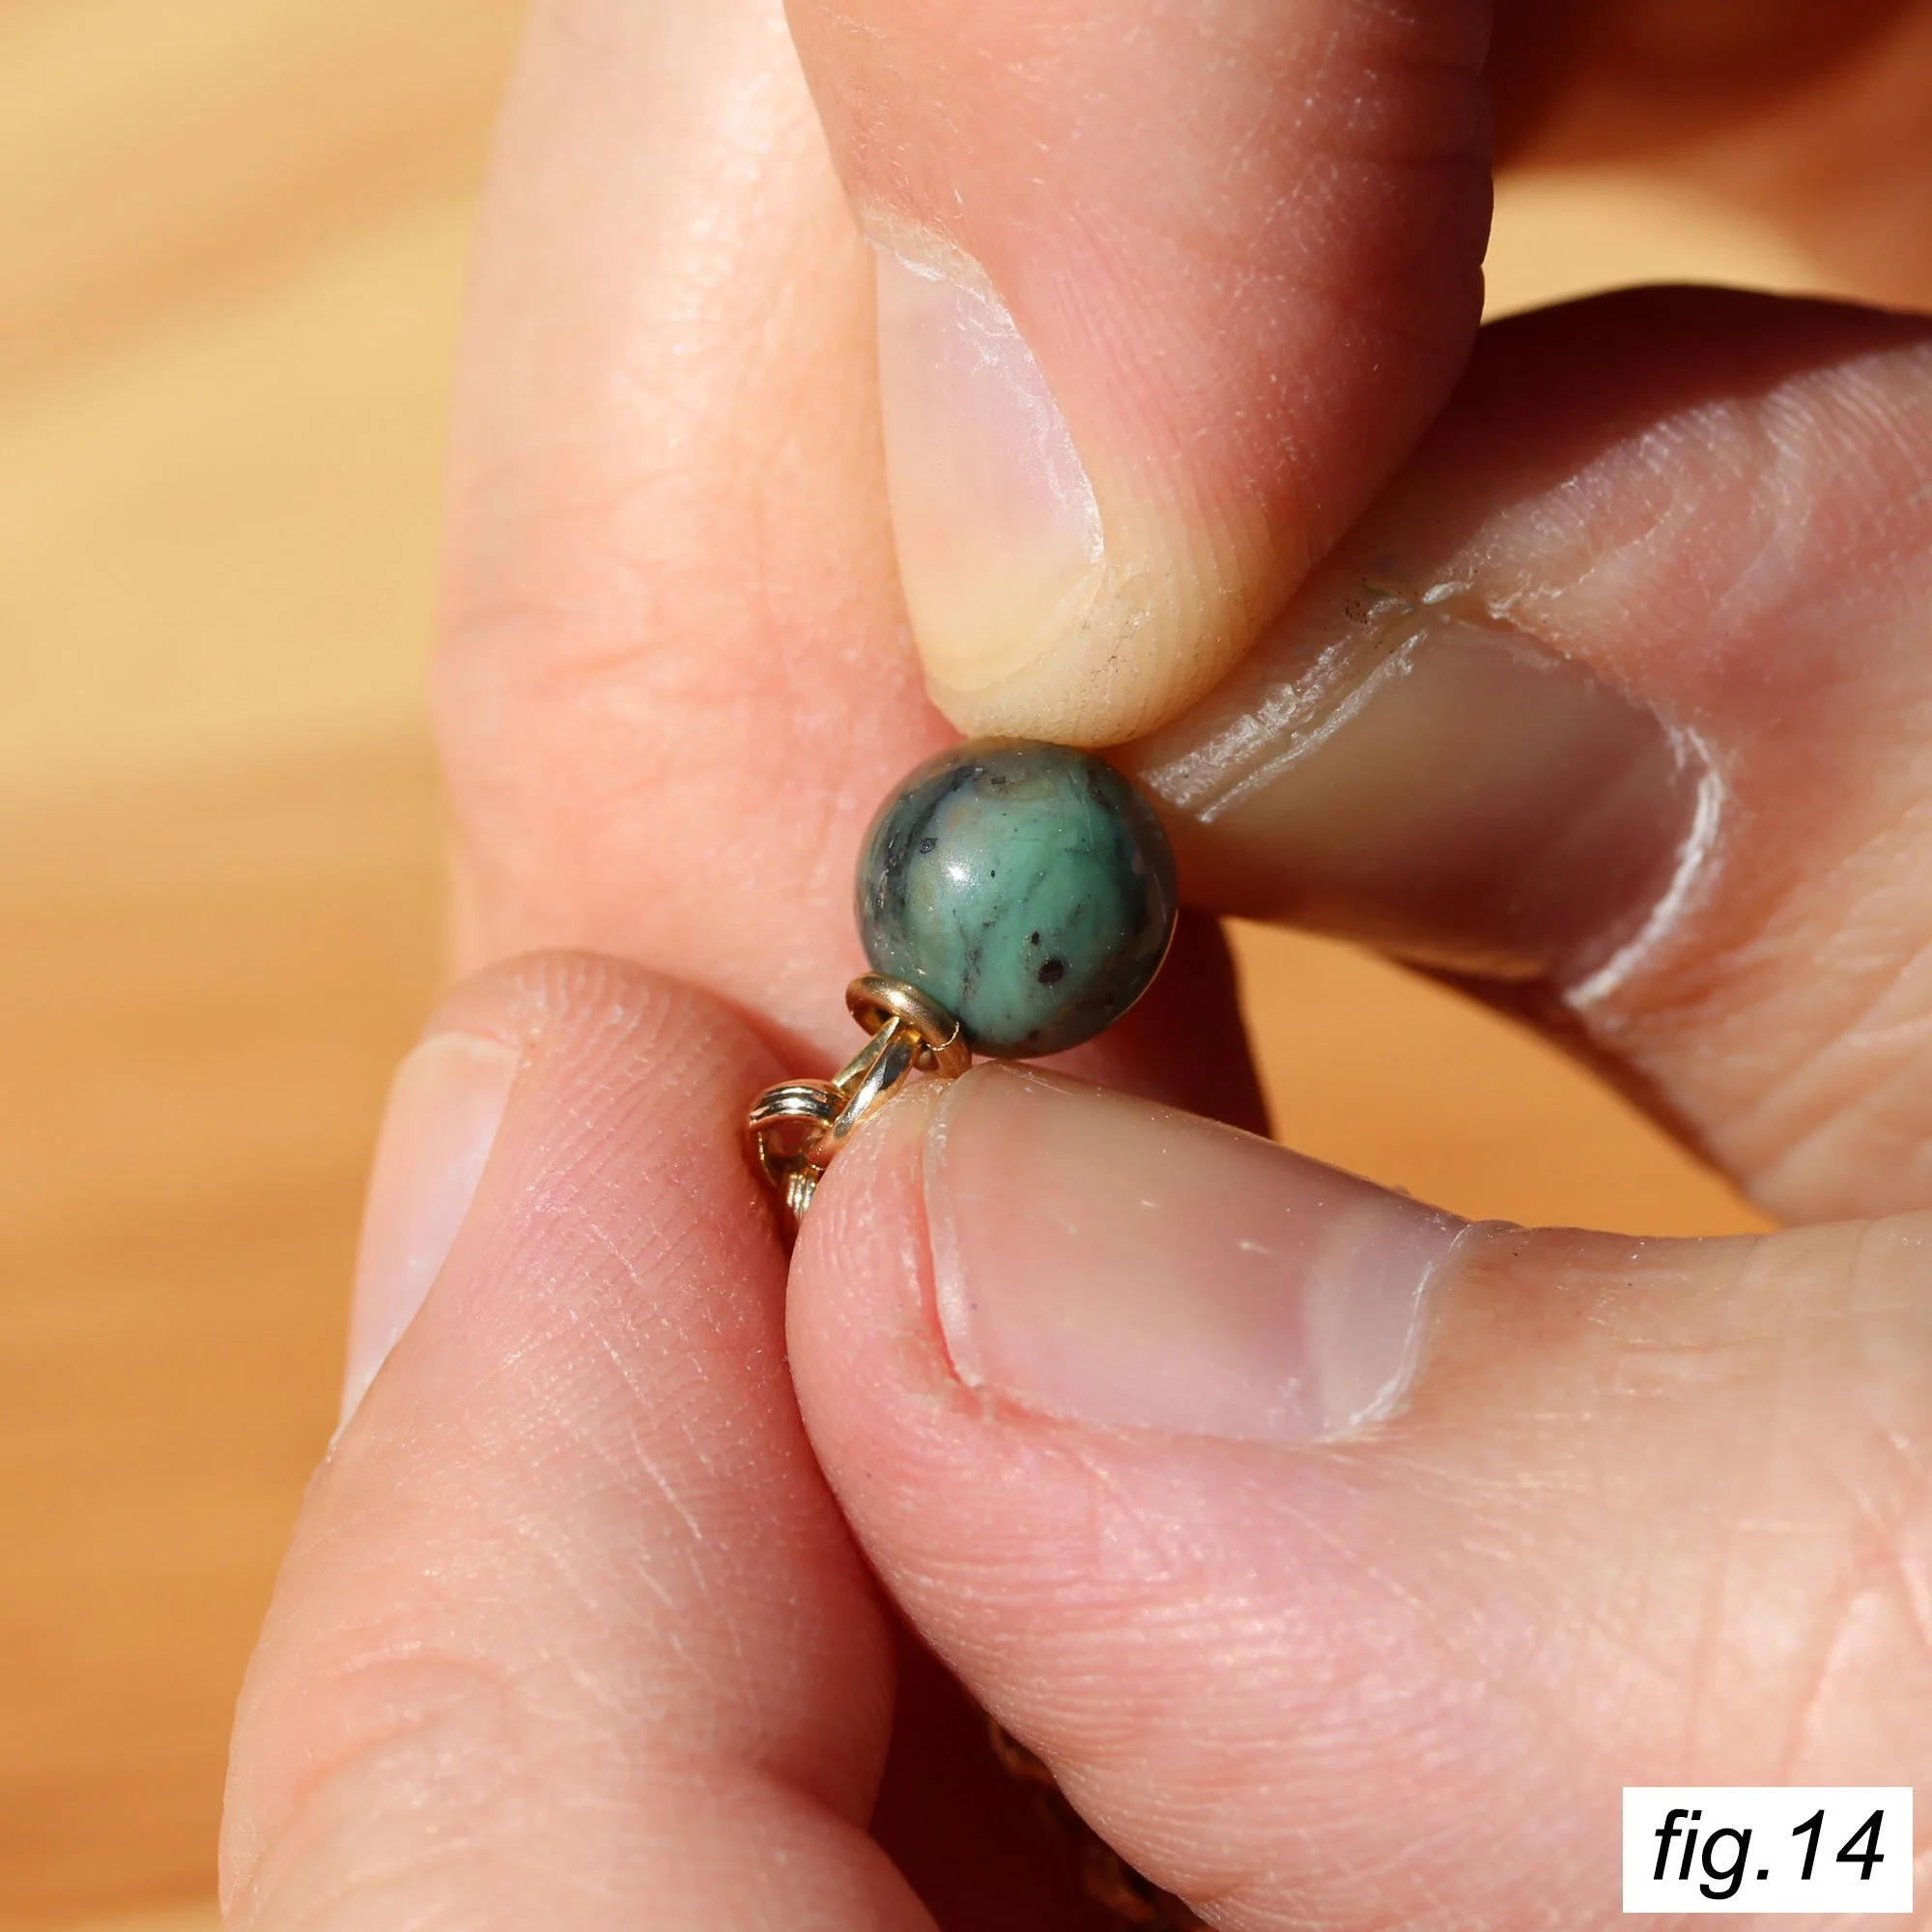
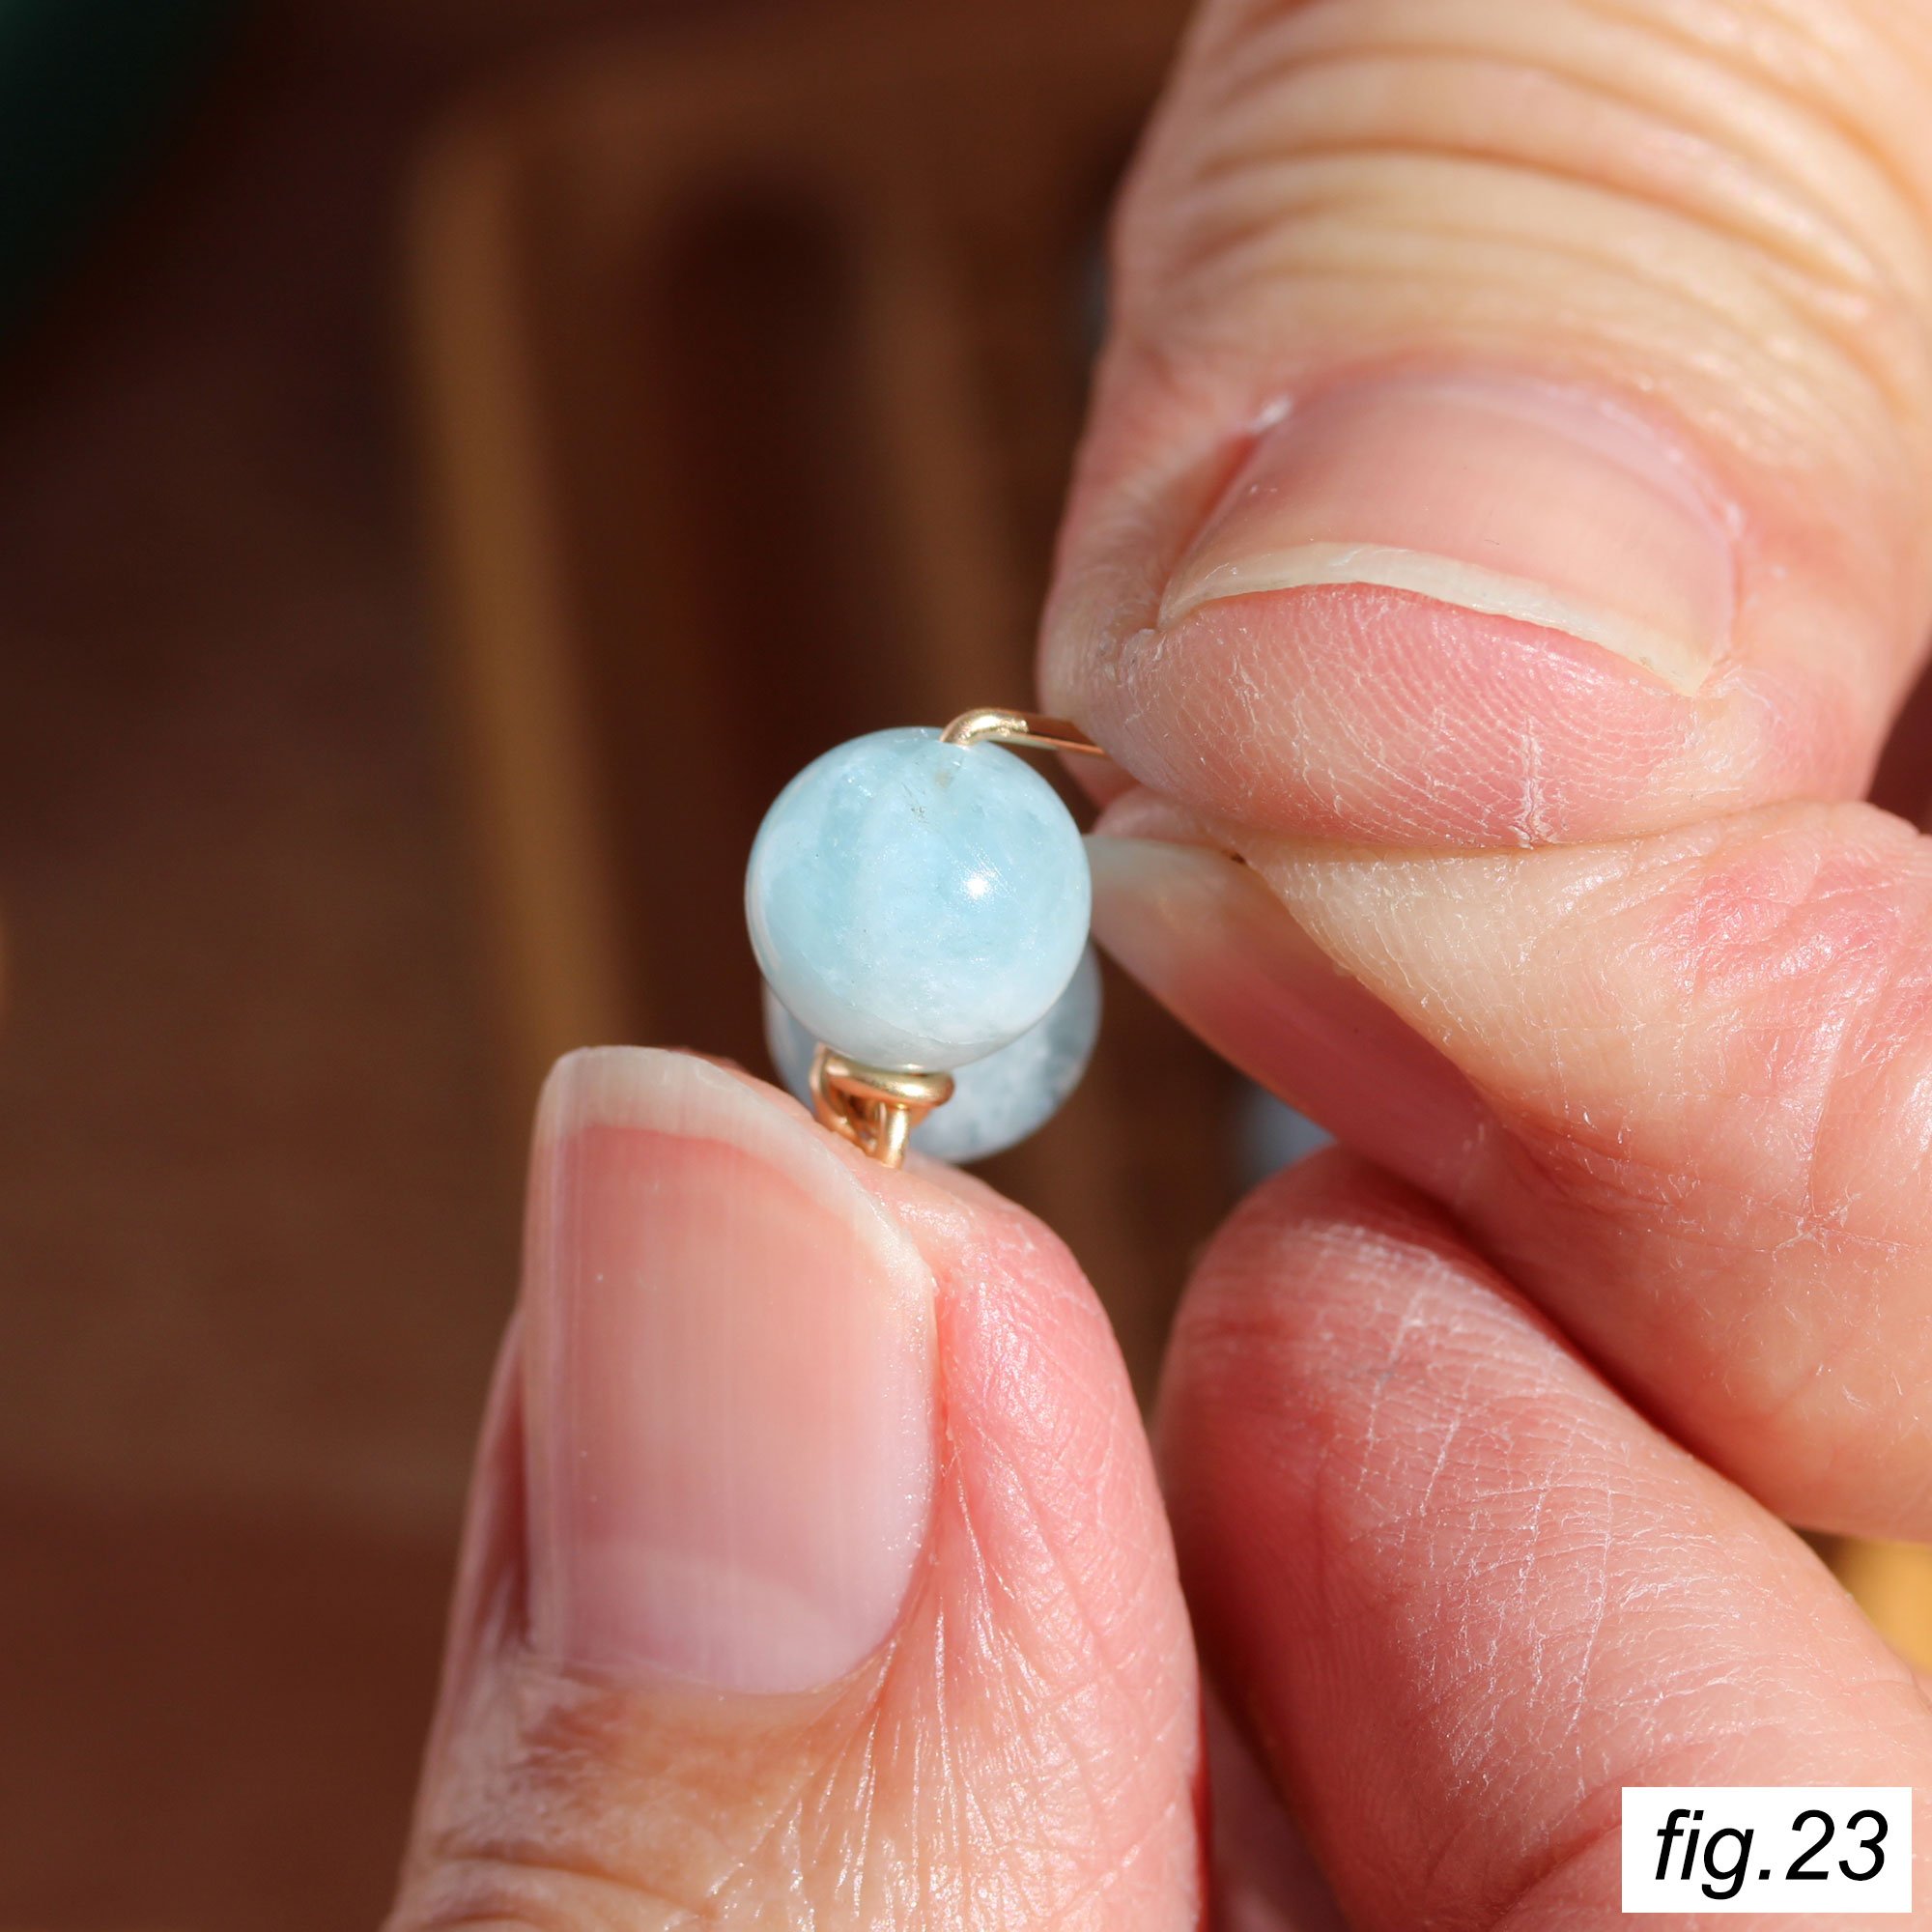
Place a bead on the wire next and press it into the loop. While holding the bead tight into the loop, push on the ring with your nail to make sure it doesn’t wiggle or move. If it doesn’t, you’re good to go. If it does, try turning the bead around to find a spot where it is tight or flipping the bead over so the other side is touching the ring. Not all beads are perfectly round, in fact very few of them are.
If it is still wiggling, then you need to take the bead and ring off and modify the shape of your loop to get the ring tight. This usually means making the loop a little wider, which can be done by making the curve of the loop sharper or even by cutting a tiny bit off the end of loop so it has to curve shaper to close. This part takes a while to learn, and it is always a little bit of a guessing game.
Getting the first ring to seat tightly is important in making the bead tight after the second loop is complete. Sometimes you just can’t make an eye pin work and need to use another one, and sometimes the ring itself is misshaped or to large. This is why we prep spares in advance!
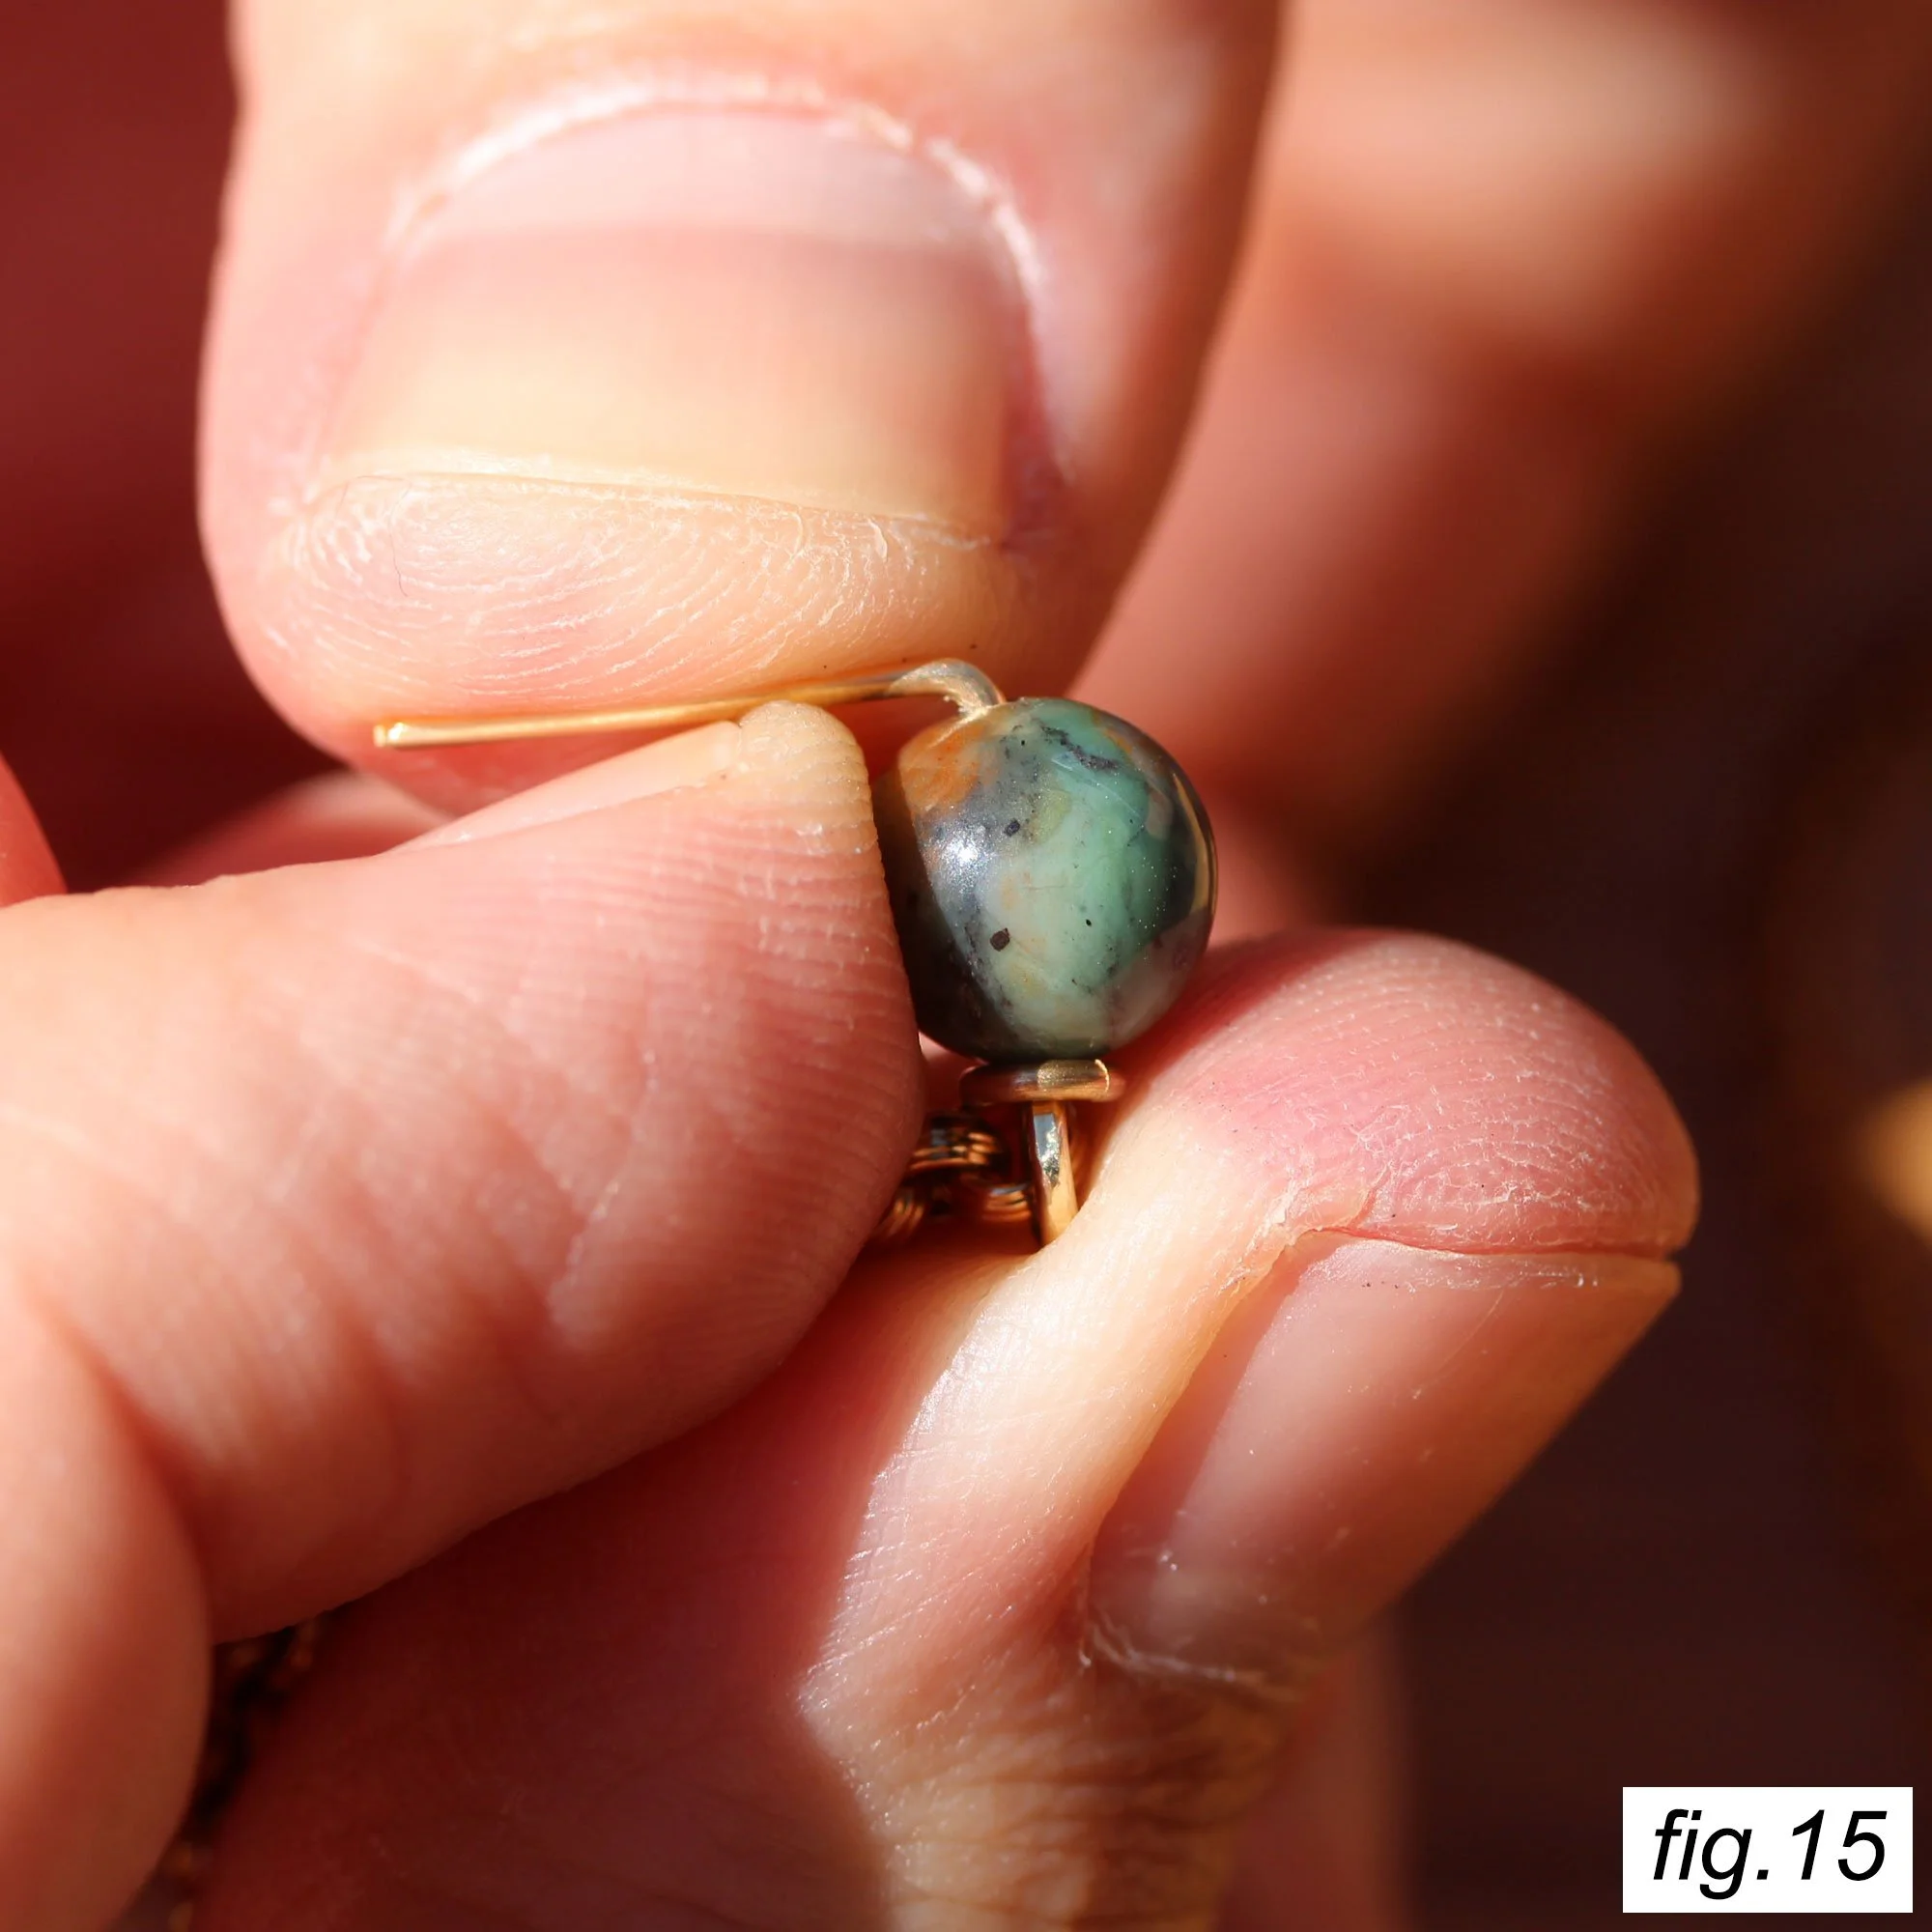
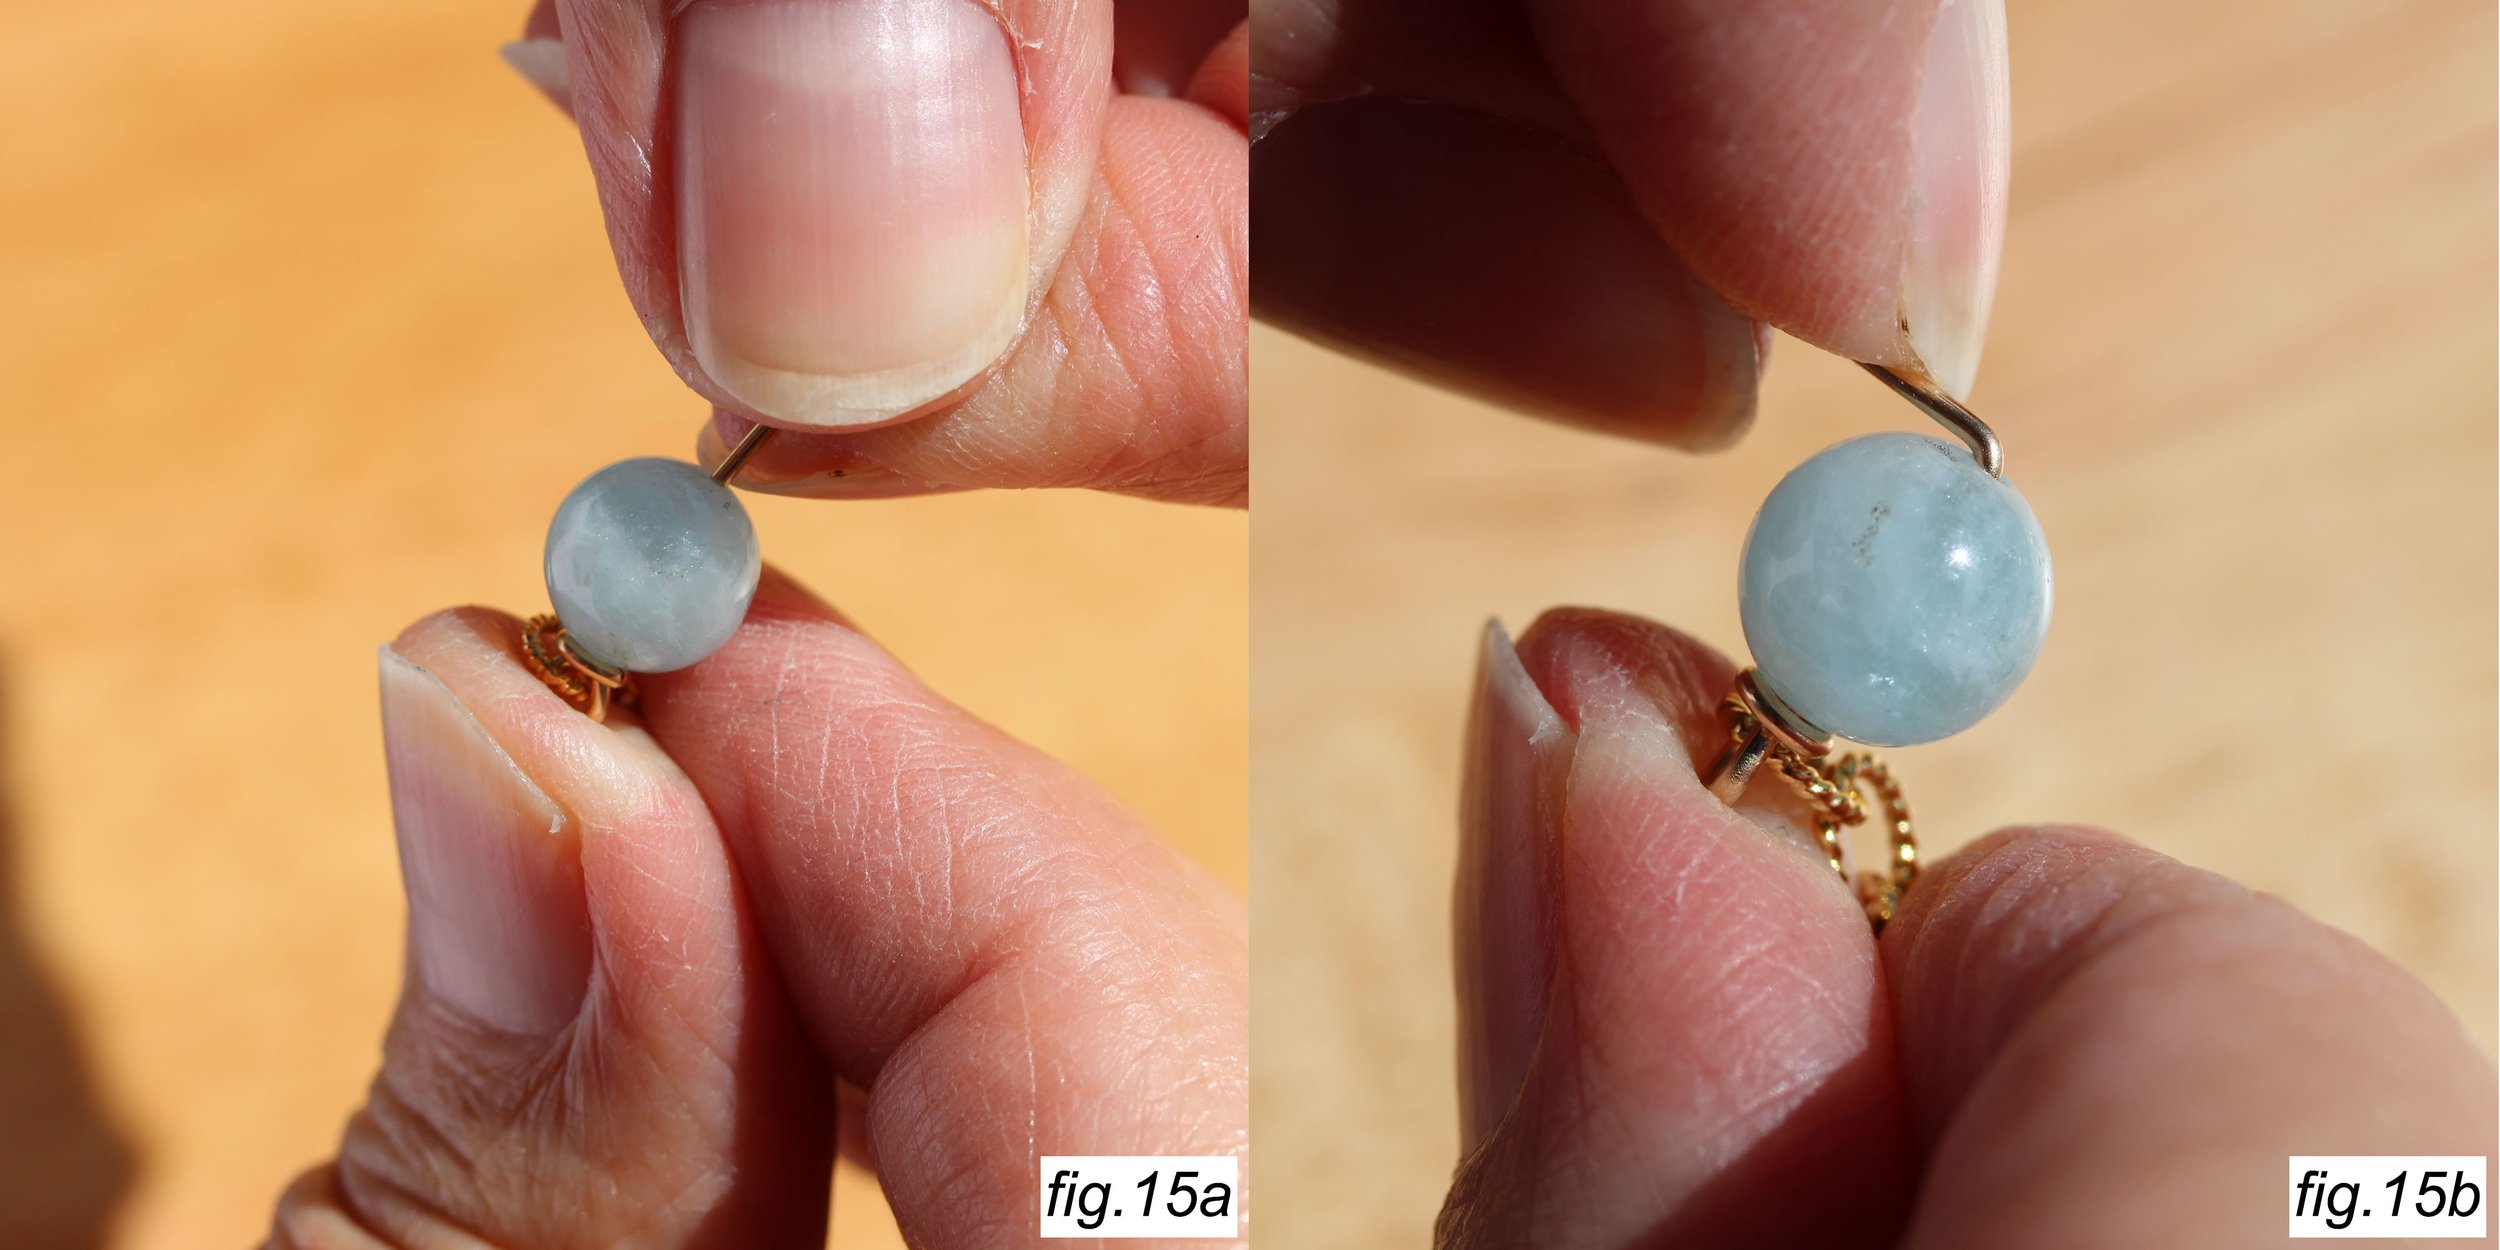
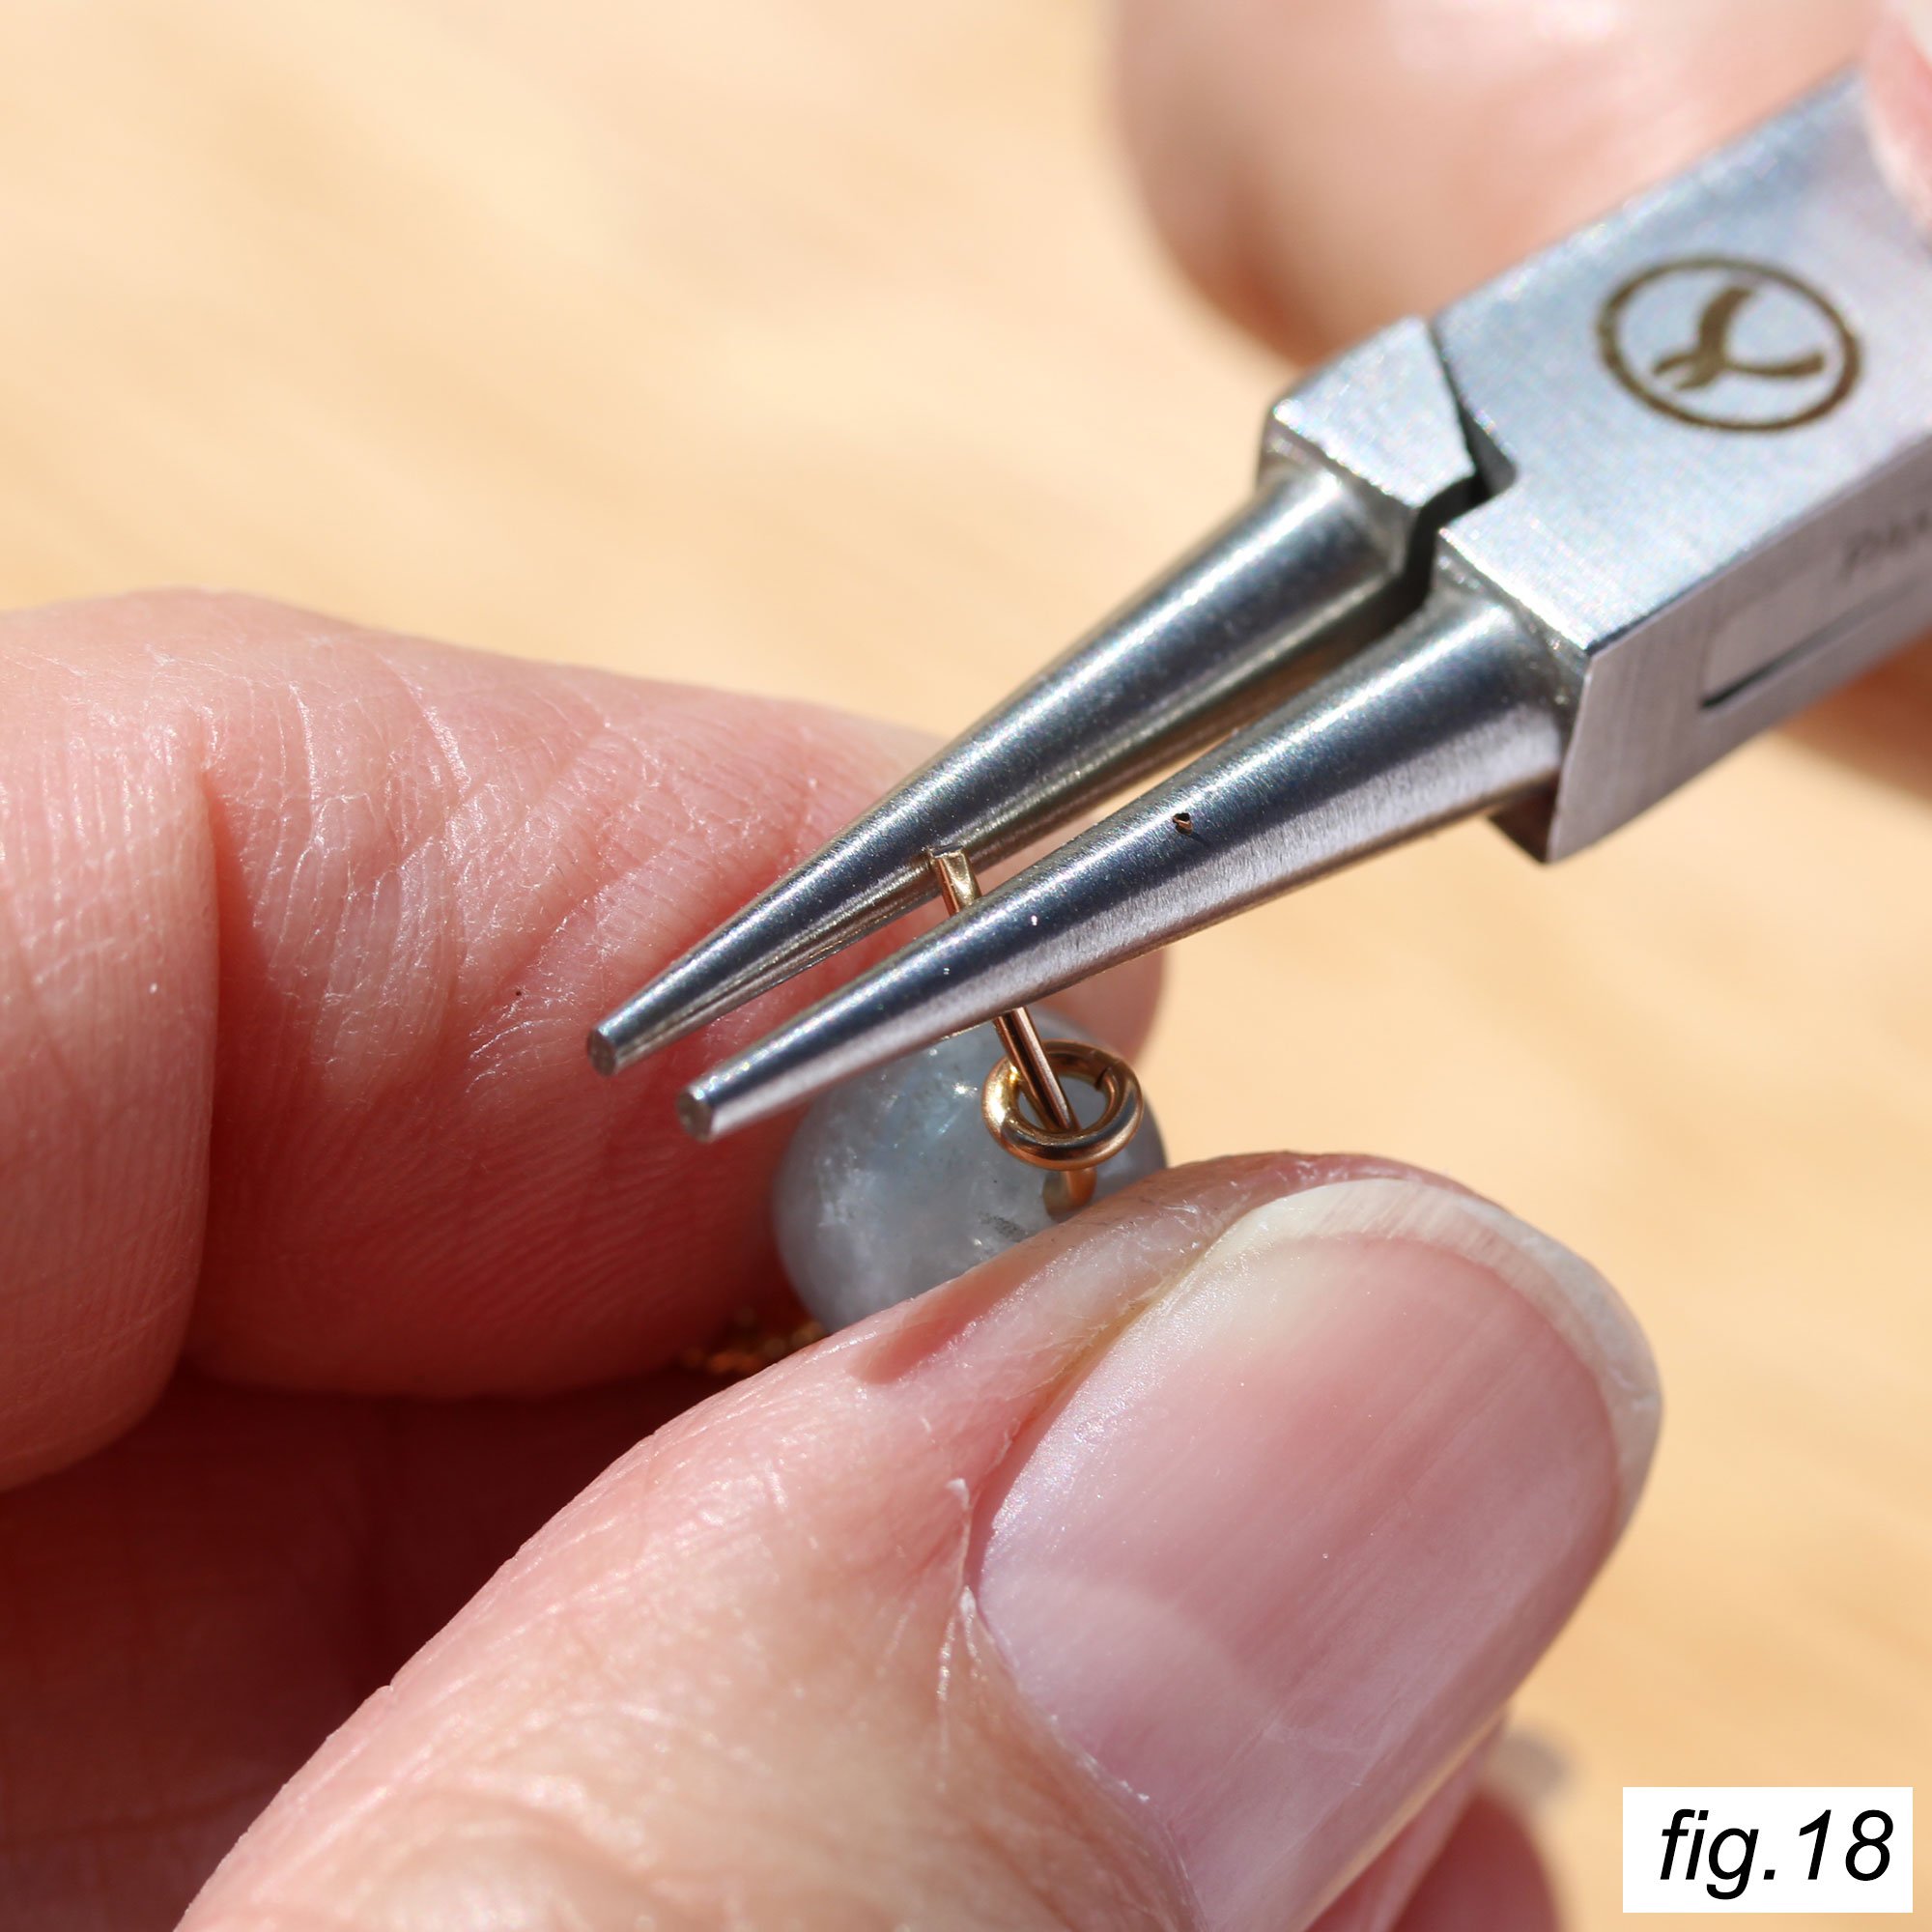
Holding the bead firmly in place and the first ring tight, bend the wire to a 90 degree angle. Push on the middle of the wire and let it bend as close to the bead as it naturally wants to. Make sure to bend it perpendicular to the first loop as shown in fig. 15. With this done, you can relax your grip, the wire bend will keep everything from falling off.
Slip a ring onto the wire.
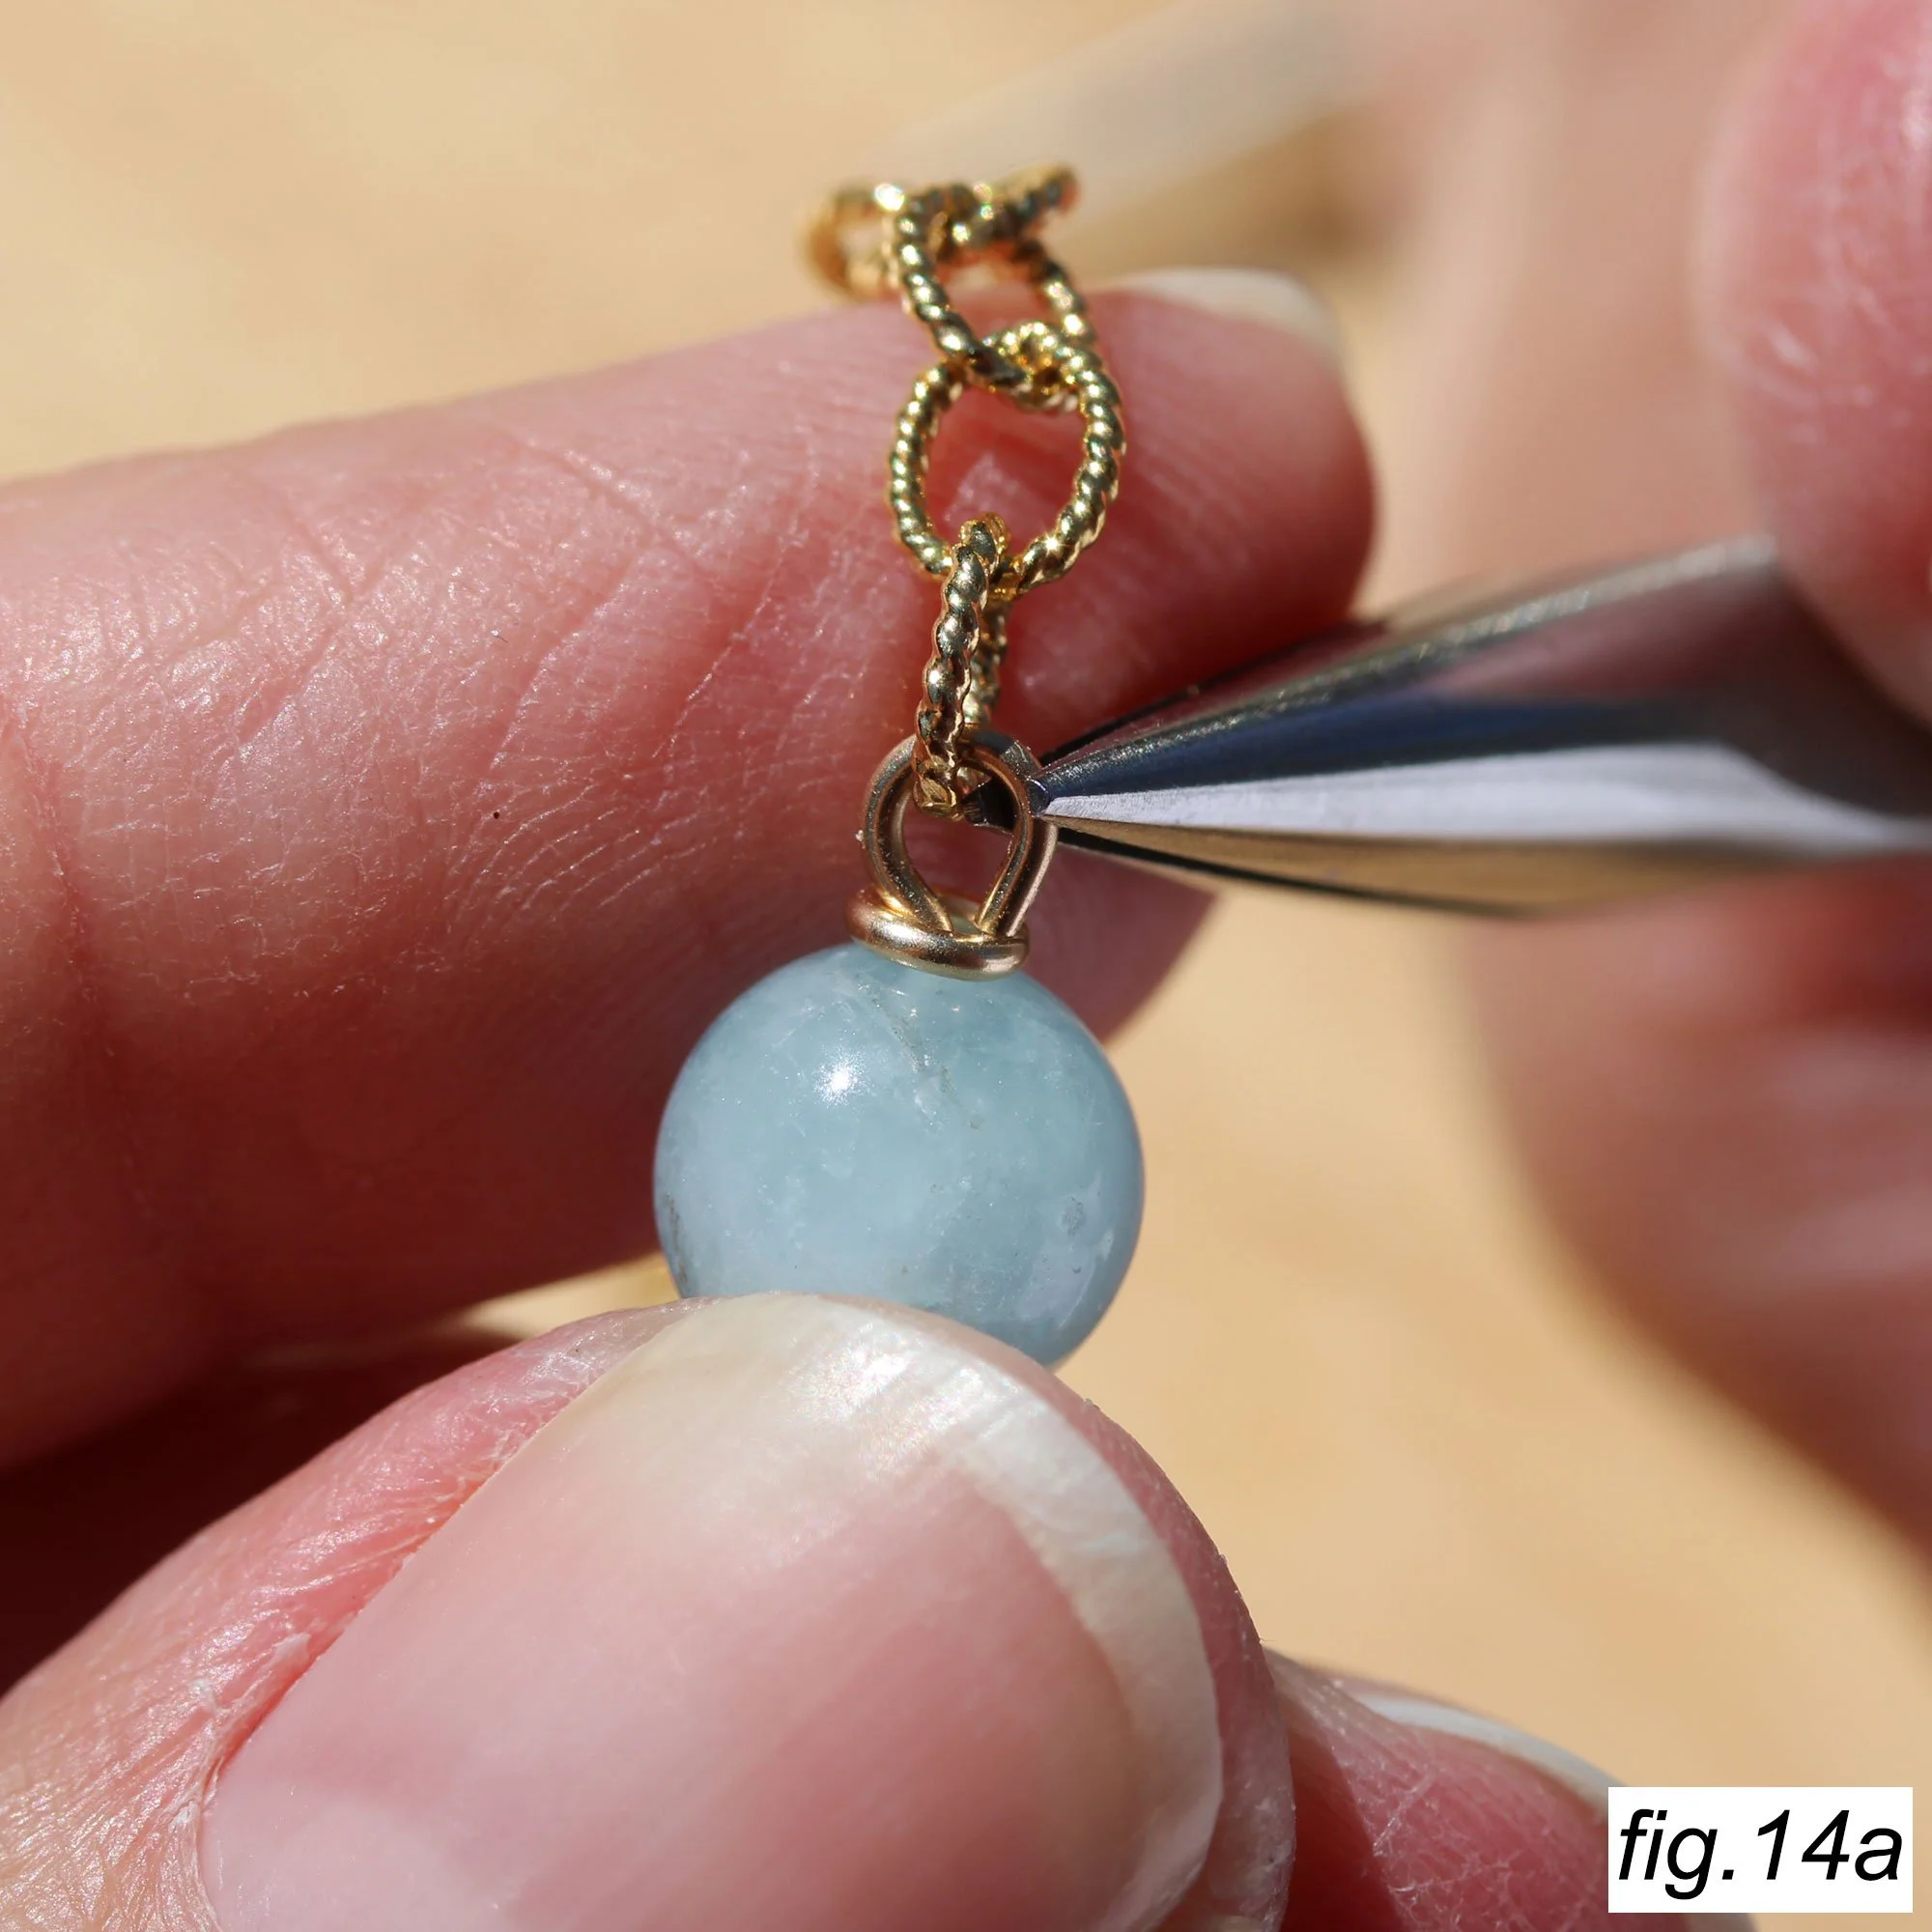
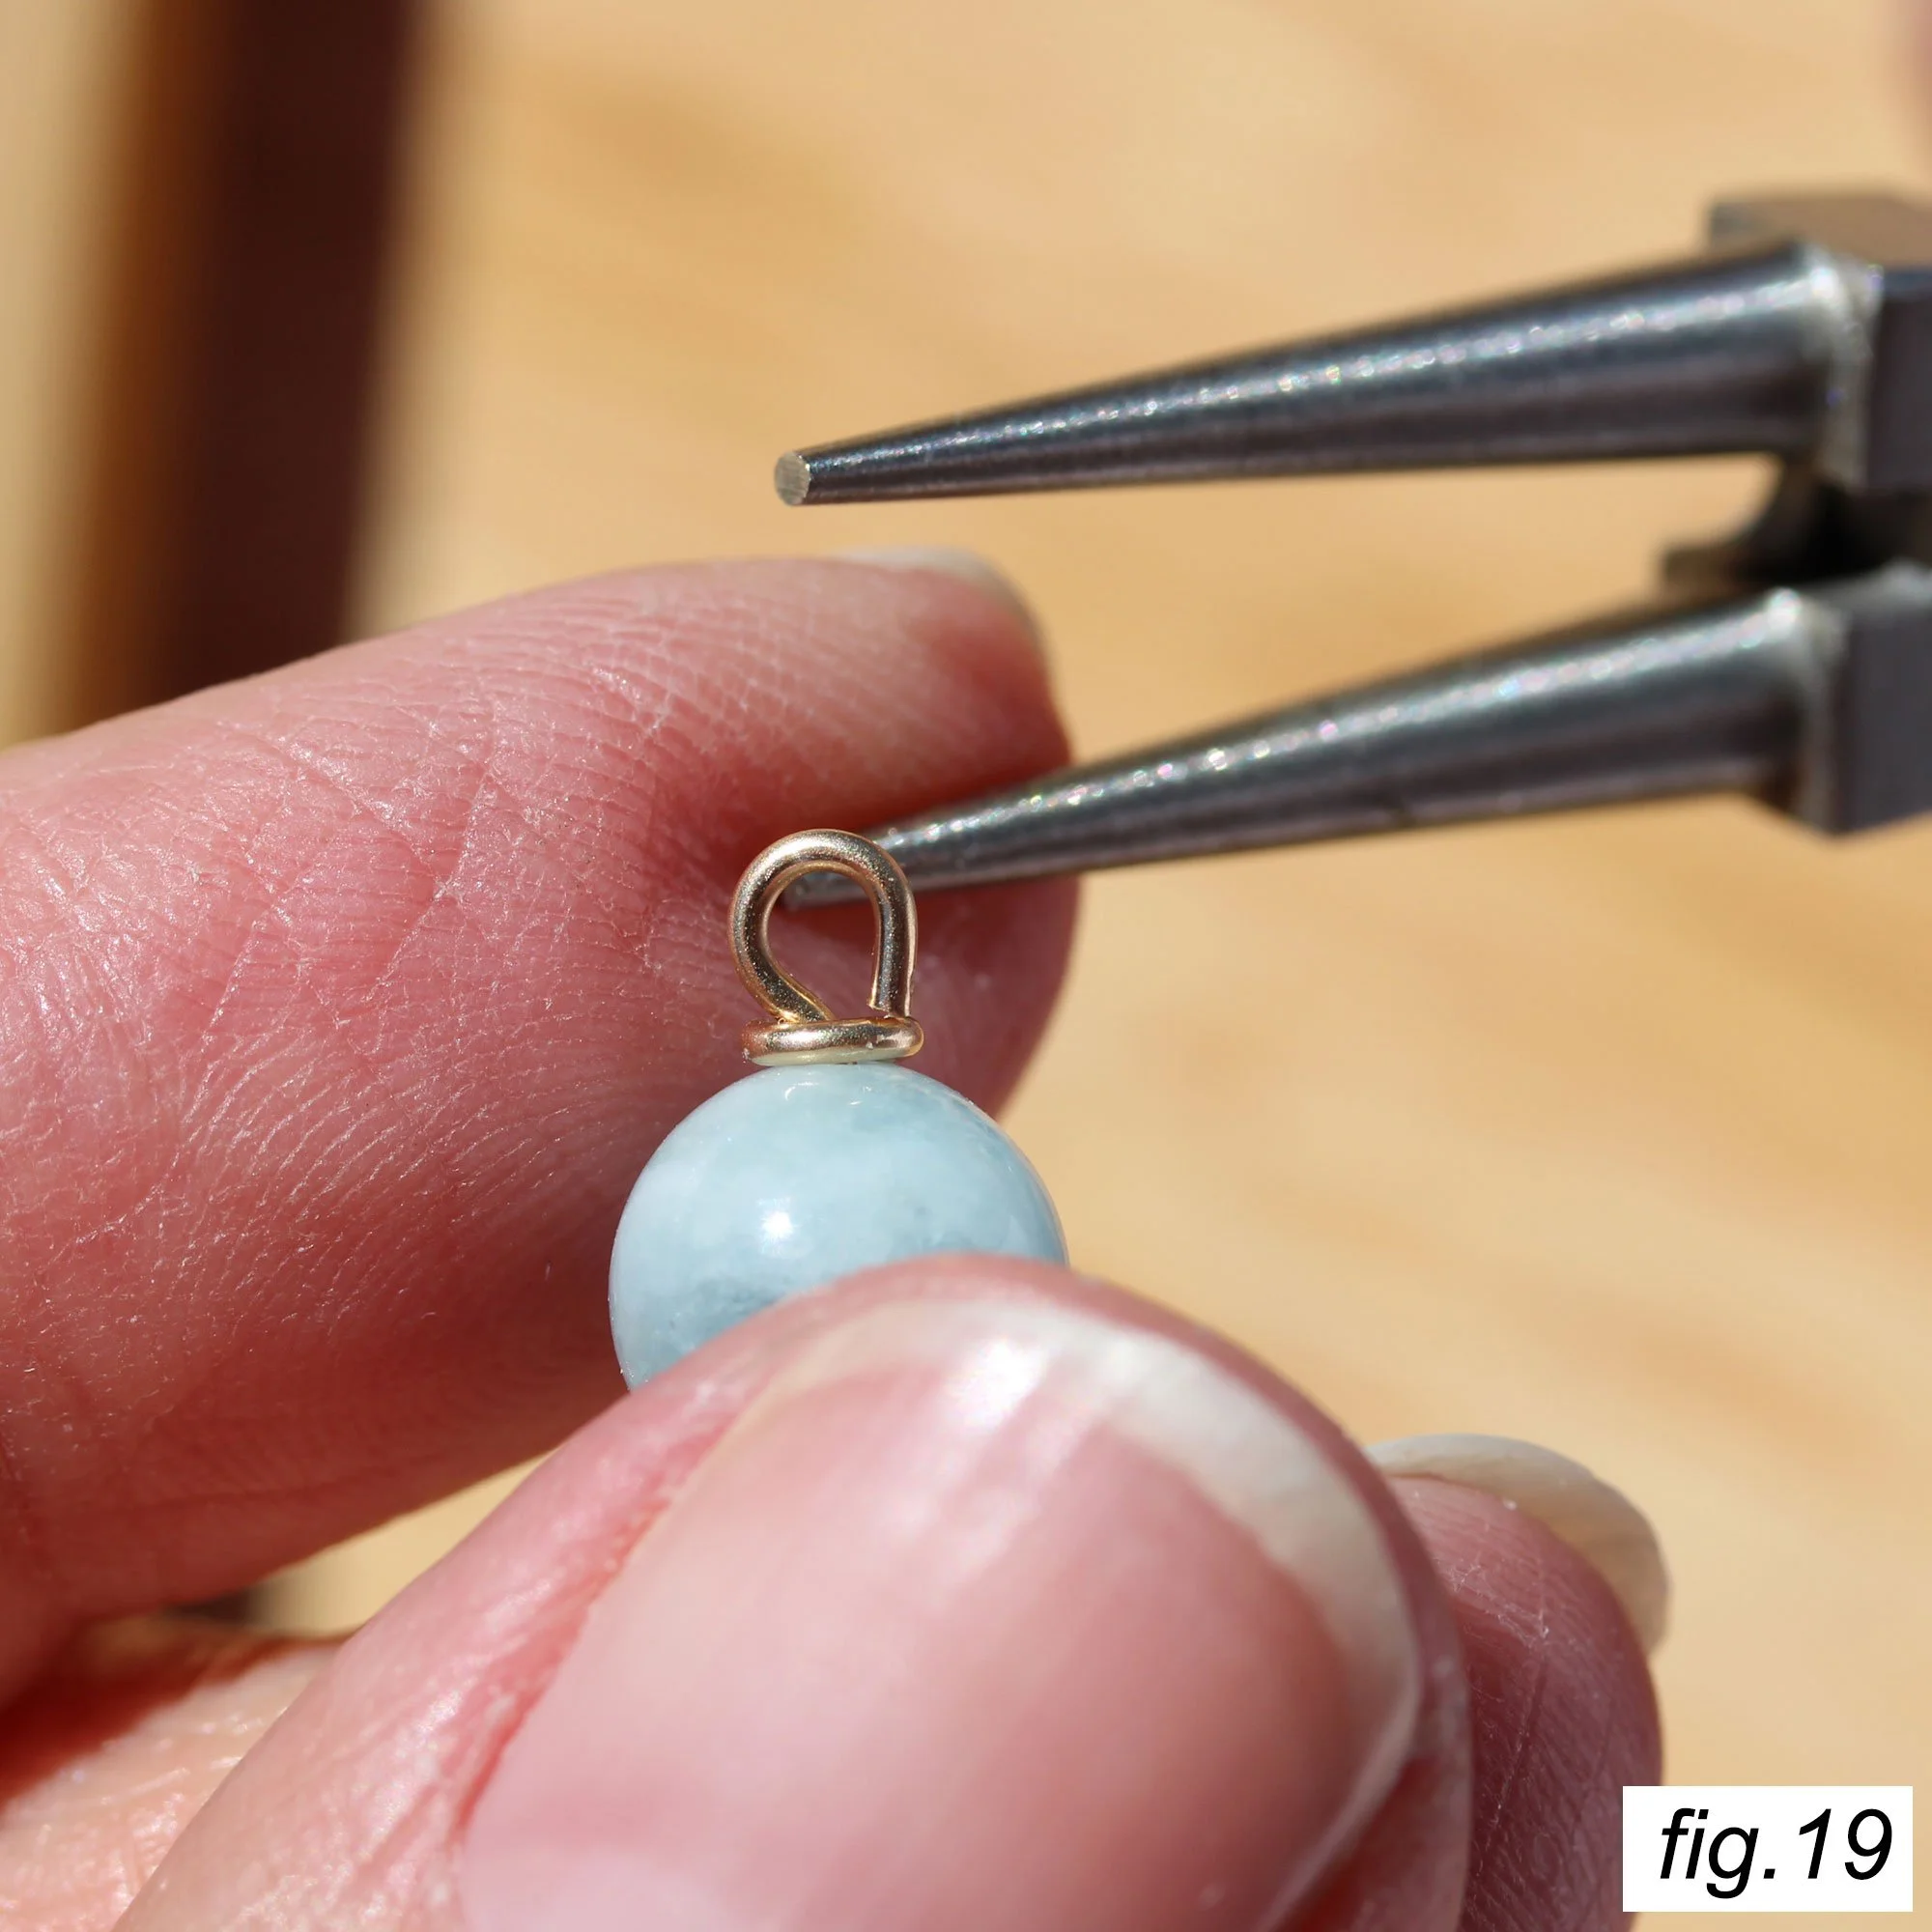
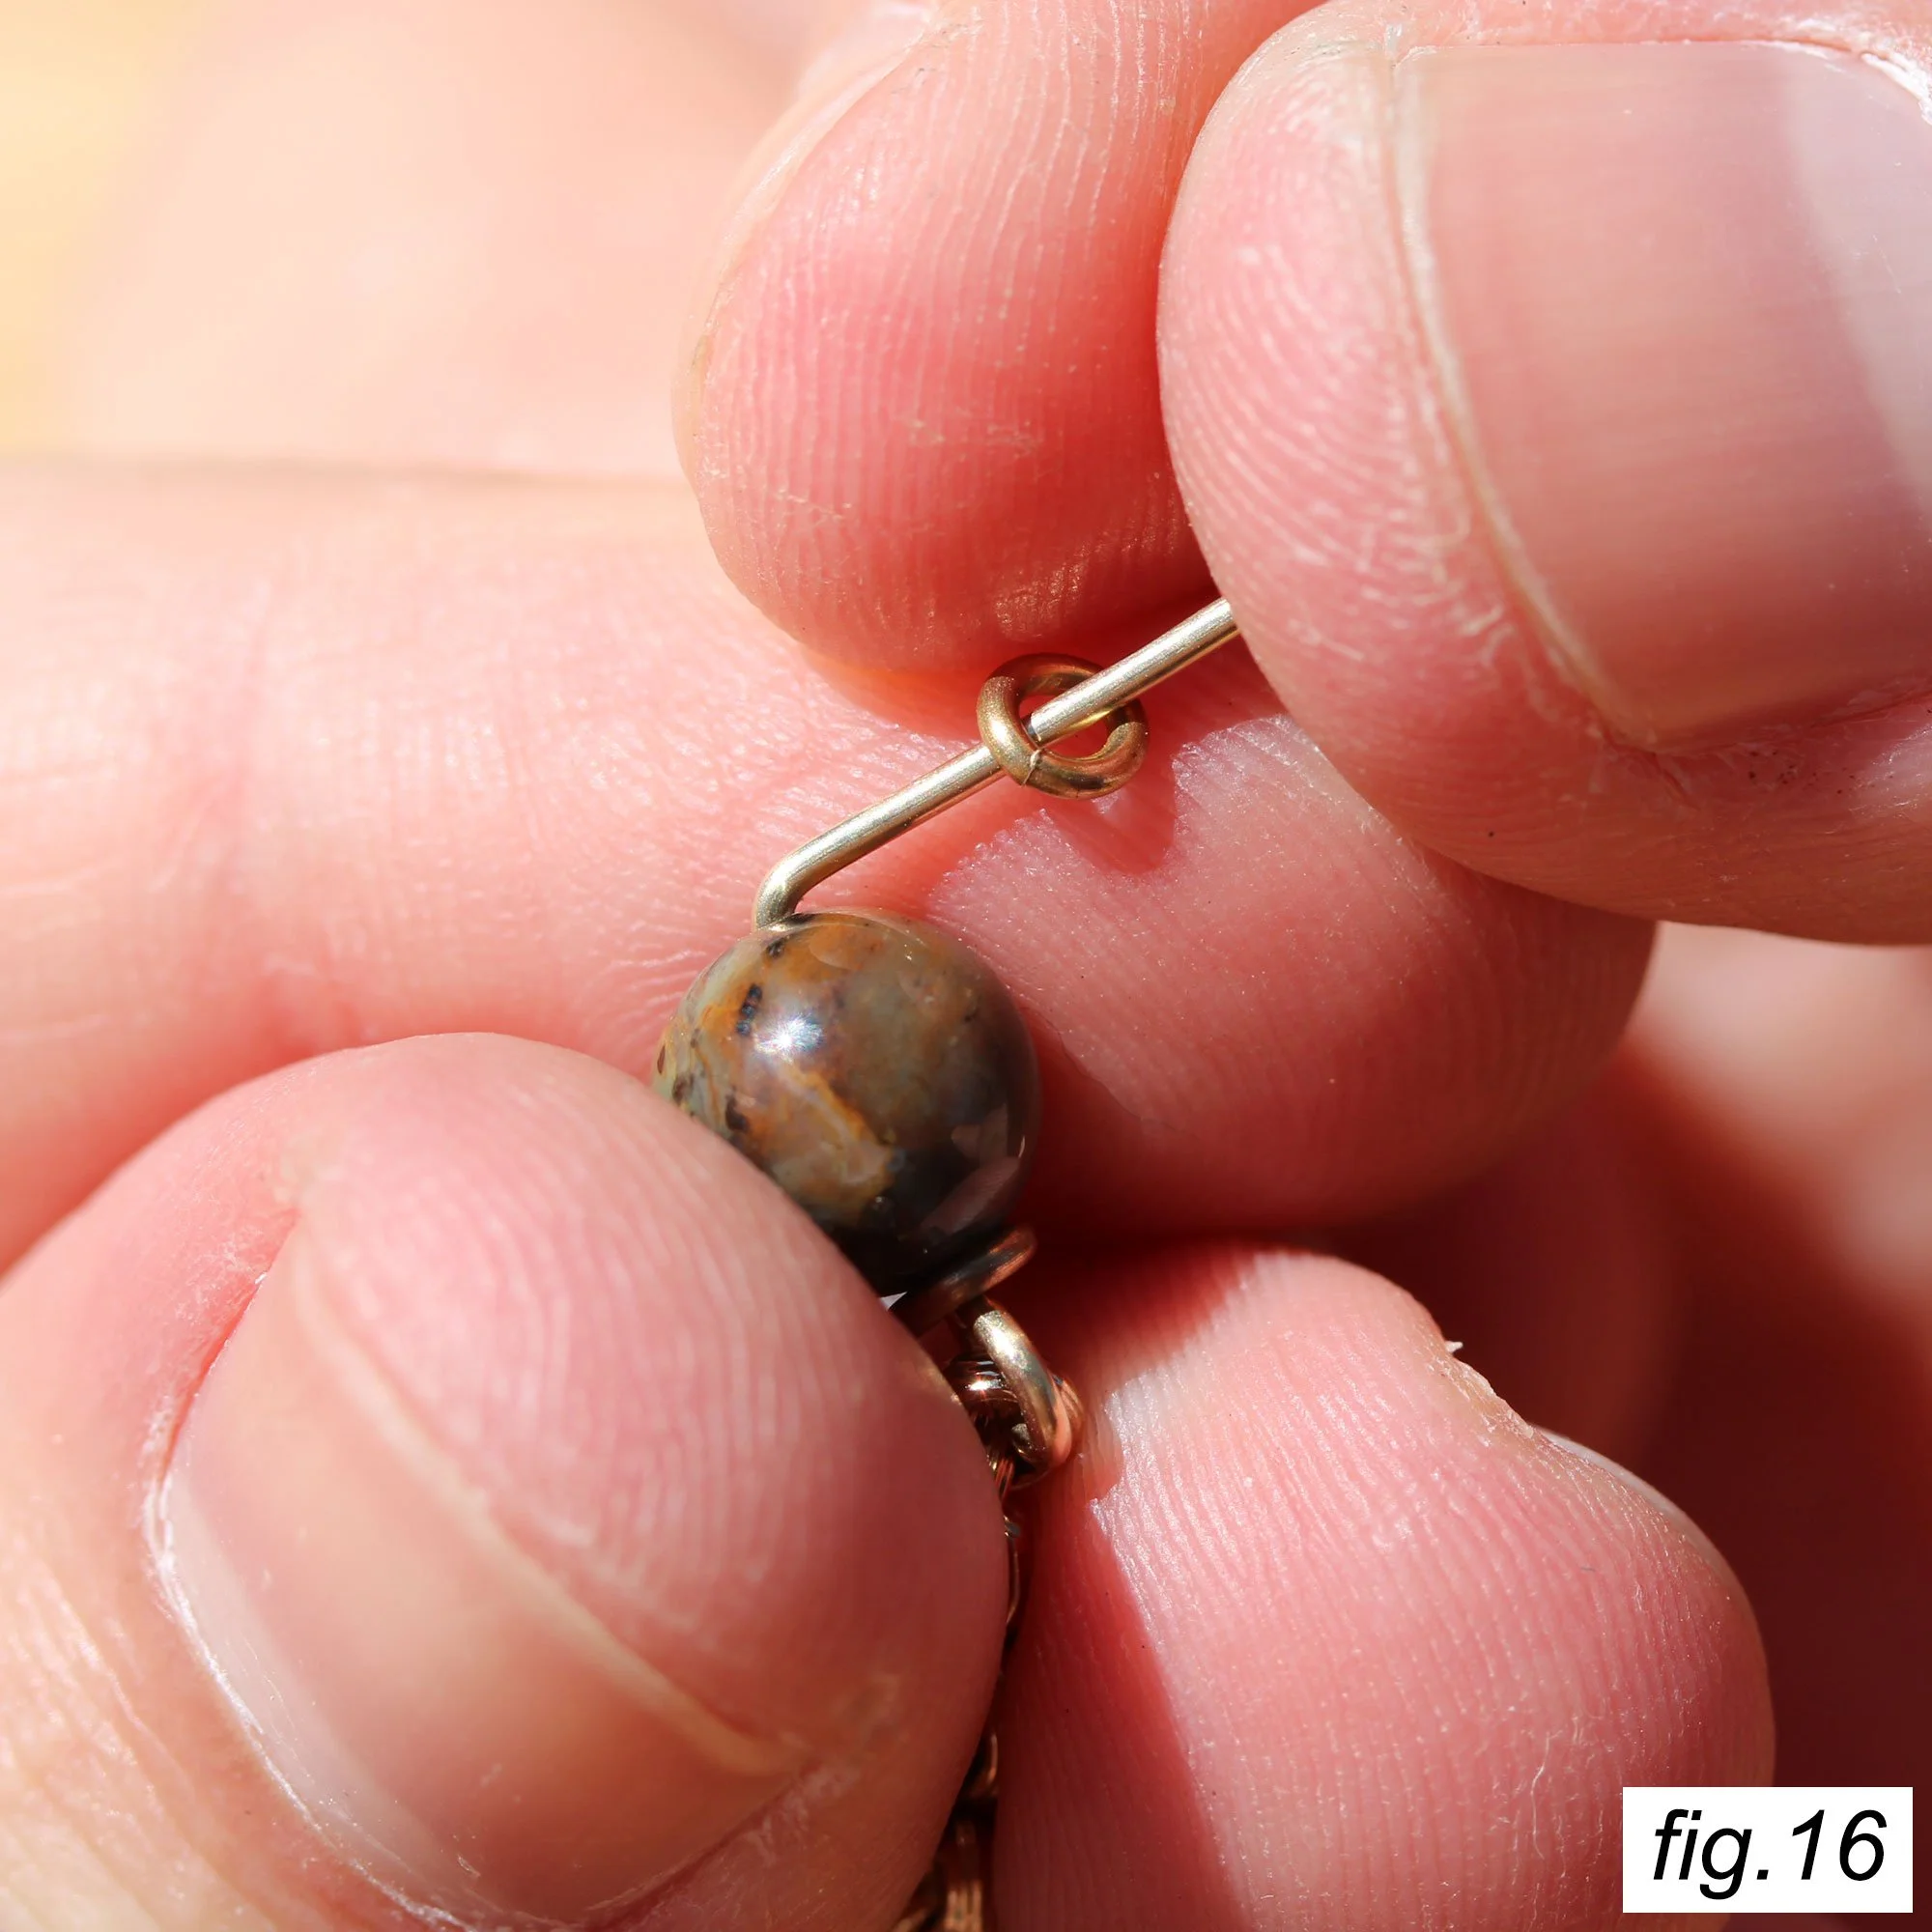
With the ring in place, use the ring and the bead itself as guides to cut your wire to the length you need to make the second loop. This part takes some time to figure out, but the length you need usually ends up being somewhere between half and the full width of the bead you are working on.
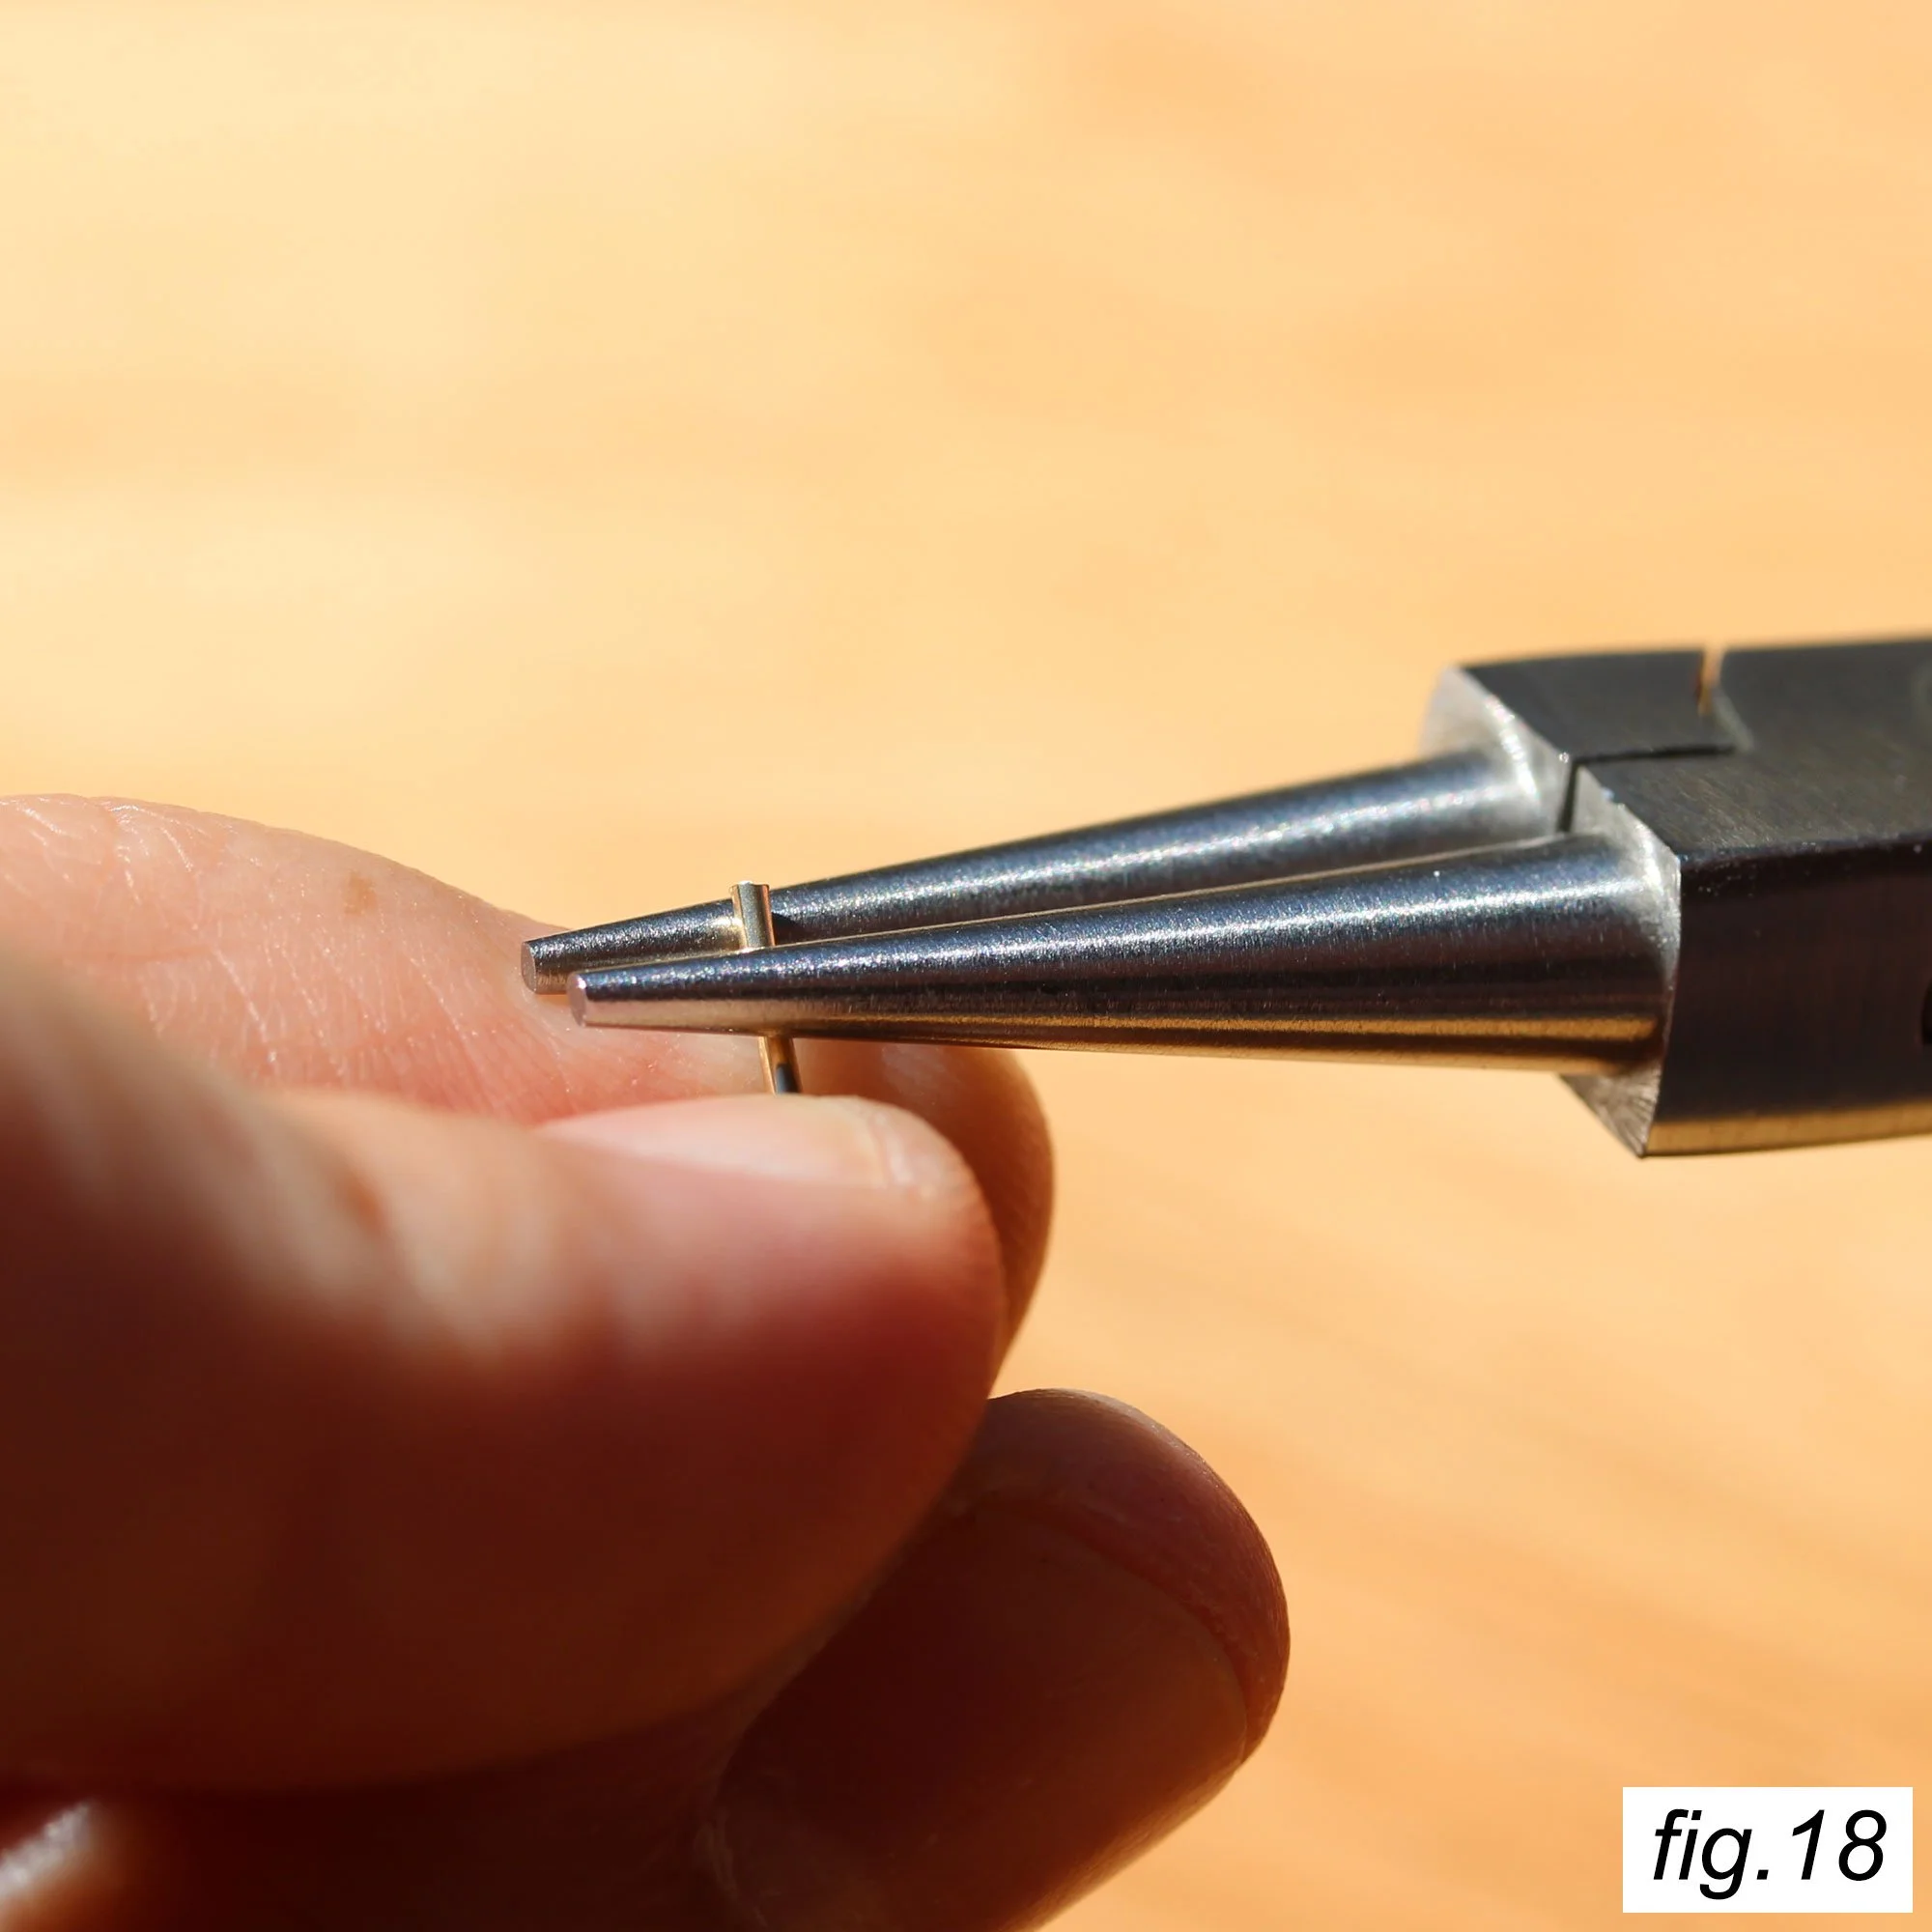
Holding the bead and ring firmly in place, grip the end of your wire with your round nose pliers and make the start of a curve. Use the outside “jaw” of the pliers to curl the wire around the inside “jaw”. Let the round nose form the curve, trying to hard to make the curve yourself does not help, and took me a very long time to stop doing. Stop your bend once you are approximately half way through forming a full loop.
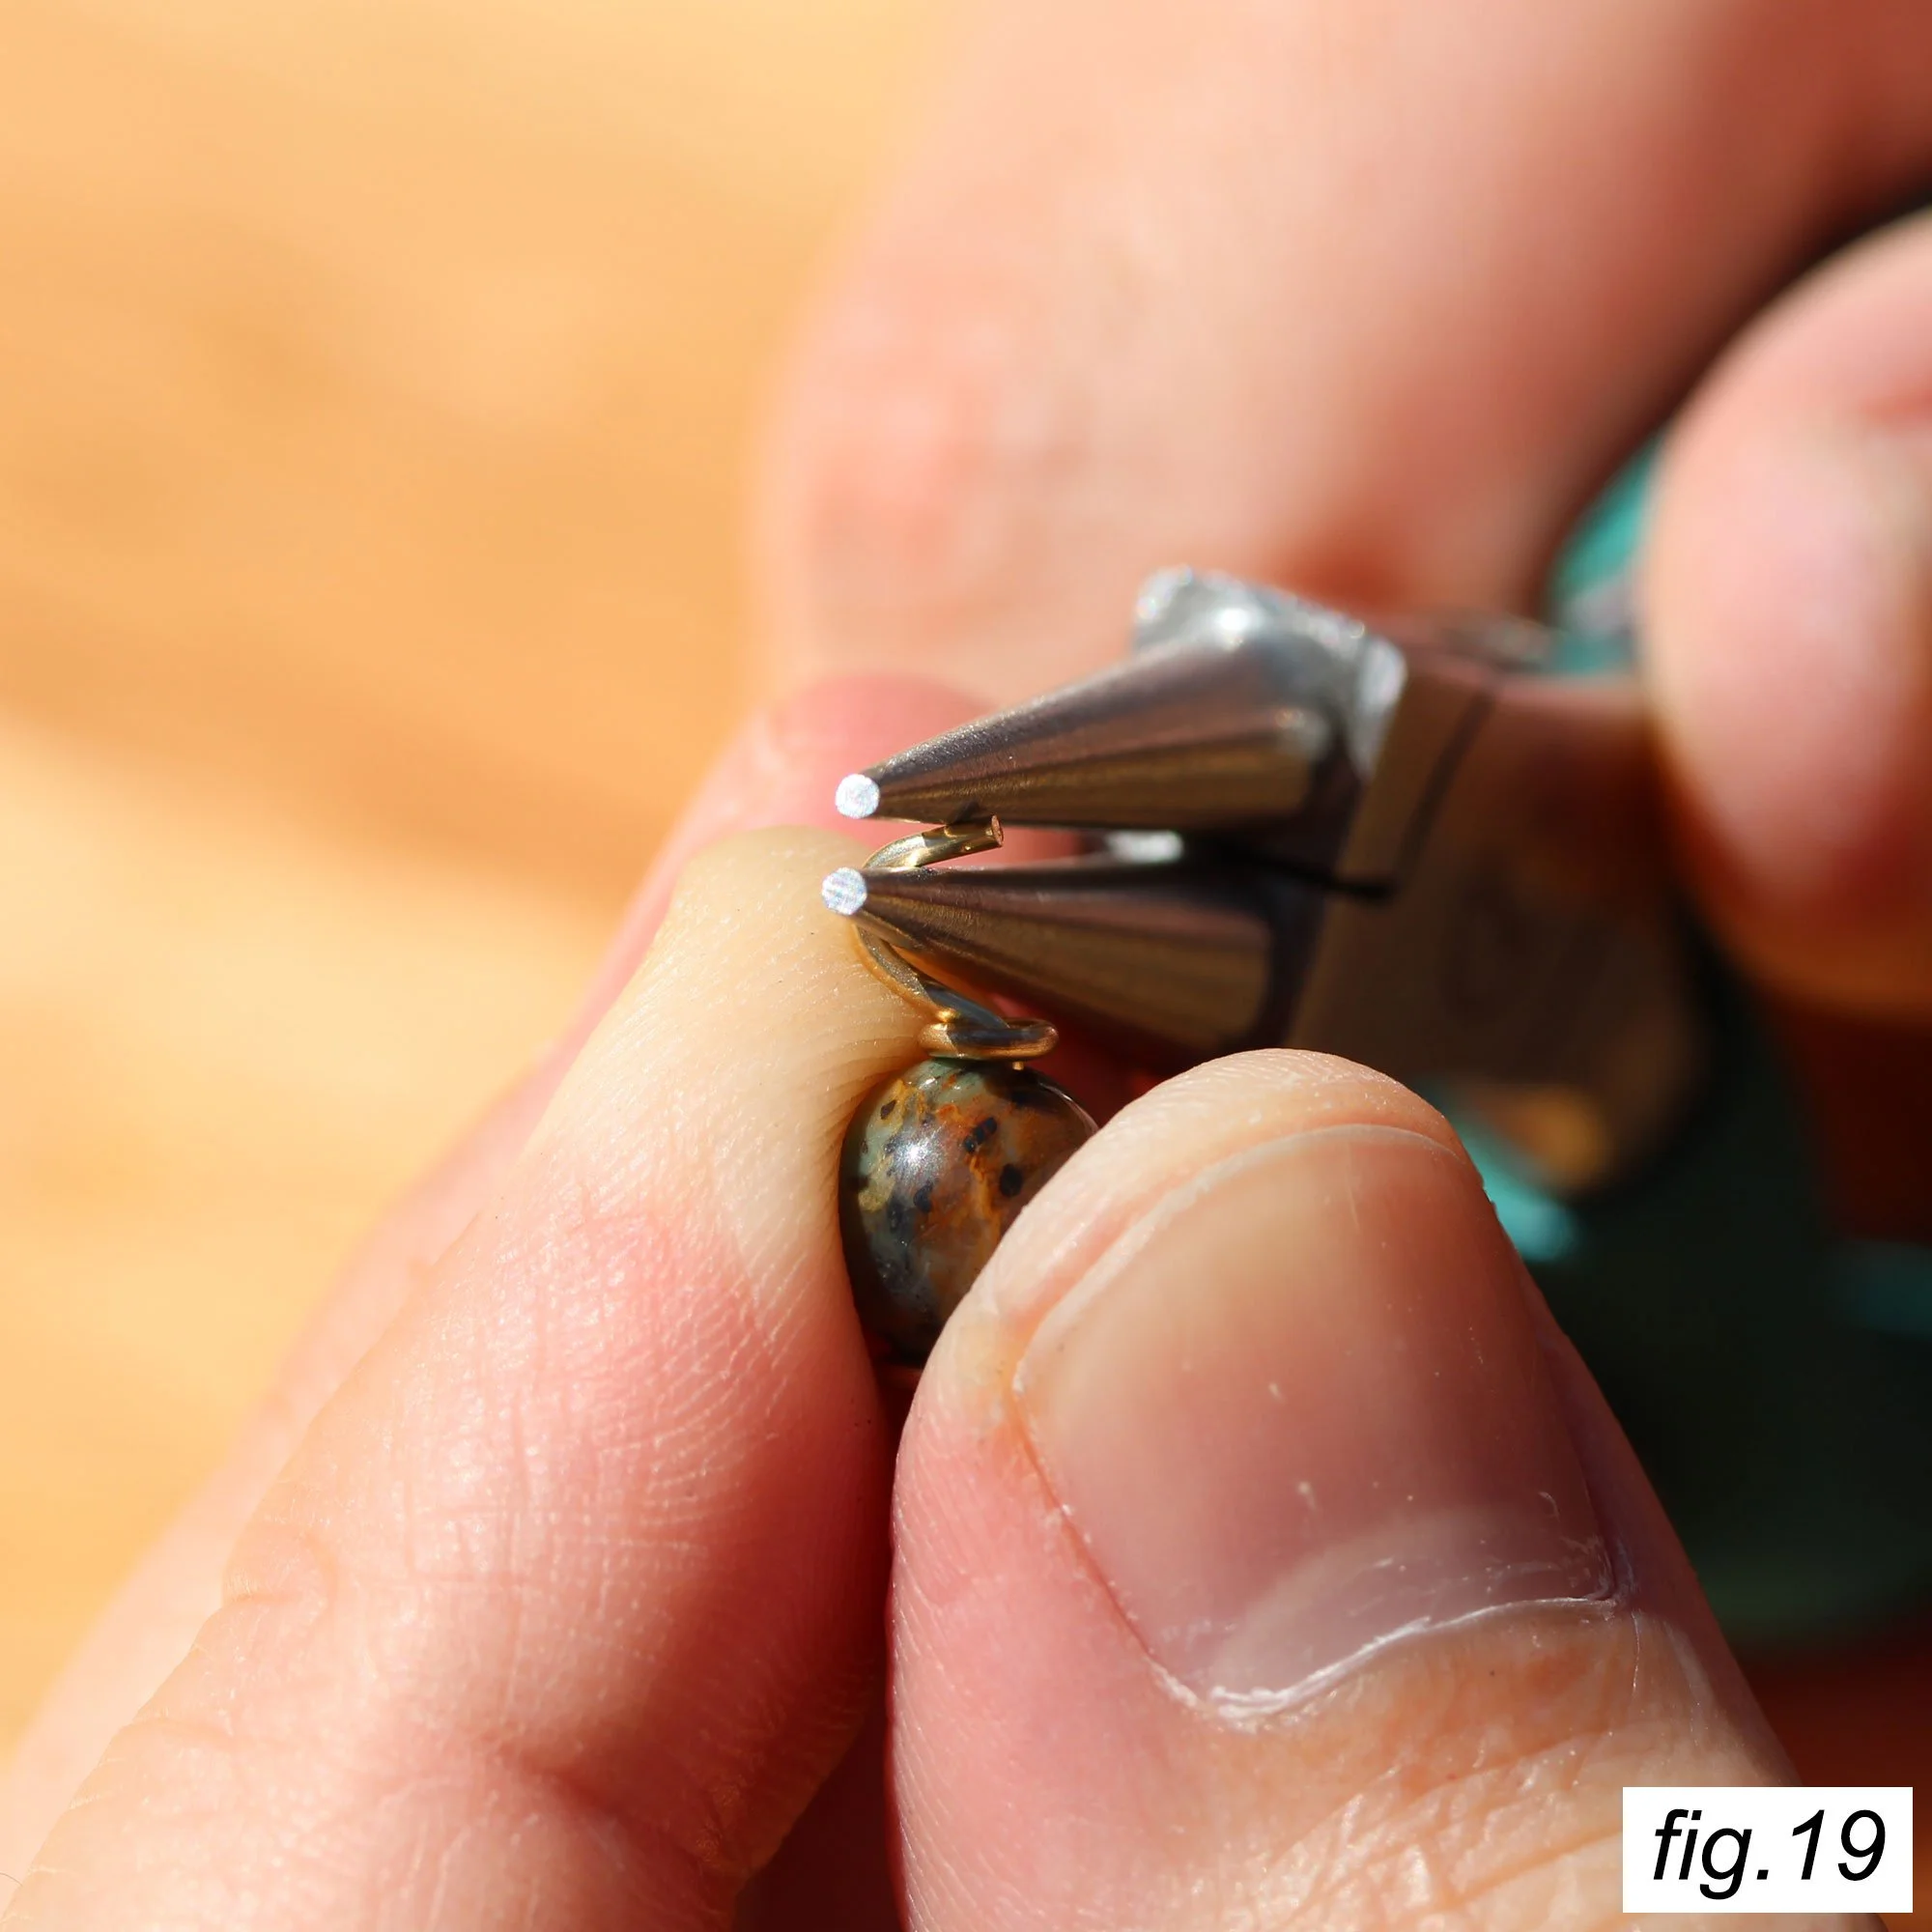
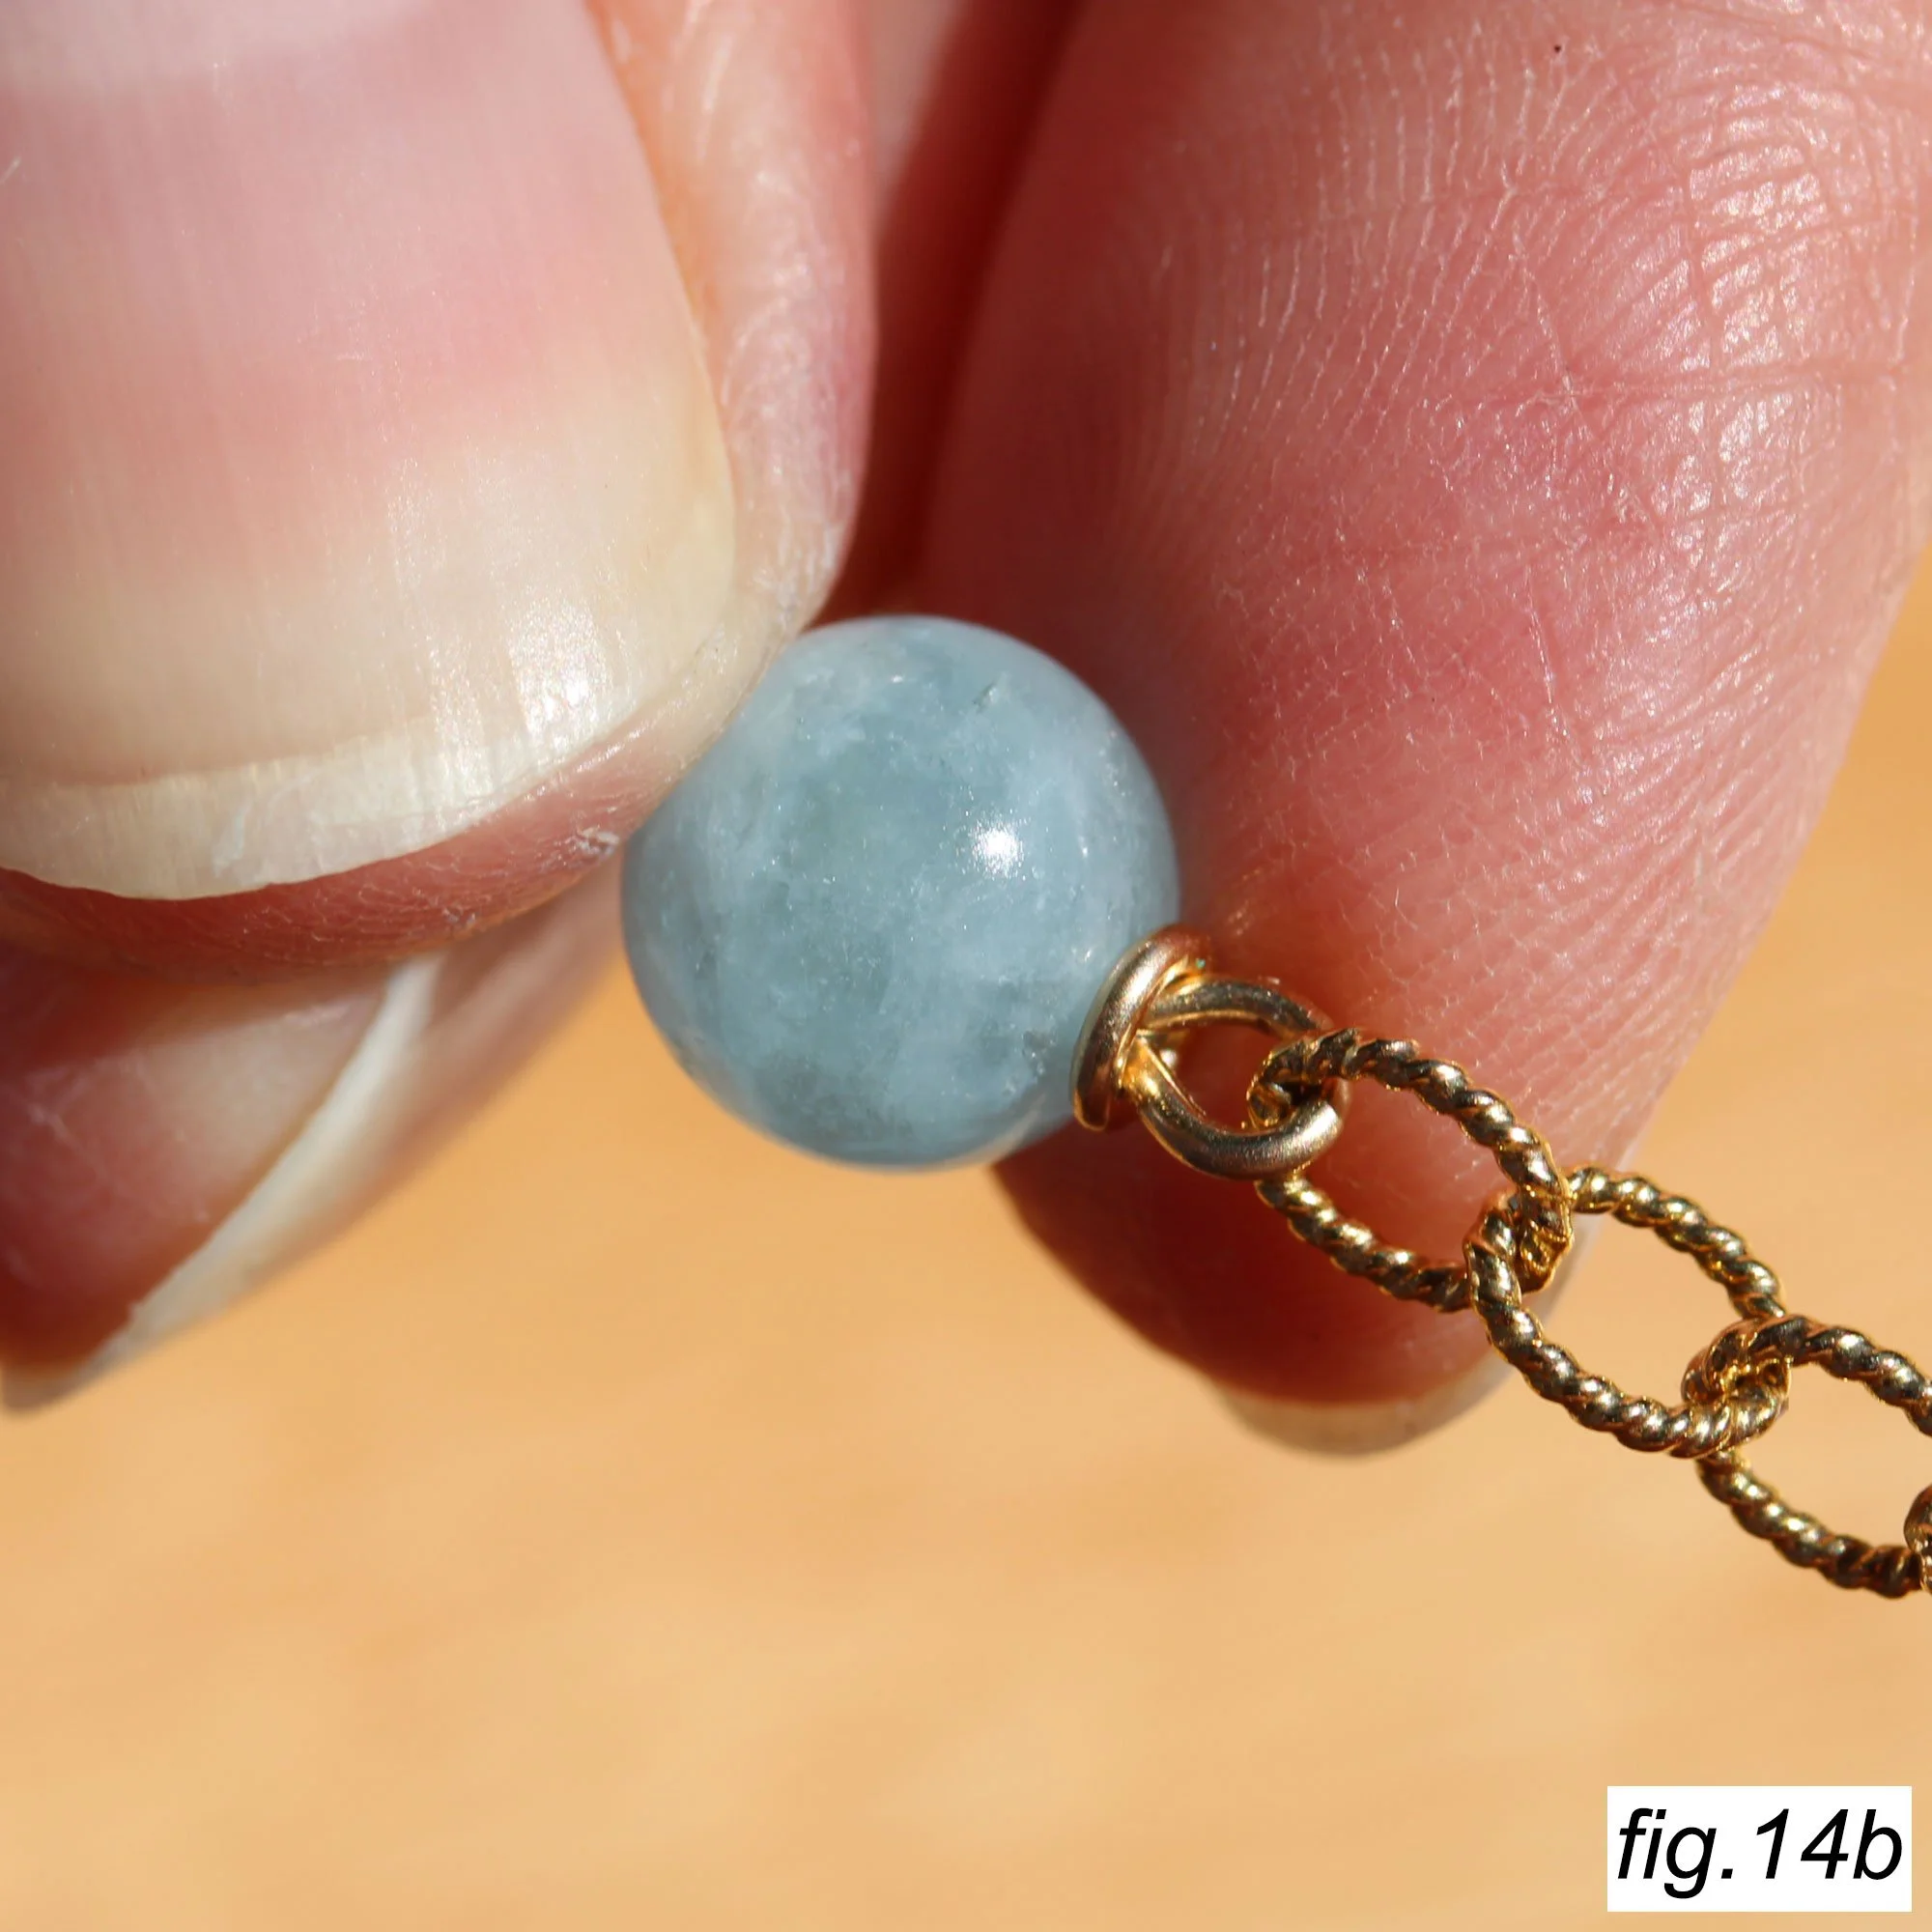
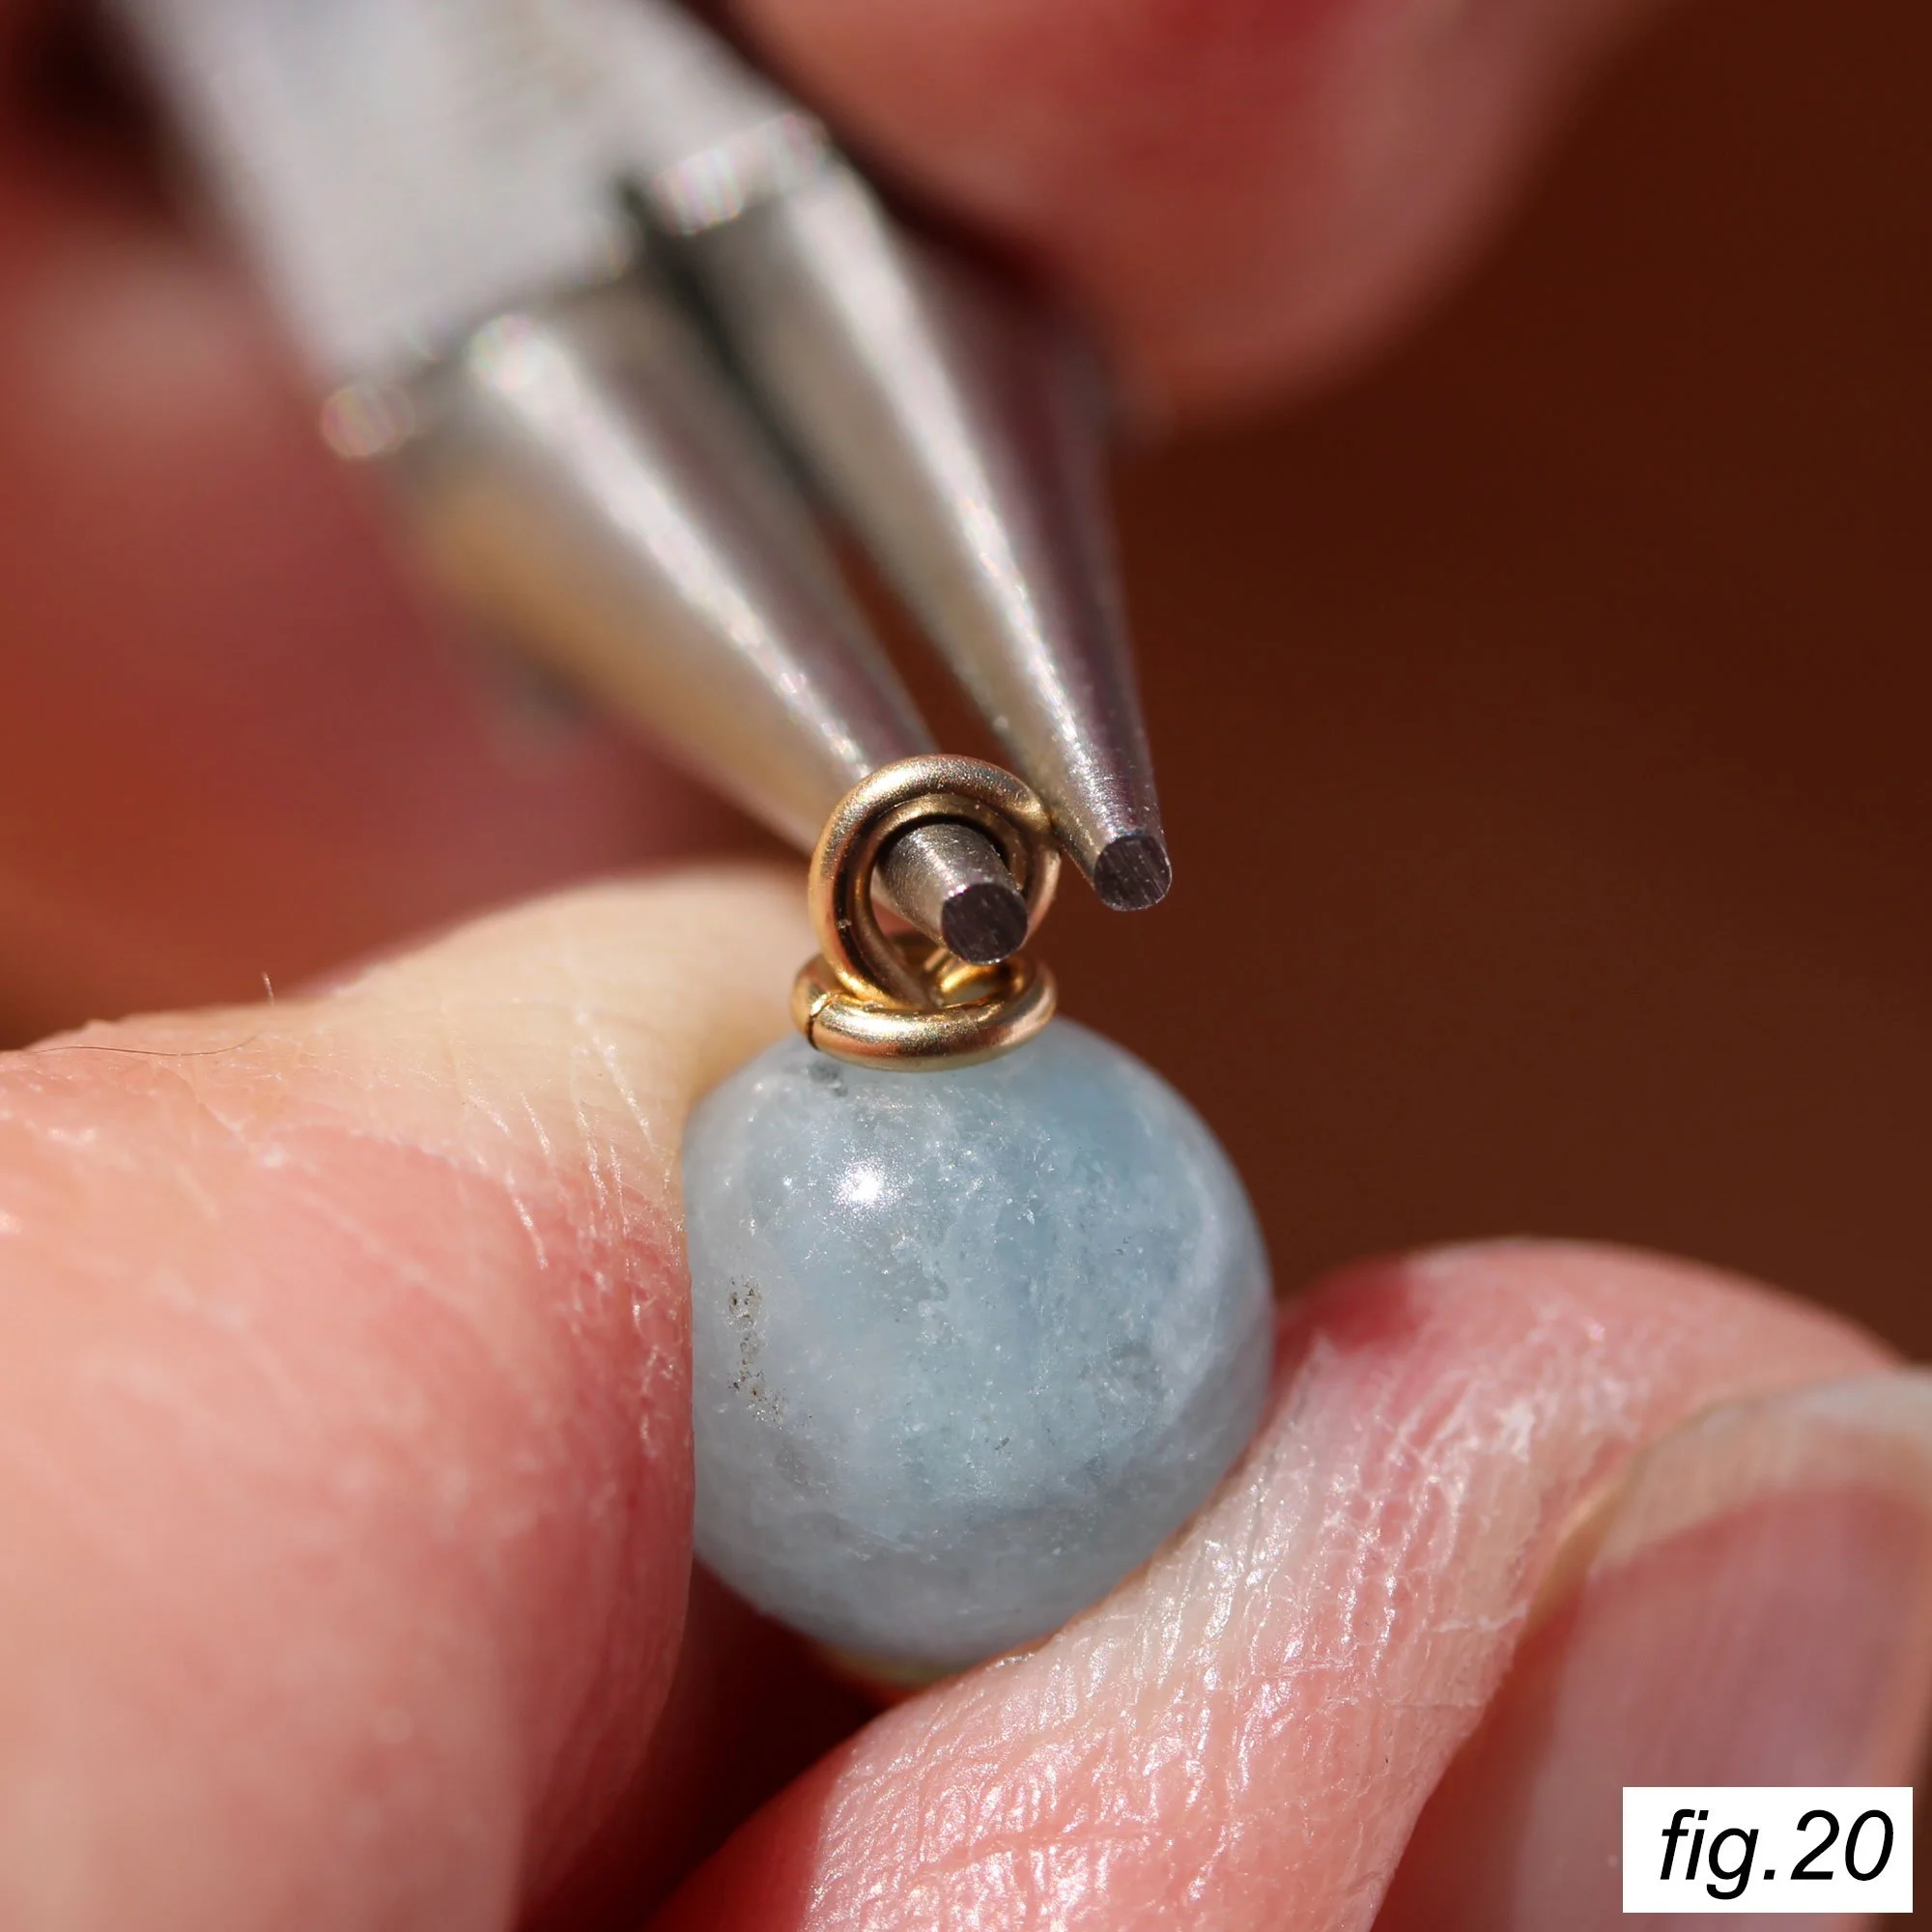
Reposition your pliers slightly and grab the wire a few millimeters away from the open end. Using a similar curling motion as before, wrap the wire around the lower “jaw” of the pliers with the top “jaw” to form a loop. Stop before you get all the way through, leaving it somewhat open.
Make sure the too keep the bead tight in place so it doesn’t move around and cause problems.
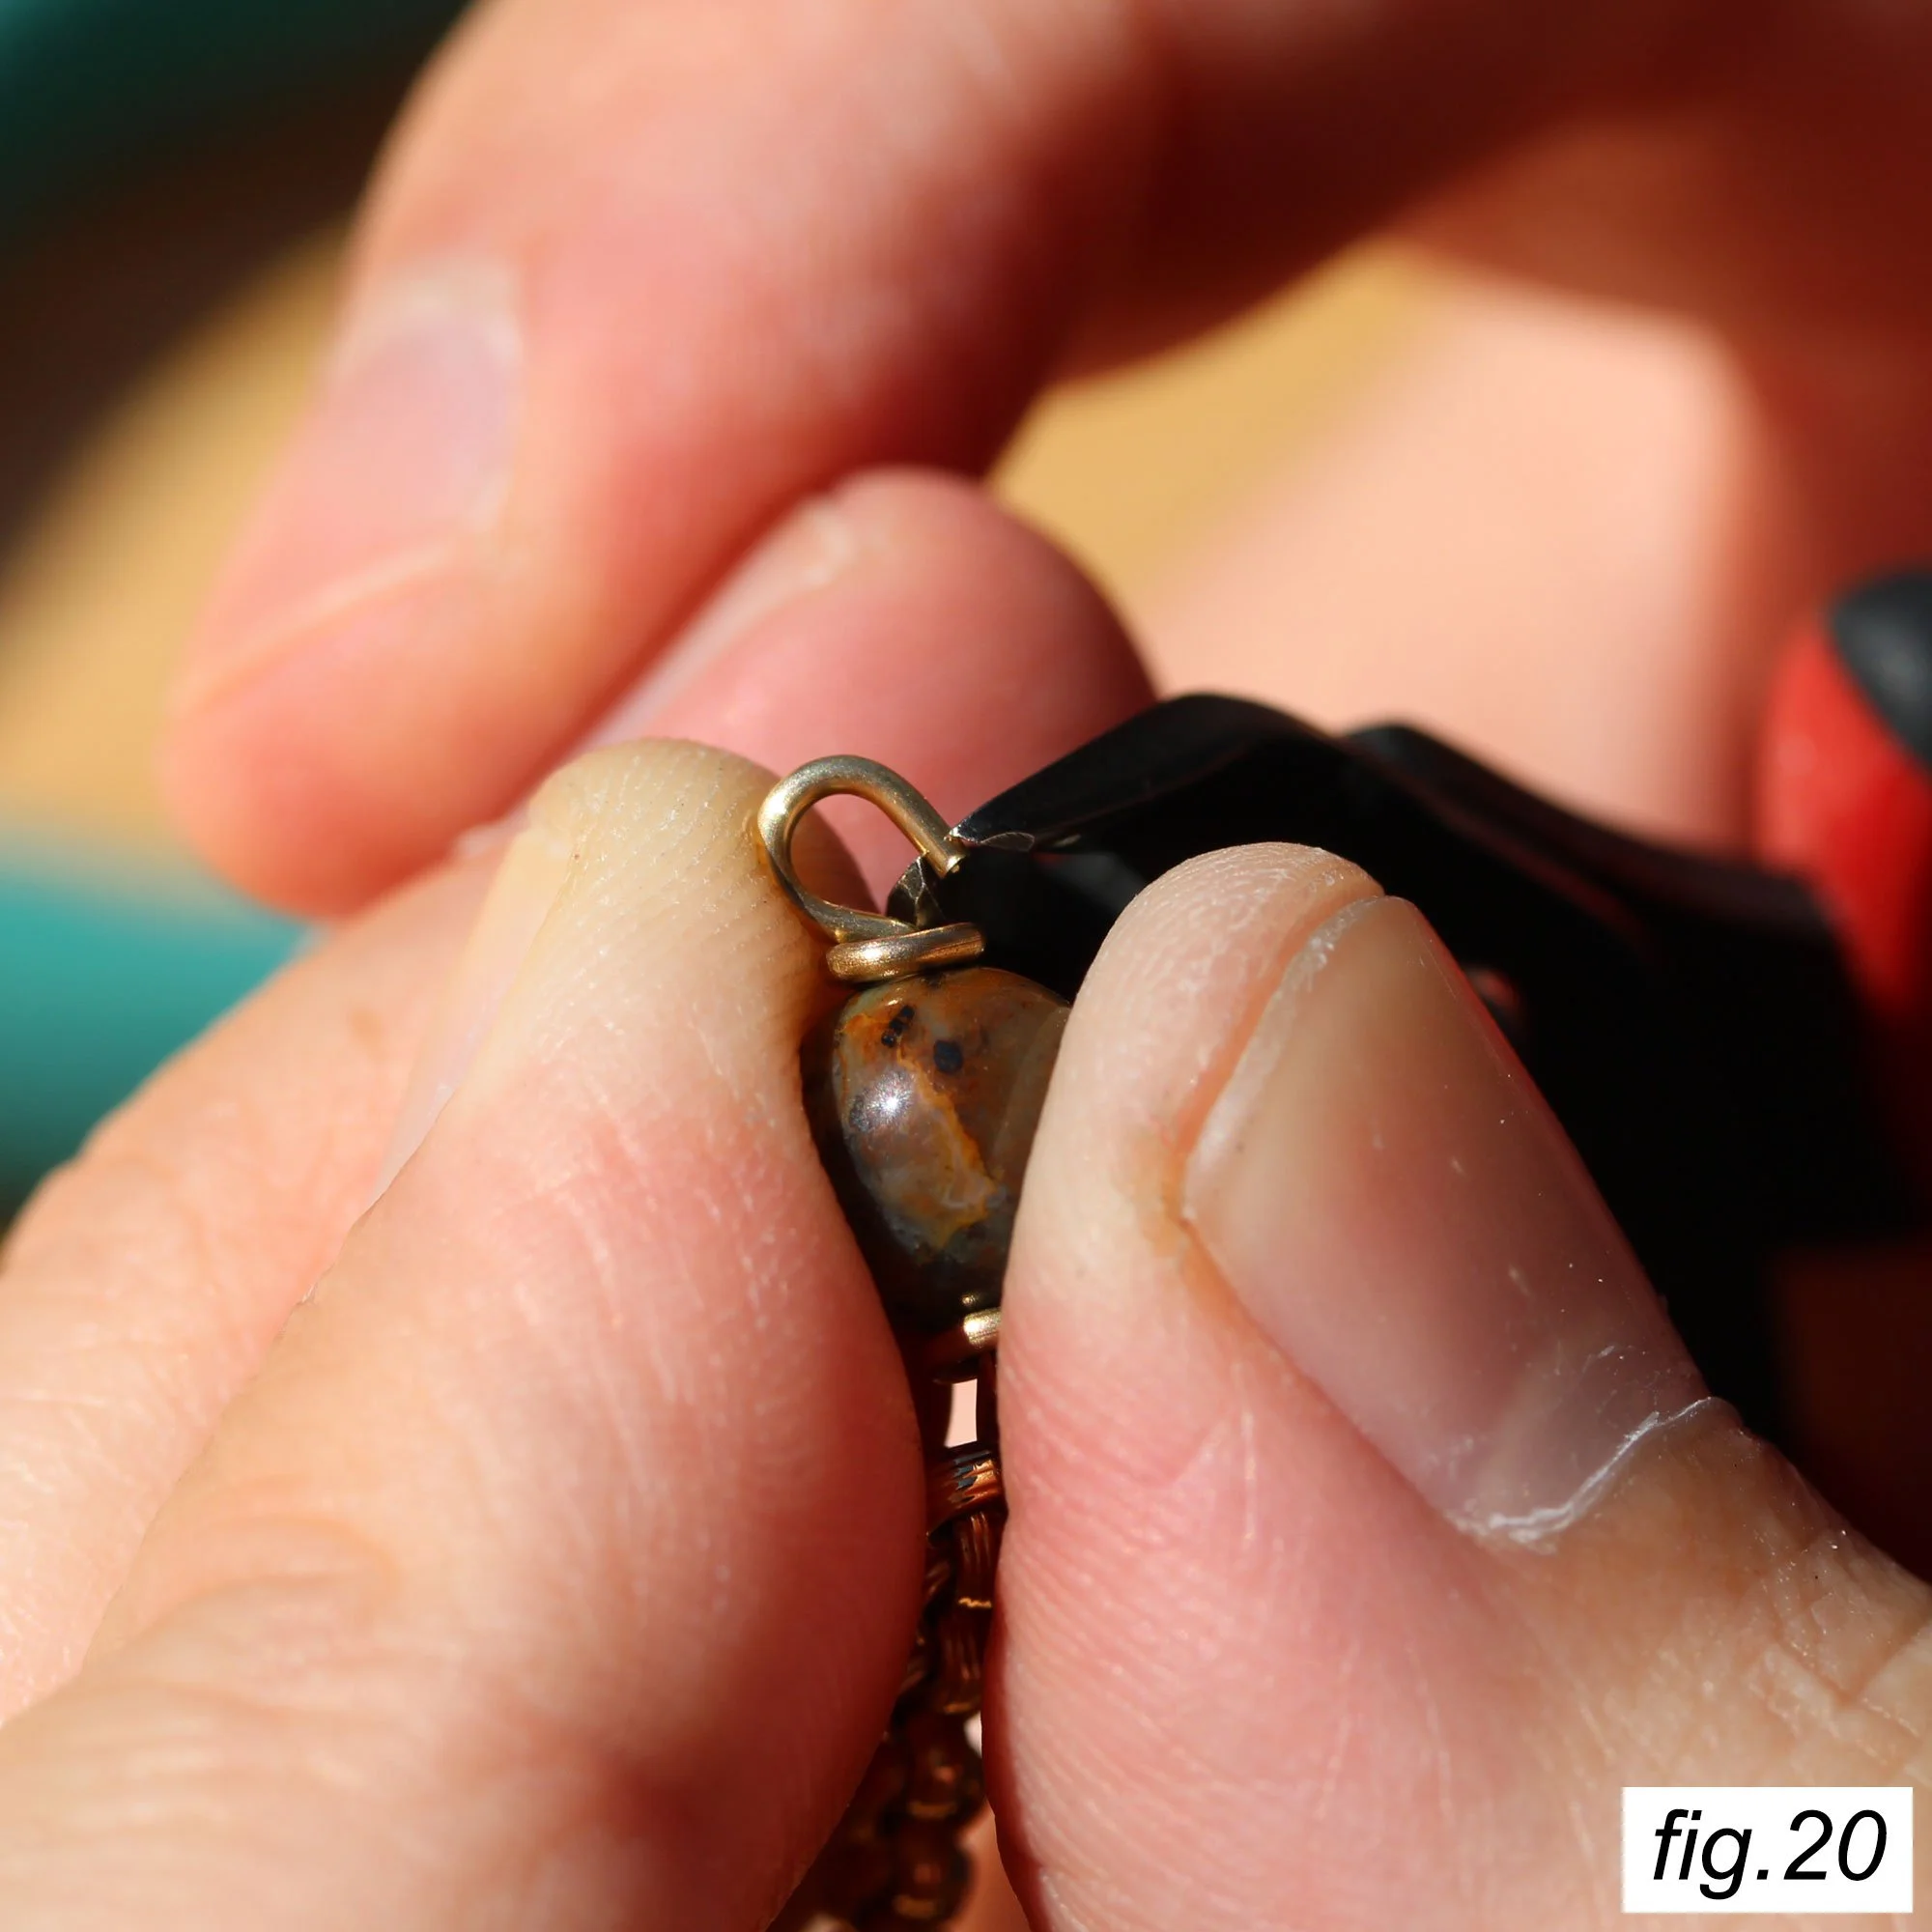
Trim the still open loop as needed to get the size of loop you want. Depending on the rosary you make, you may want larger or smaller loops. Do your best to be consistent with loop sizes, as they determine the alignment of your rosary when it is complete. This part can also take some experience to learn. Make sure to pay attention to the direction of your flush cutters as shown in fig. 20.!

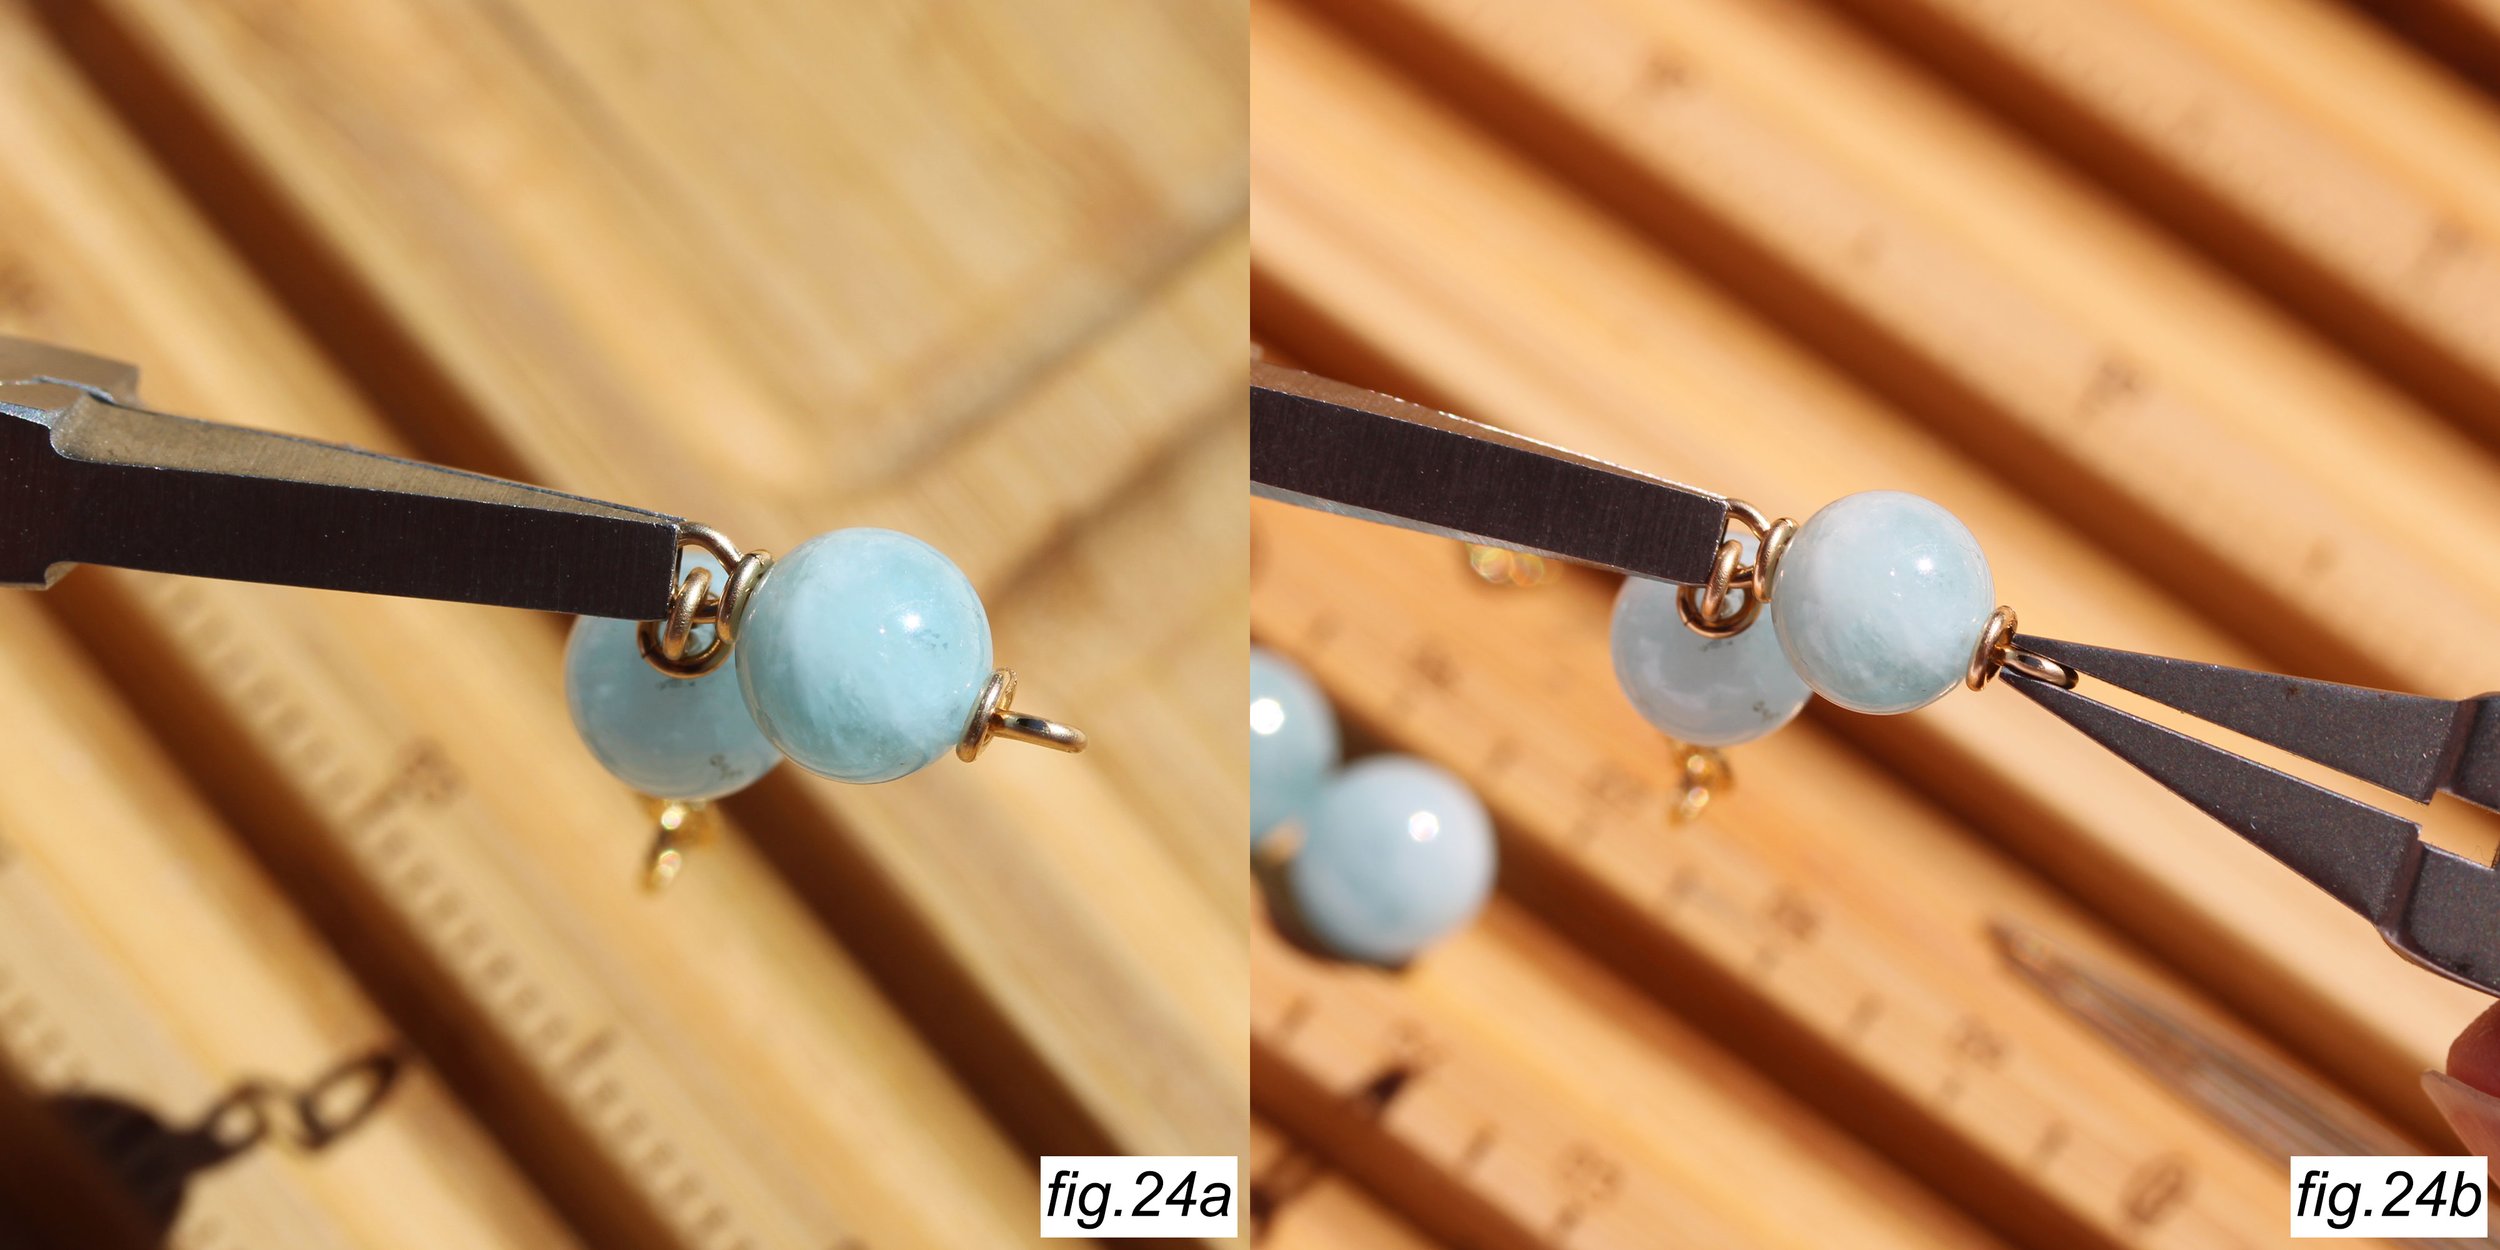
Grip the wire with your round nose once again, this time farther away from the end as shown in fig. 21. Use the same curling technique you used before, but pull “up” on the loop, like you are trying to pull the loop off the bead, while you curl. This helps seat everything in place and get things nice and tight. Make sure not to pull to hard or you’ll destroy your loop, and make usre not to squeeze to hard with the pliers or you will have a flat spot on your loop.
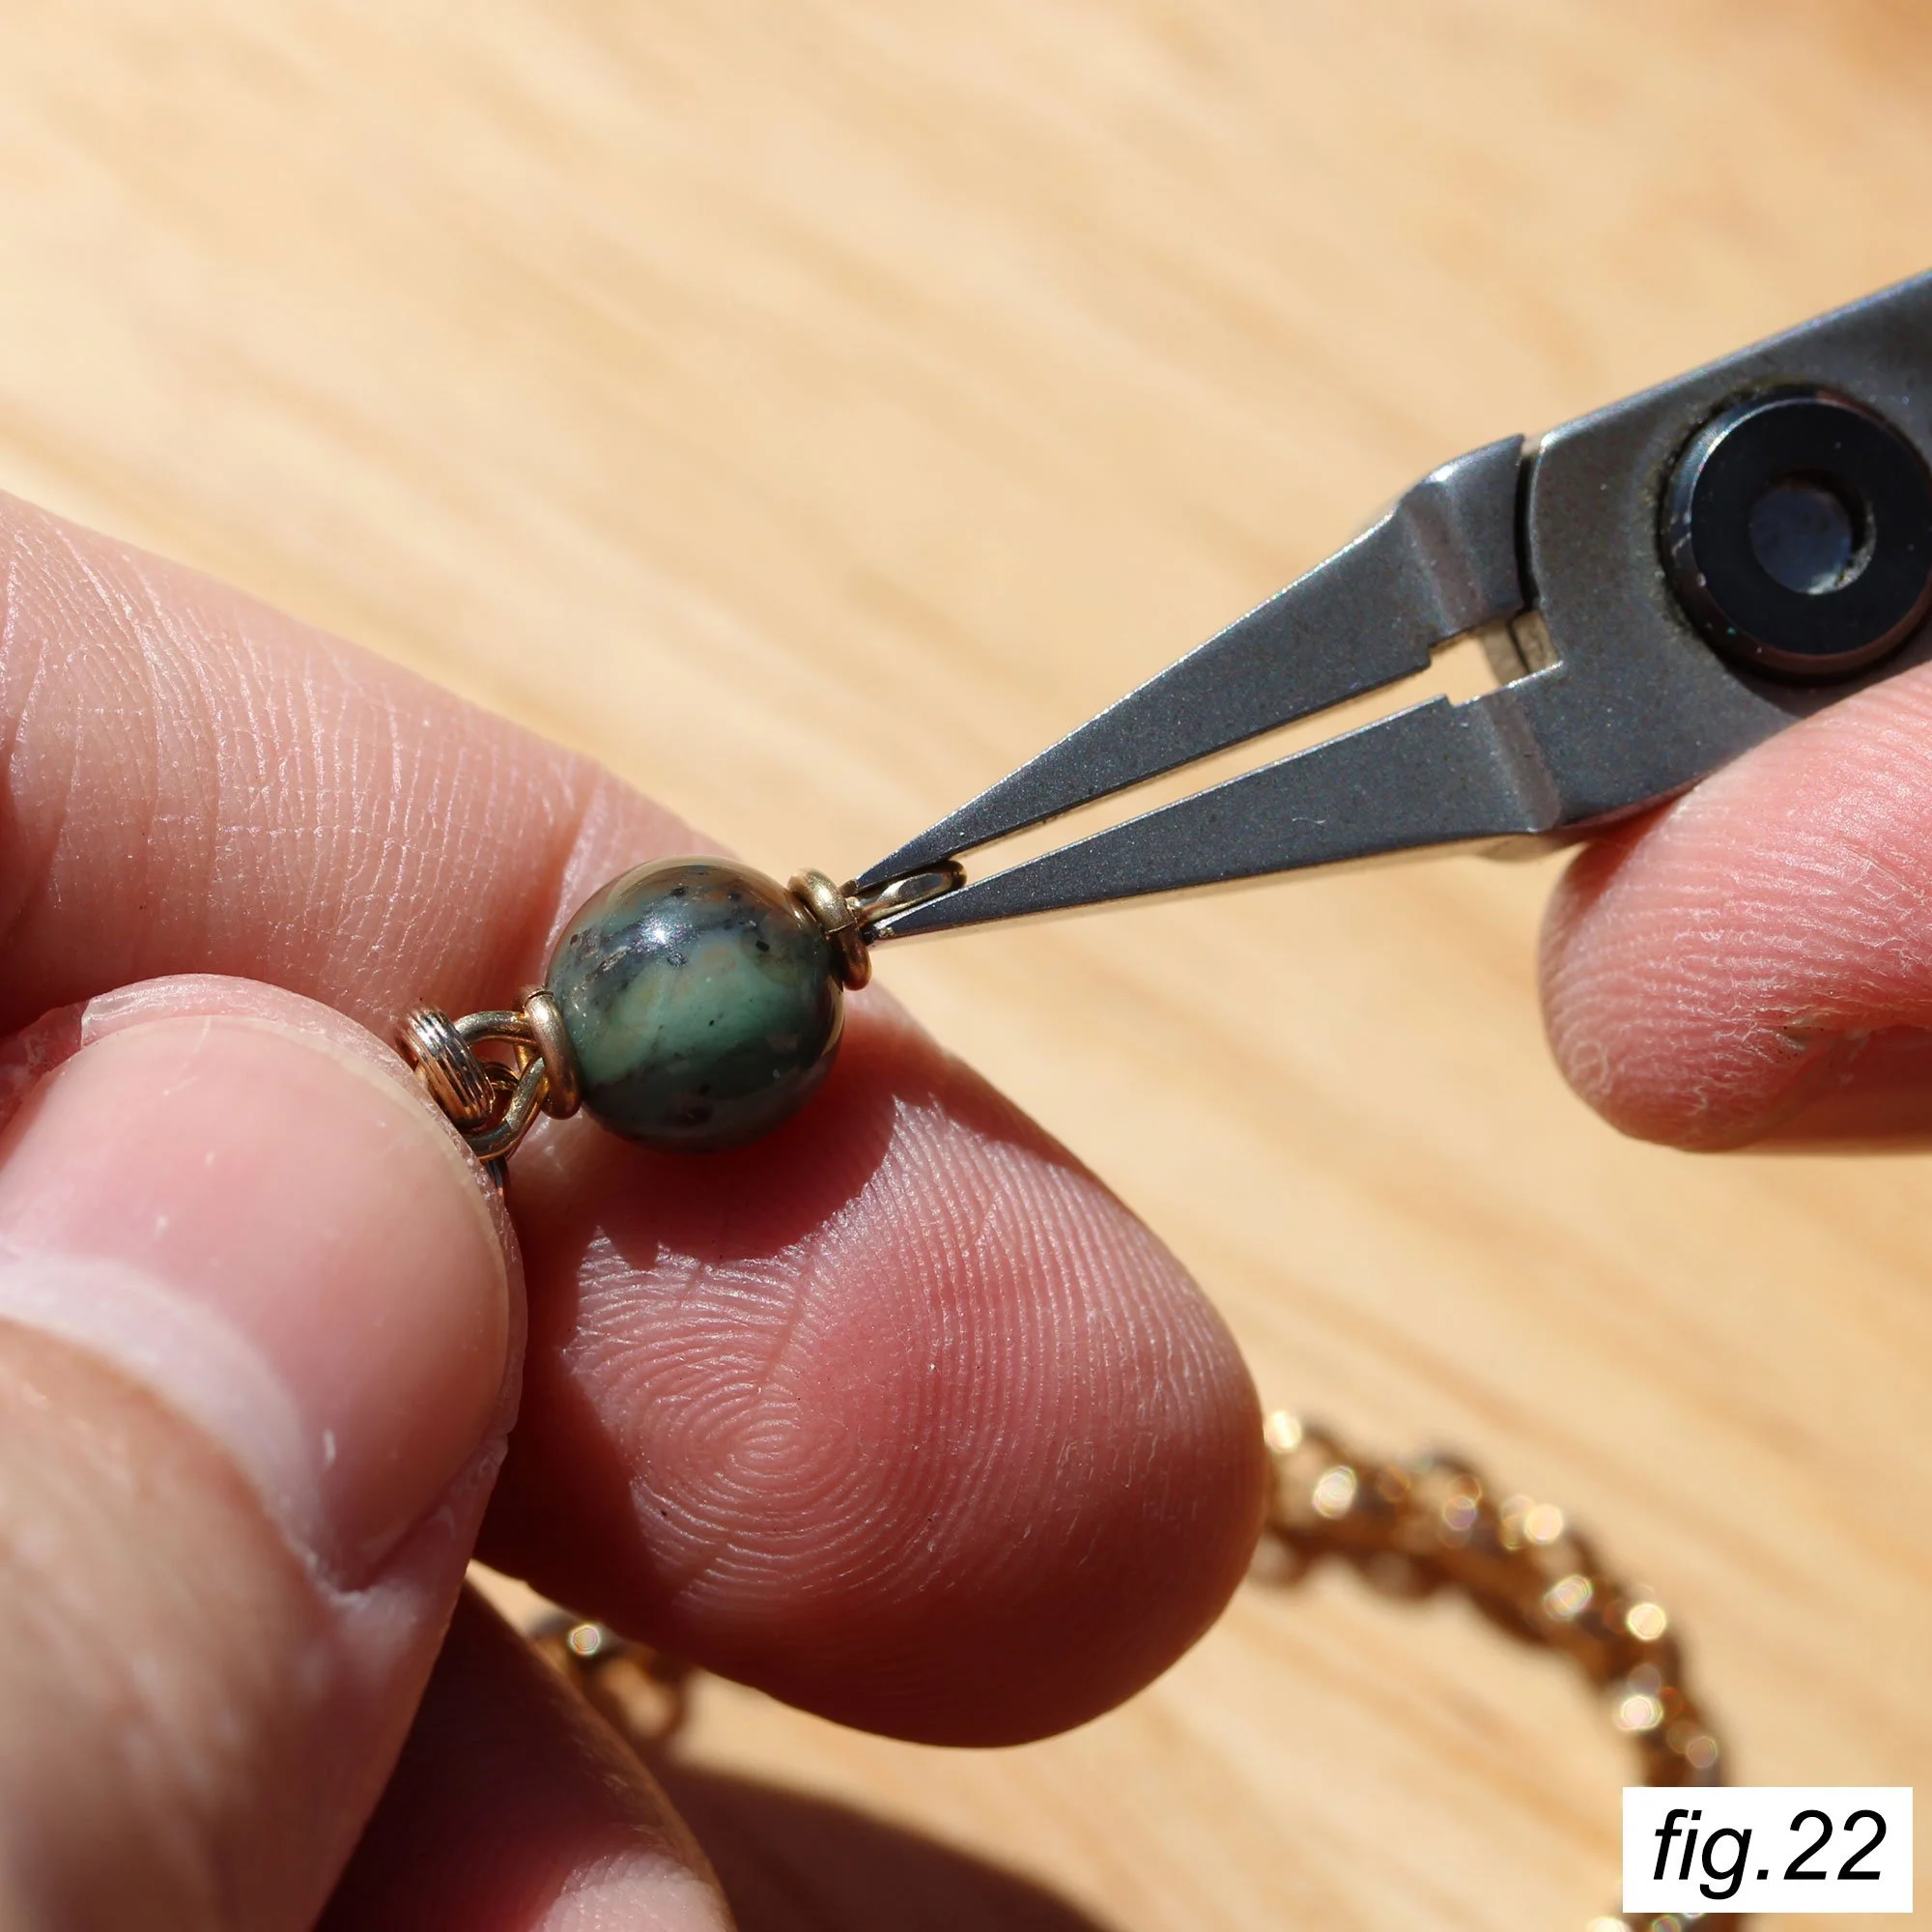
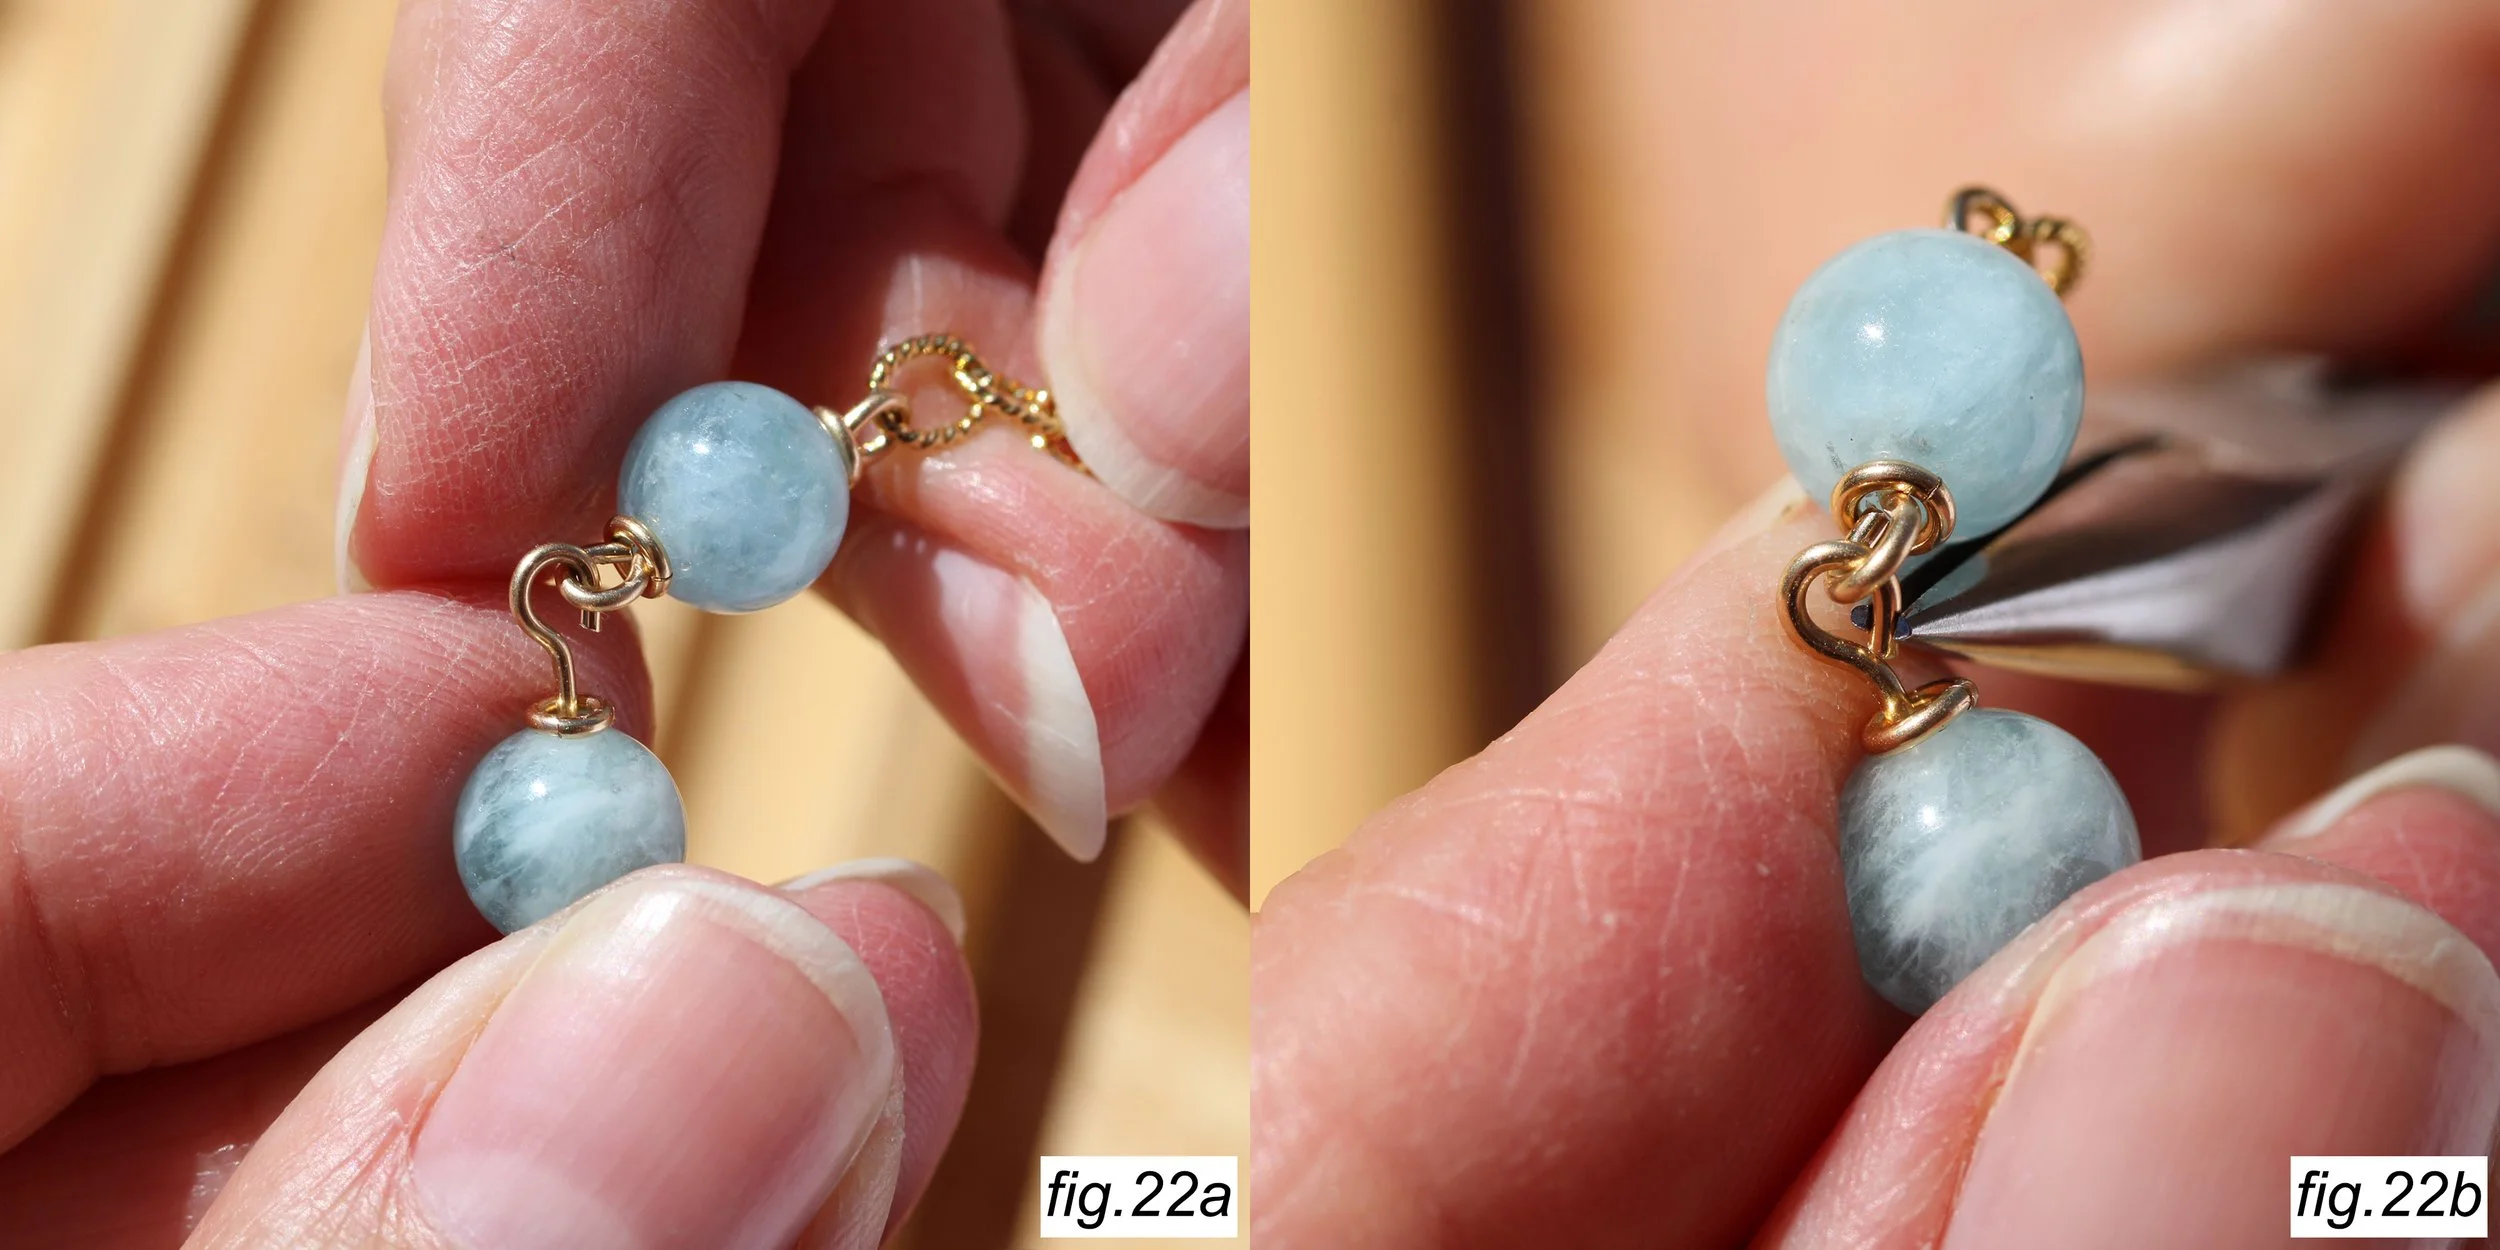
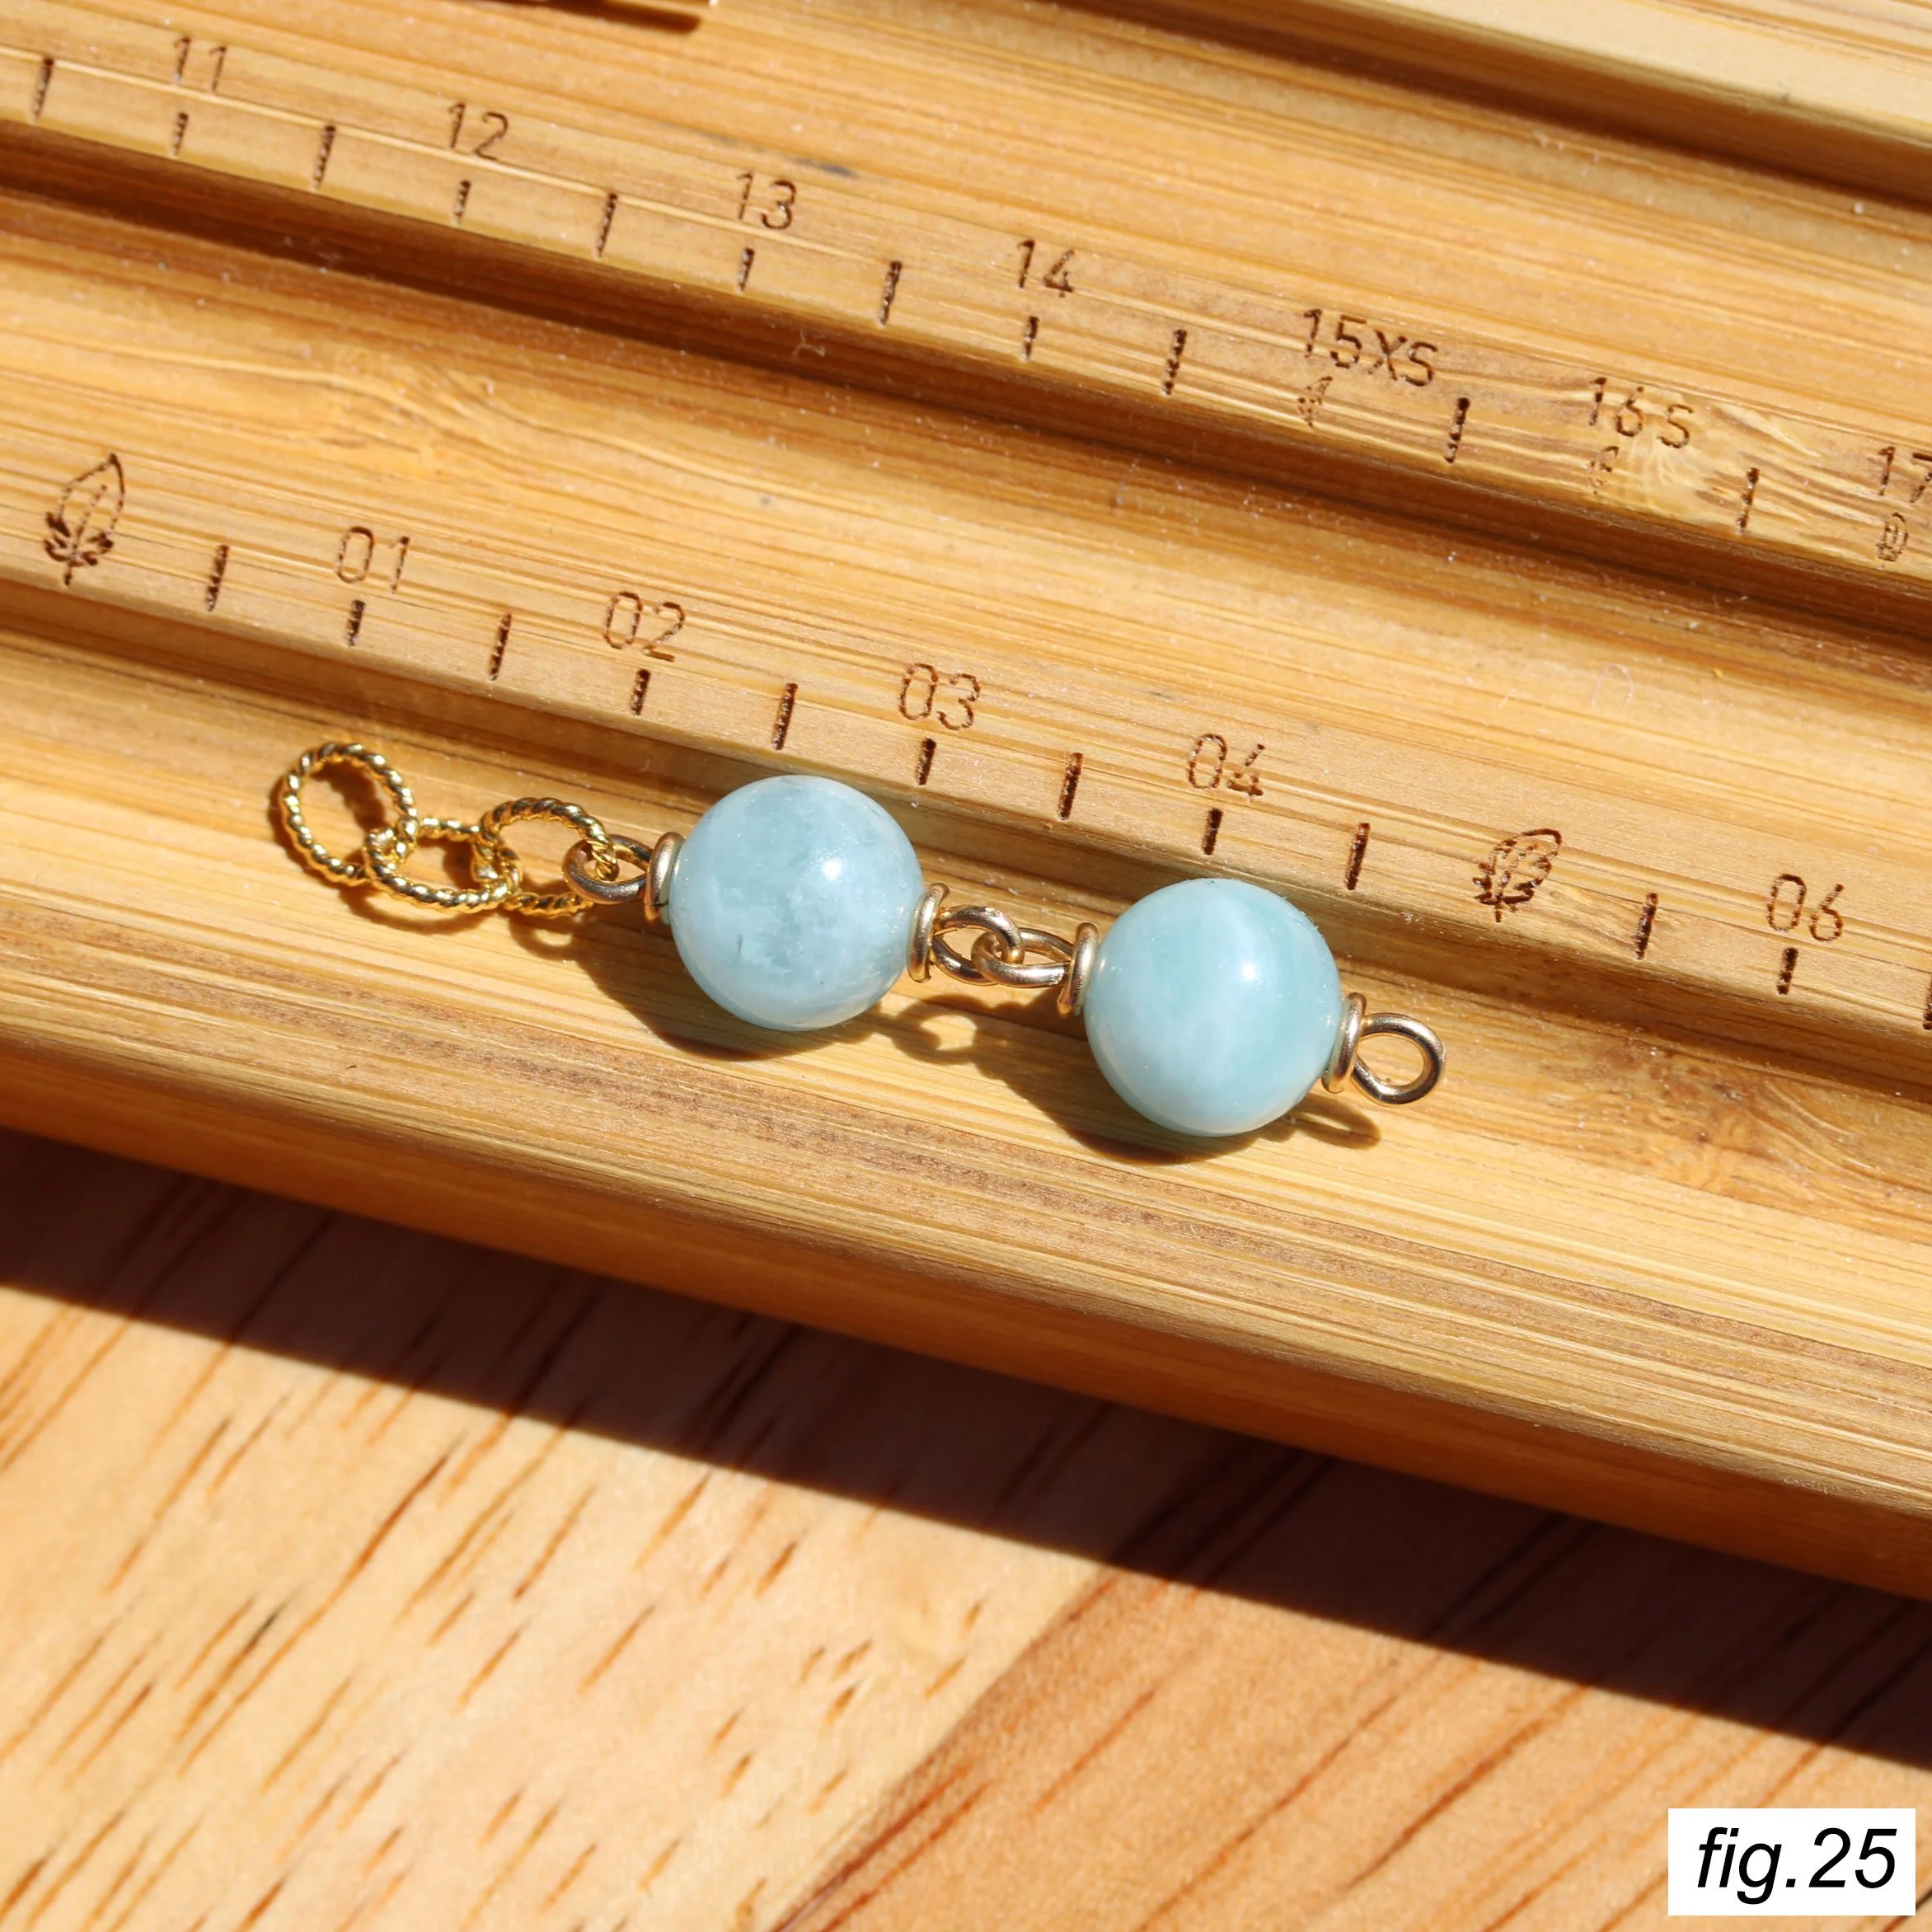
With the loop complete, its time to get it nice and straight. Grab it with your flat nose pliers and gently work it up or down so the loop sits parallel with the bead when viewed from the side, as shown in fig. 22. Repeat this for both loops.
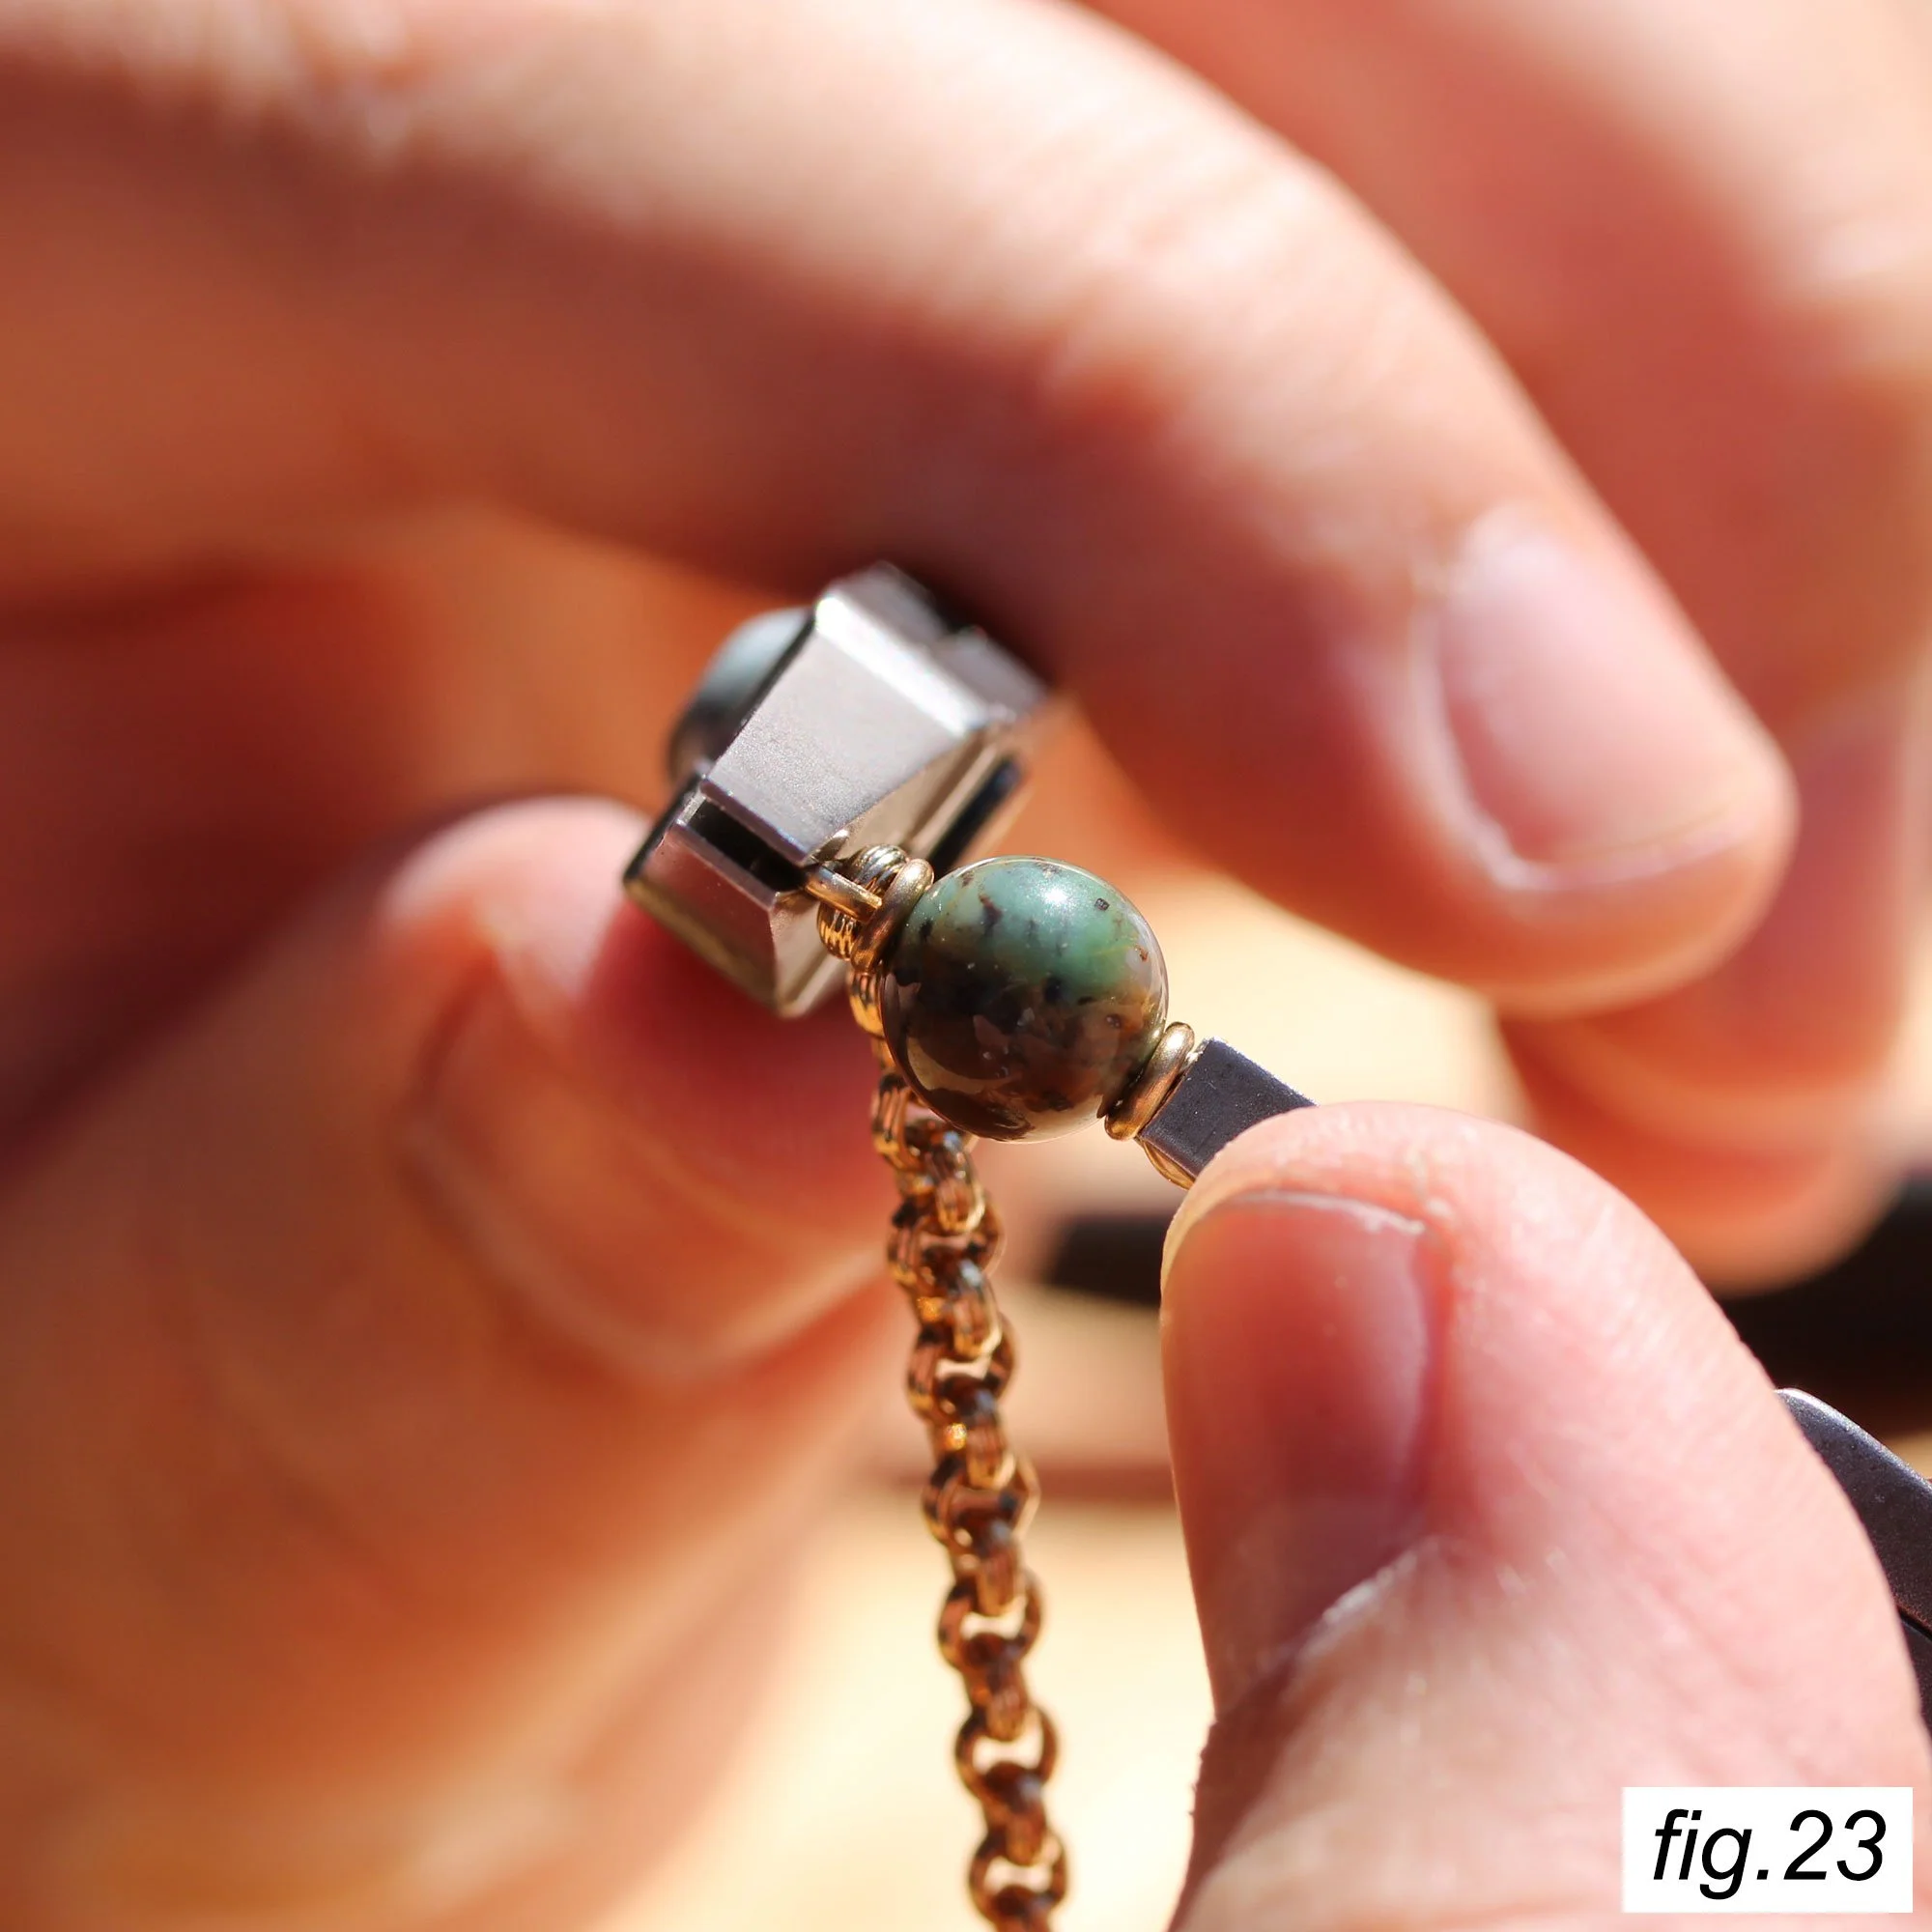
While holding one loop in one pair of flat nose and the other in another pair, slowly twist them to get them so the two loops are perpendicular to each-other. Use the flat nose pliers as a guide to better see when you’ve got it it right. Once you’ve got them perpendicular to one another, you may need to repeat the previous step.
This step is important to the overall drape and feel of the rosary. Its your chance to make every bead nice and perfect.
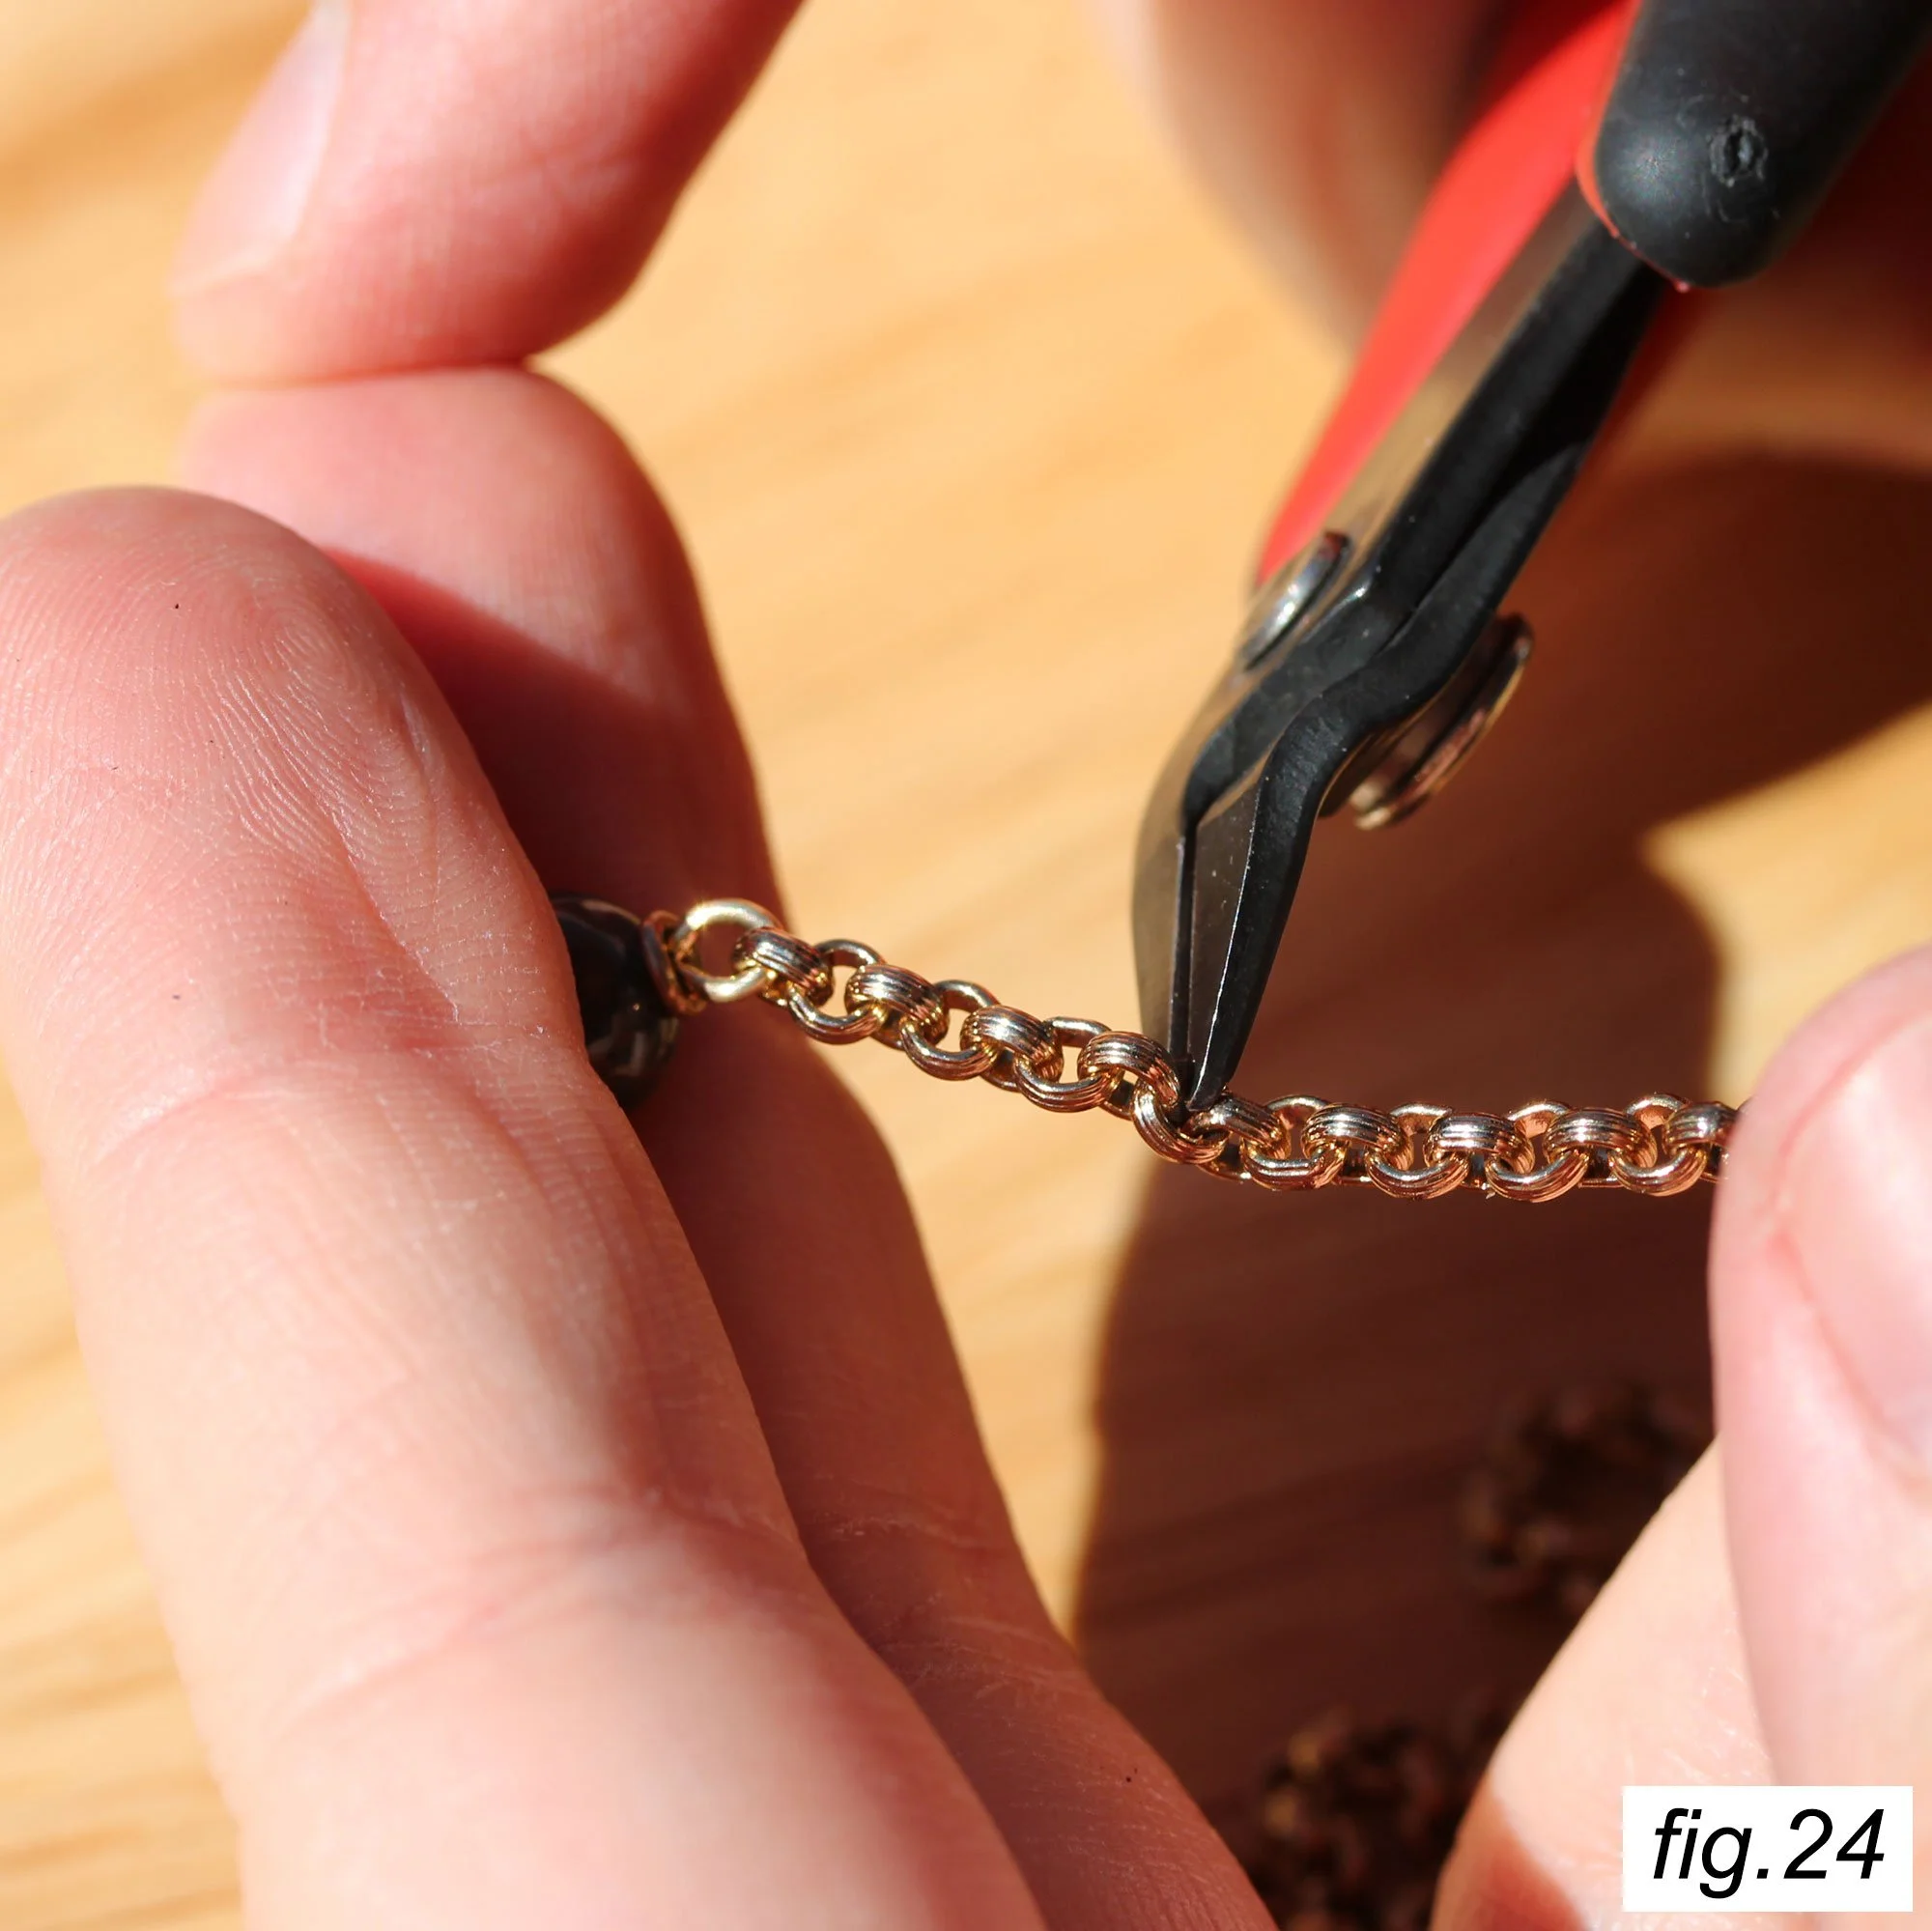
Cut your chain to the length you want. Longer chain sections look nice and help it drape well, but can make the rosary to stringy and add a lot of weight and material cost. Short sections make the rosary more compact and use less material, but having your chain sections to short can throw off the dimensions of the entire piece and make it less satisfying to hold and use.
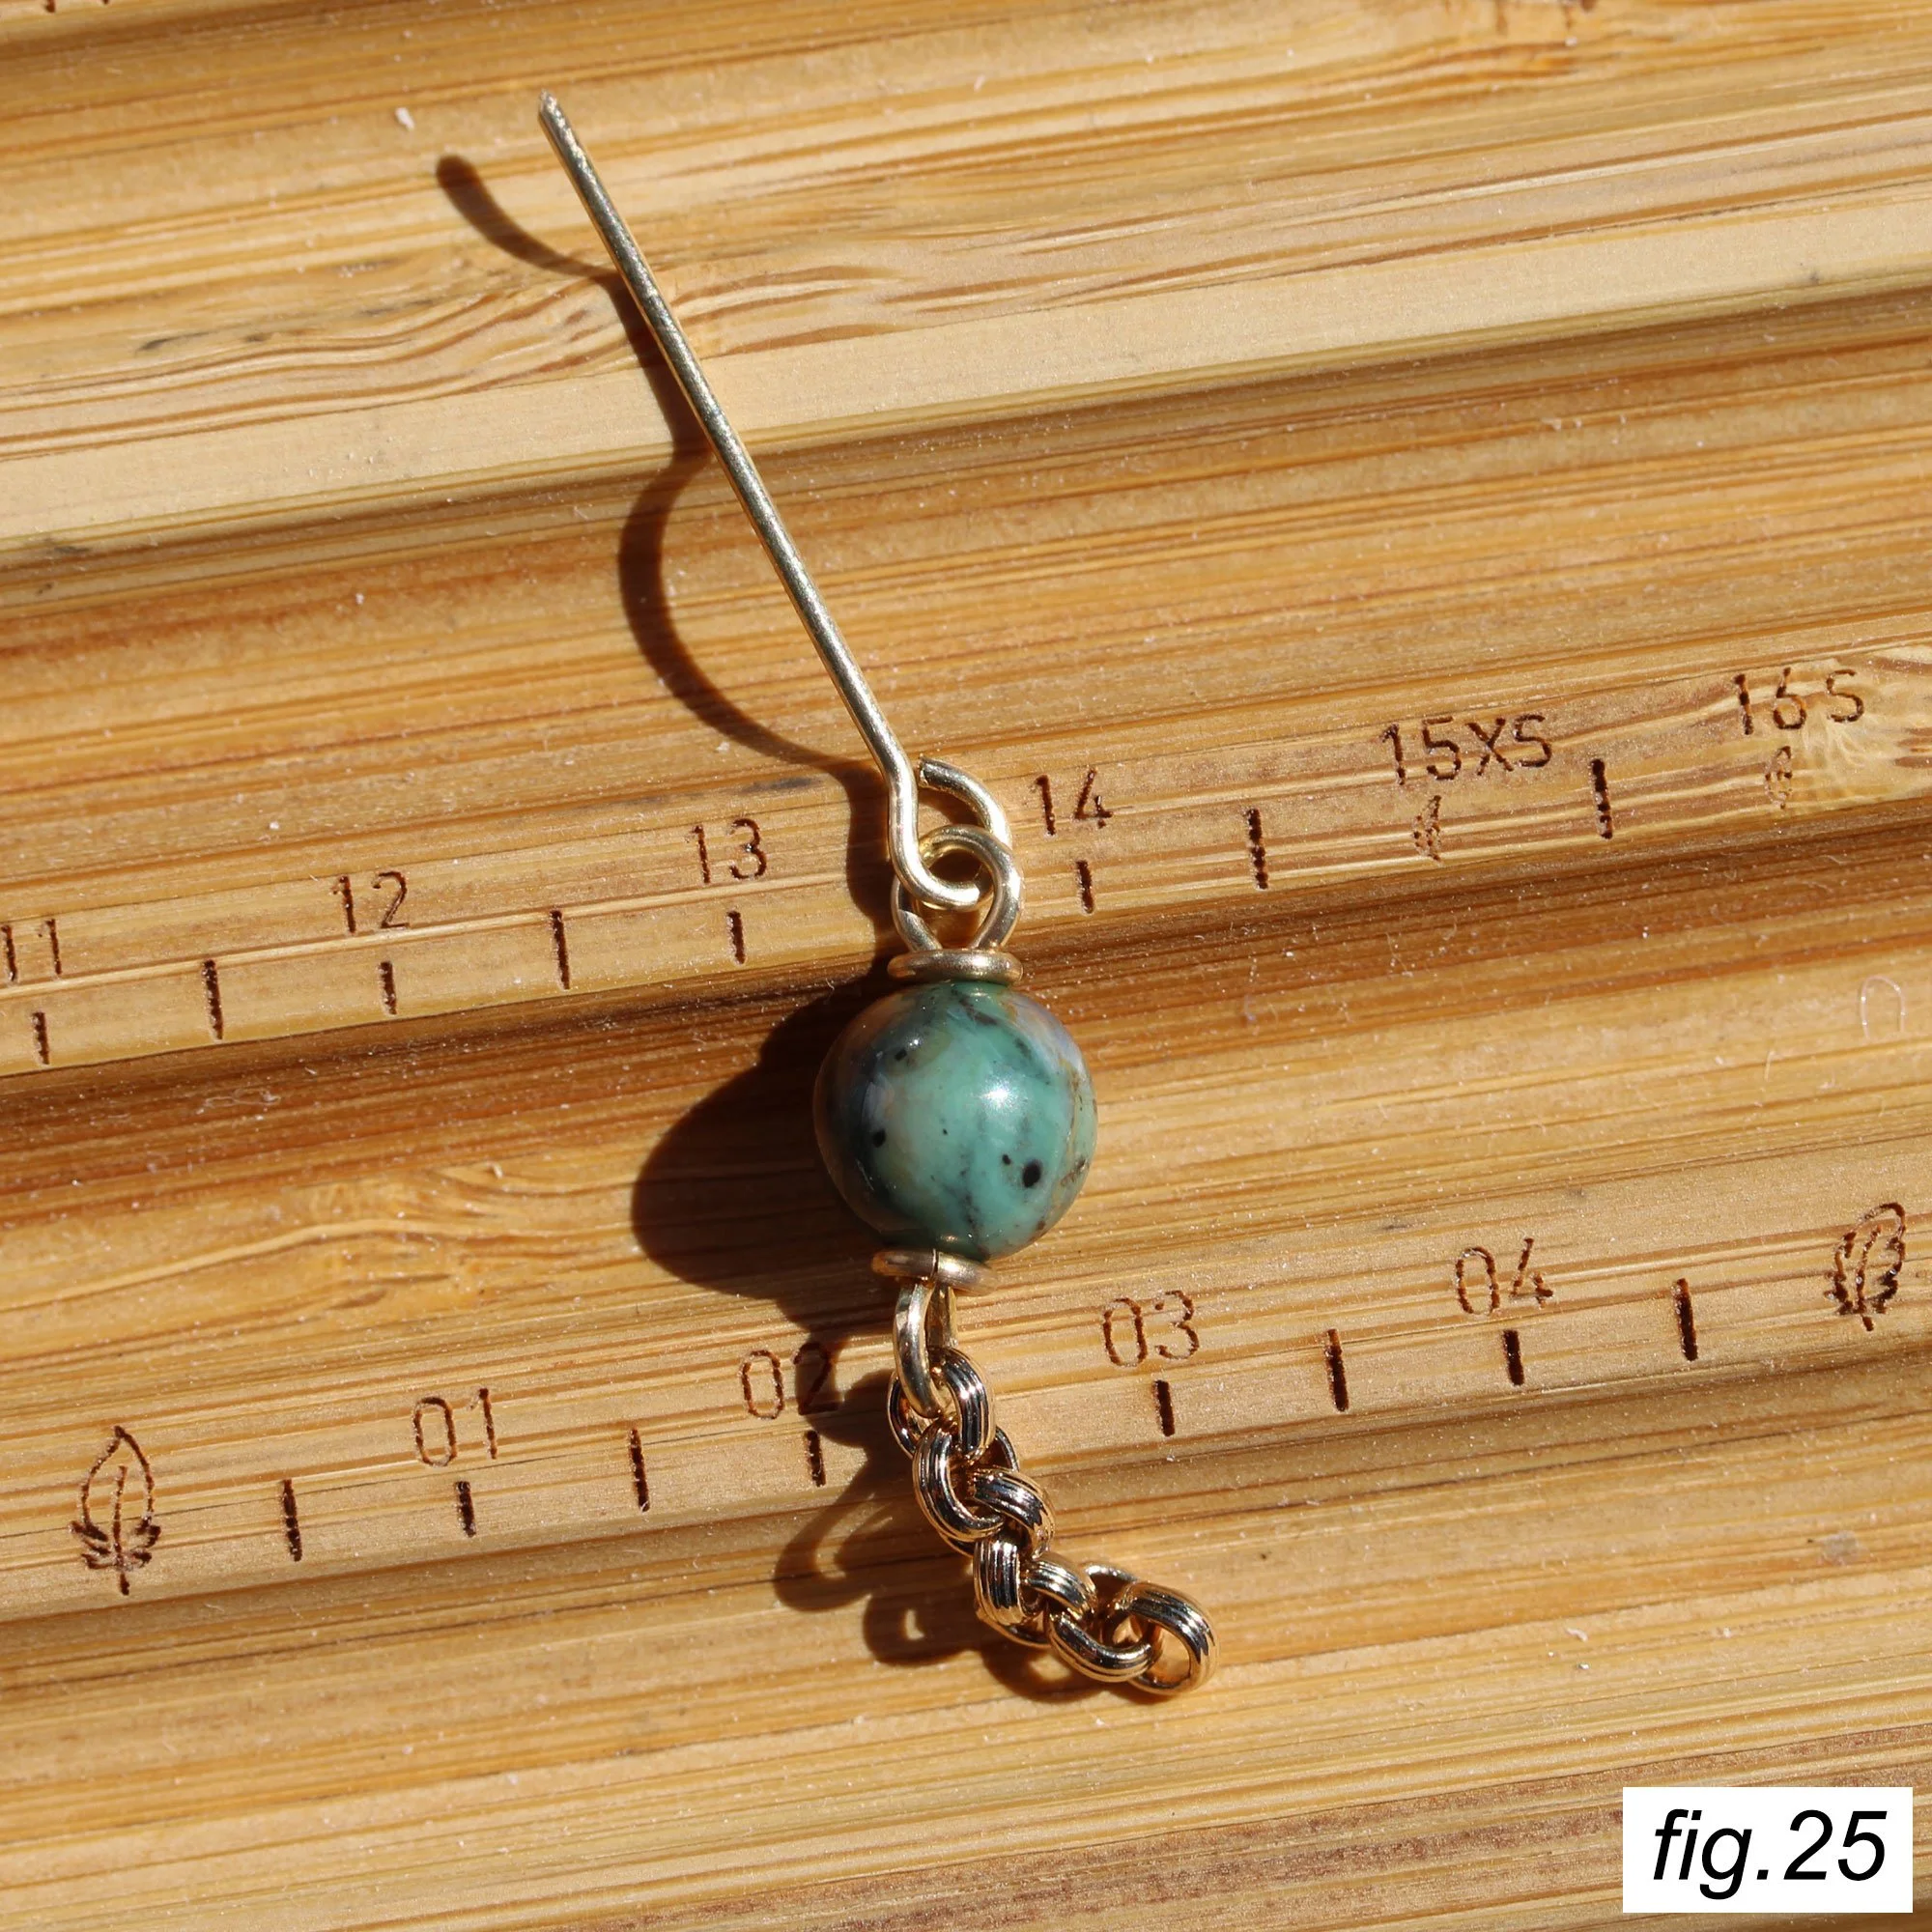
With your first bead done, take a second eye pin and put the loop you just completed through it, and close it up like you did before.
Repeat your steps to complete the second bead as you did the first.

To make a nice neat finish to your drop or decade, start the final bead with chain in the eye pin instead of connecting it to the previous bead, as if you were starting a new decade. Make your loop as normal, but instead of closing the second loop fully with your round nose, leave it open slightly.
Put the loop of the previous bead through this one, and close it up with your chain nose pliers. This can take quite a while to learn, and is much harder to do with unfamiliar chain nose pliers or low quality tools. Your goal should be to get it as tight as you make the other beads. Fortunately, by finishing the decade or drop in this way, if your loop is misshapen or slightly crooked, it is far less noticeable!