
Materials and Sizing: Wire and Rings
This page provides information regarding wire gauges, materials, tempers and shapes, as well as instructions on how to open and close jump rings and incorporate them as "ring cap" embellishments and structural support for your chained bead rosaries.
Choosing Your Rosary Wire
A chained rosary is one in which the beads are connected to one another with bent or wrapped segments of wire to form a chain of beads. The wire in a chained rosary is visible in the completed piece. In a chained rosary, wire serves two purposes: it provides structural support for the beads, the crucifix and the rosary center medal, and functions as a design element.
In a chained rosary, one method used to create the chain of beads is the simple loop. A small segment of wire is passed through the hole in the bead; the excess wire on one side of the bead is bent into a loop and threaded into the completed loop of the previous bead.

A second technique which may be used to create a chained rosary is wire wrapping. In wire wrapping, a tail of excess wire threaded through the bead is wrapped around around itself for a very secure connection.
When shopping for wire for your chained rosaries, you will be selecting wire gauge, metal type, temper and wire shape. It's important to read your supplier's listings carefully for all of these criteria before making your buy.
Wire Gauge
Wire gauge is a measurement of the thickness of a wire. For a rosary constructed in the simple loop style, it is very important that you match the gauge of your wire to the size of the drill holes of your beads. If you're just starting out on your rosary-making adventures and don't have a stock of wire yet, shop around for some inexpensive or sample lengths of different gauge wires which you will use to test the size of your bead drills: 22ga, 21ga, 20ga and 19ga.
Don't search for inexpensive wires at the hardware store. Many of those wires are not in the American Weight Gauge (AWG) and are sized differently. Shop for test wire where other crafting supplies are available locally or online.
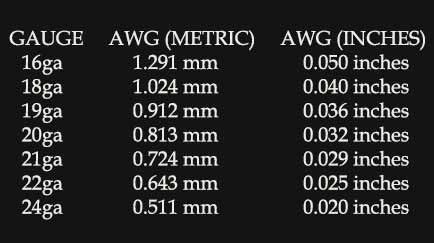
Please refer to the wire gauge chart on the left. As the wire gauge measure gets higher, the wire gets thinner. As you might expect, thicker wires will support the weight of heavier or larger beads and rosary parts better than thinner gauges.
Try your best to select bead/wire combinations which fit the drills and weight of your beads properly. That is, the wire should fill as much of the drill hole as possible. Doing so will prevent roll and shift of simply looped beads. This will result in a beautifully finished piece with excellent durability.
Metal Types & Finishes

Wires are available in solid metals (like brass or Sterling silver), bonded metals (like gold filled), and electroplated/coated metals. You will likely be choosing the type of wire which coordinates with the metal of your crucifix and rosary center.
If a solid, precious metal wire is too costly, then bonded metals (like silver filled) are an excellent, high quality option. These have a thin, pliable sheet of precious metal bonded to brass, and are far superior in durability to plated or color coated wires.
Solid wires are widely available with antiqued finishes (such as oxidized Sterling and antiqued or fumed brass). These will match your antiqued rosary parts beautifully.
Wire Temper
Wire temper is a measure of a wire's "stiffness," and its ability to hold a shape or curve when bent. Tempers are given as full hard, half hard, quarter hard and dead soft.
To make chained rosaries and jewelry, you'll usually be choosing between the half hard and dead soft tempers. Half hard is the temper of choice for Sterling, brass, bronze, gold filled, silver filled and solid karat gold wires. It curls without much difficulty around your round nose pliers, and holds the curl without springing back. Half hard wires are used for both simple loop and wire wrapped construction.
Dead soft temper wires are limp and easy to curl. This temper may be used to wire wrap rosaries should you find half hard challenging. If you have hand or wrist problems, dead soft might be a good choice for your wire wrapped pieces. It should never be used for simple loop construction, as the loops will pull open too easily and your rosary will likely break.
Wire Shapes
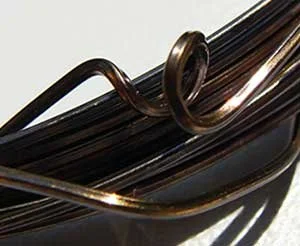
Because the wire is a decorative element in chained rosaries, you can have a little fun experimenting with different wire shapes. Square wire, shown in the photo to the right, is very nice for men's rosaries. There are also twisted wires and glitter wires for even more variety.
Round wires are the most commonly available shape over a range of different gauges and metal types. If you are planning to try ring capping your rosaries (instructions to follow in the Build A Rosary section), then you should match the shape of your wire to the shape of the wire used for your jump rings.
You may also coordinate the shape of your wire to the shape of the links in a chain that you like!
The Eye Pin Option
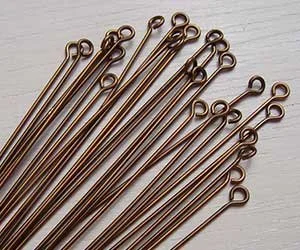
Prefabricated eyepins are a wire option which many rosary makers use to save time on construction, as half of the loops are already formed for you!
There can be some frustrating supply issues with eye pins, however. In certain metals, they can be difficult to find in gauges thicker than 21ga (not so great with 8mm Hail Mary beads and large Our Fathers), and the temper of the wire used to form the eye pins is often dead soft.
Don't overlook this choice in wires should you come across eye pins that will suit your project. They're also nice for beginning rosary makers to practice with, no matter the temper, just to get a feel for forming loops and the satisfaction of completing a whole rosary more quickly.
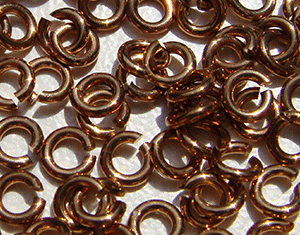
Jump Rings Basics
Jump rings are commonly used in rosaries to connect the crucifix and center medal to the beaded decades and introductory beads. They are also used to attach medals on chaplets and tenners, and to attach clasps on rosary bracelets. The first thing to know about jump rings is how to open and close them correctly!
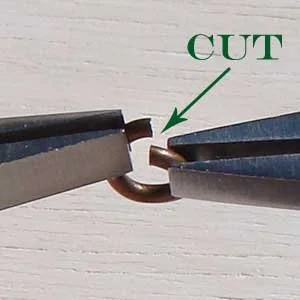
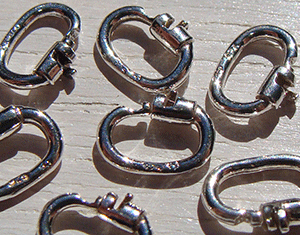
Pictured above is an "open" jump ring. It is called open because this small ring of wire has a cut which allows you to securely connect (or "jump") from one element of your design to another.
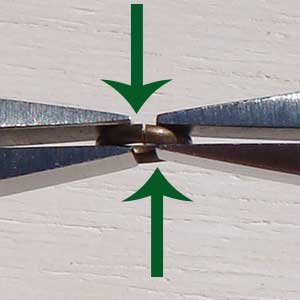
To close a jump ring, grasp each side of the ring near the cut with a pair of flatnose pliers. Holding the pliers firmly, move one hand toward your body and the other hand away so that the wire ends meet perfectly. Use the opposite motion to open a ring.

Never attempt to open or close a jump ring by pulling or pushing the wire ends perpendicular to the cut. This deforms the circle of the ring, and it's unlikely you'll be able to reshape it!
In addition to the "open" jump rings with which you are likely familiar, two other types of connecting rings might be of interest to you: split rings (which look like small key rings) and locking links, which have a tiny "lock" on one side to securely attach one element of your design to another. Locking links are great for bracelets, which are often accidentally caught on things during regular use.
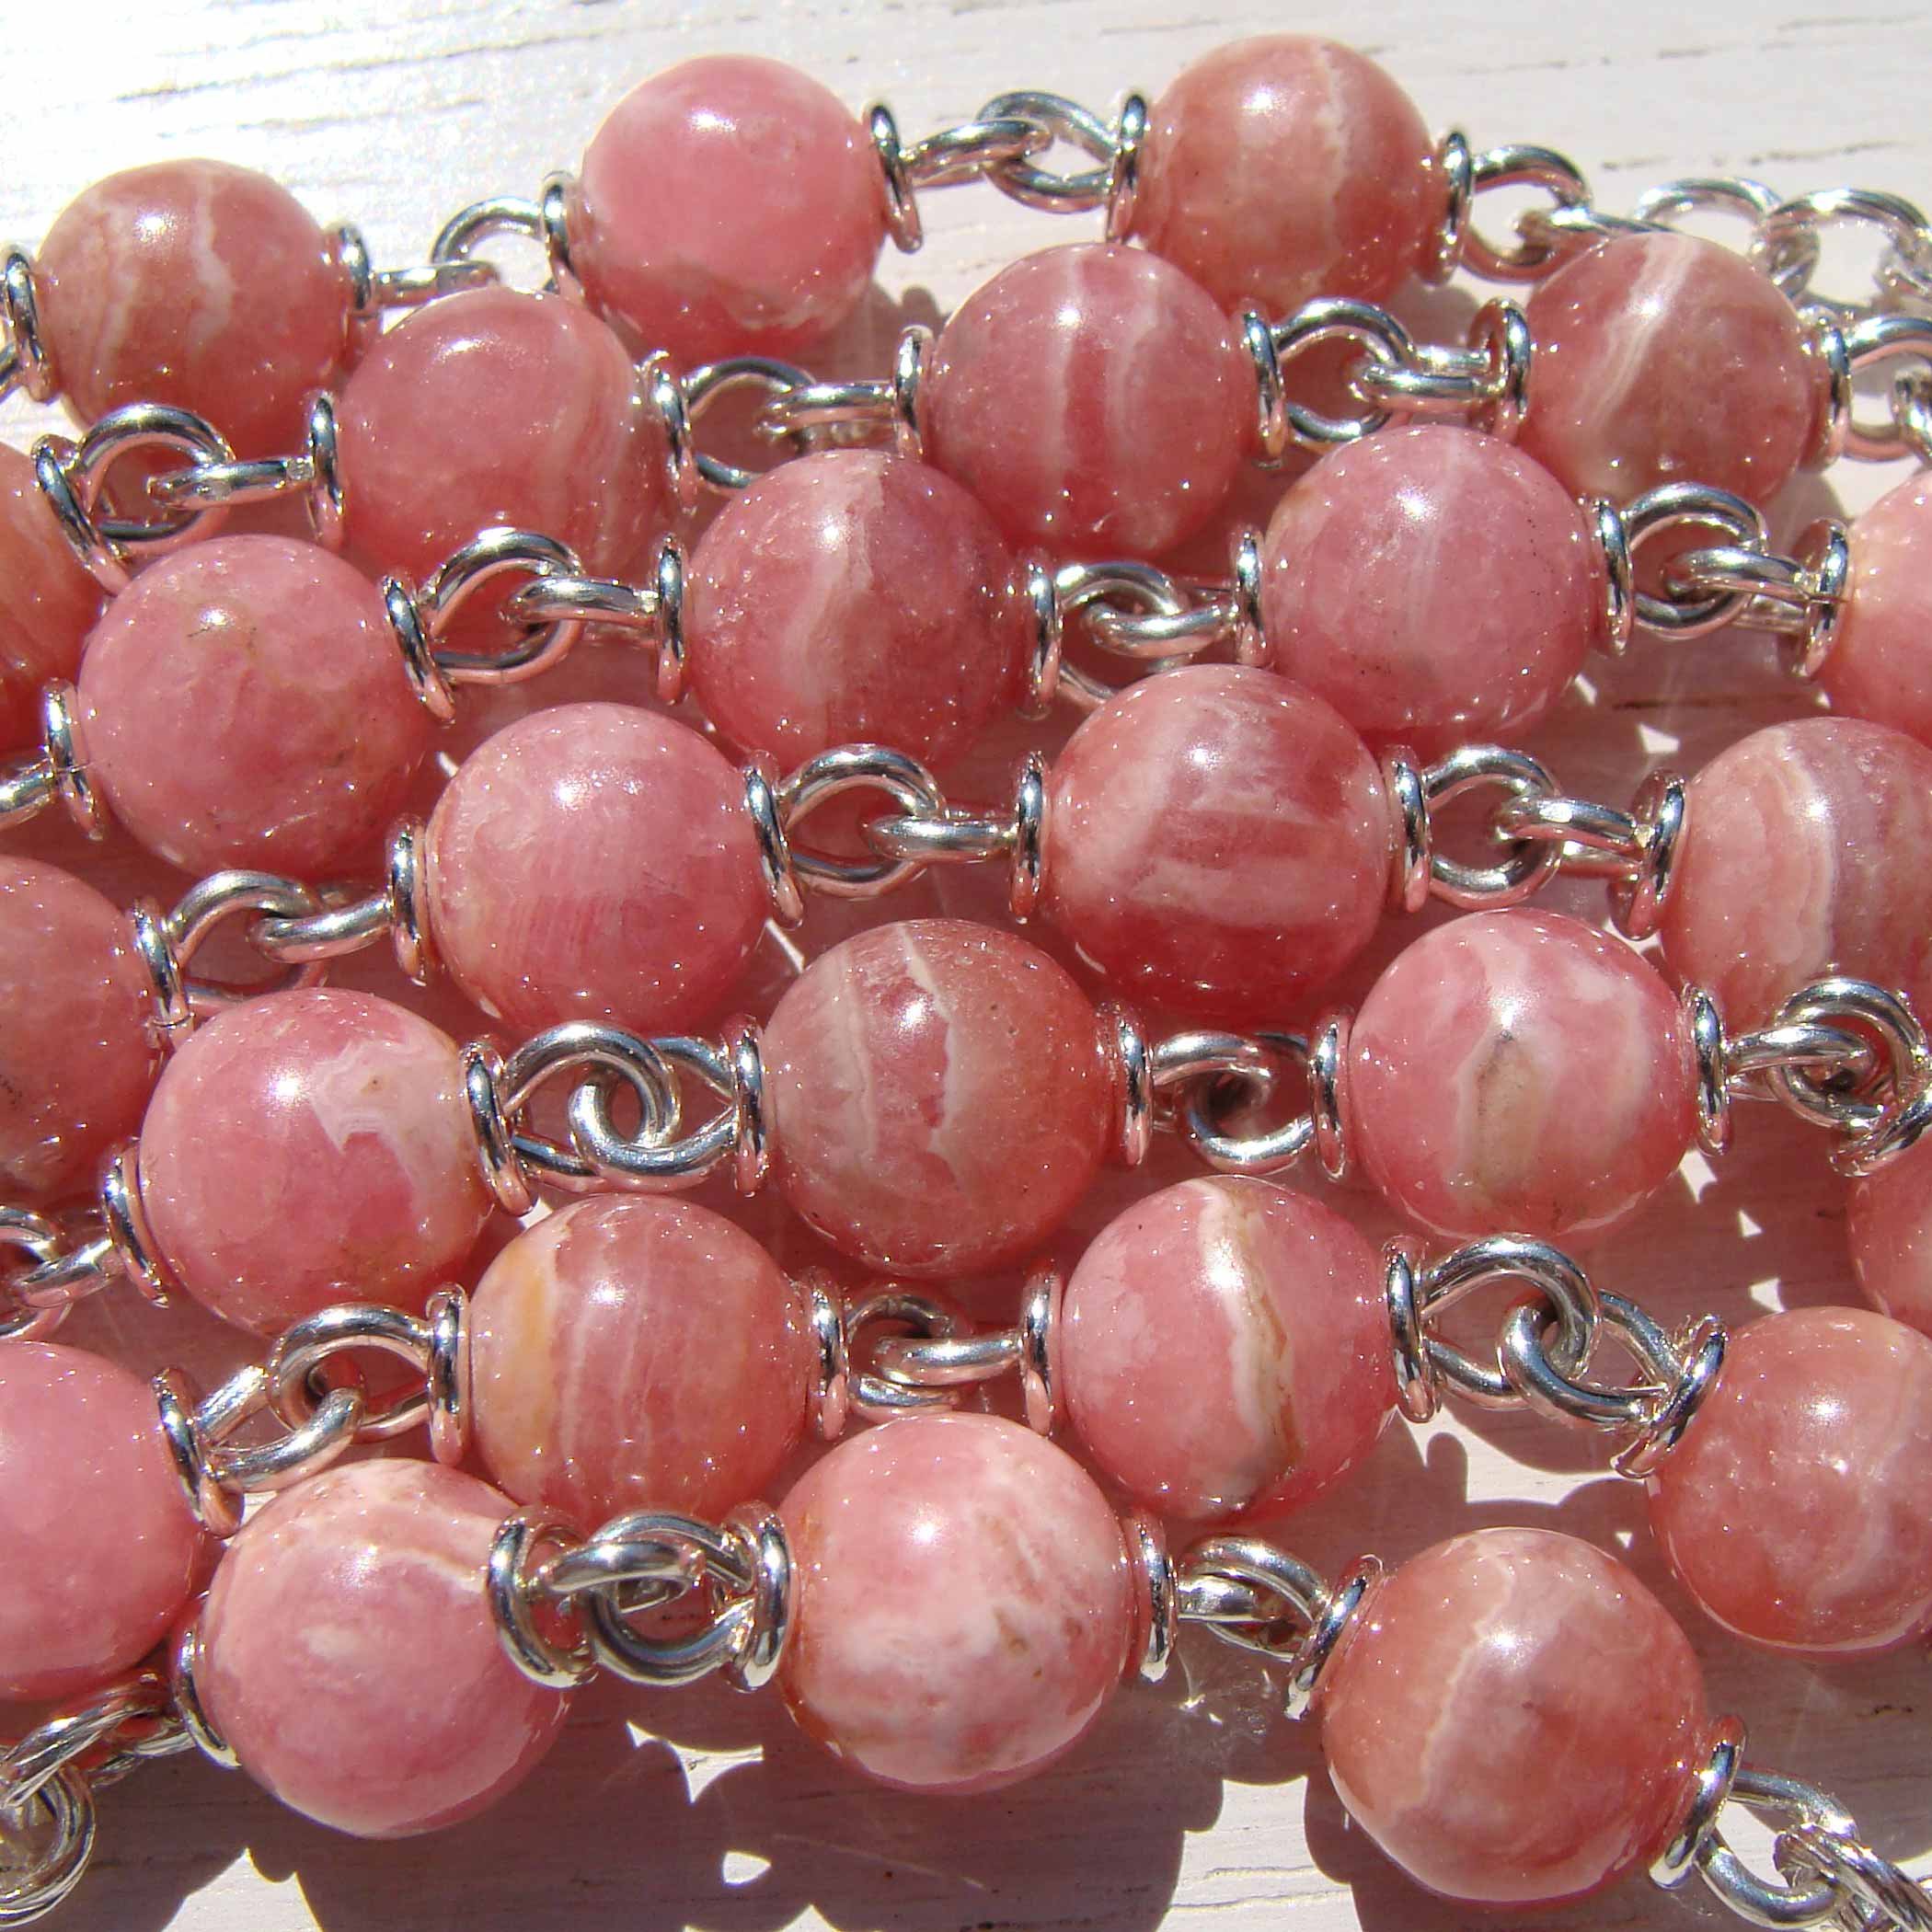
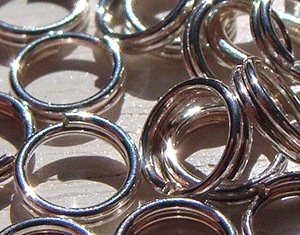
The Ring Capping Technique
Properly sized and weighted jump rings may also be employed as an embellishment to your rosaries as "ring caps," which top each side of your bead. More than decorative, the ring cap cradles your simple wire loop, and helps prevent the wire loop from pulling open laterally while the rosary is handled.

In the photo on the left, jump rings are used as caps on each side of all the beads in a chained rosary. Ring caps not only add a finished beauty to your completed rosary, but structural integrity as well!
It's very important to size the inner diameter and wire gauge of your jump rings to the size of your beads, the drill holes of your beads, and the gauge of wire you've selected for your wire loops. The guide below will help you select jump rings for the best fit.
Each open jump ring will have to be manually closed before use as a ring cap. This does add between 20 to 30 minutes to your construction time.
The "ring capping" method isn't new. Many beautiful and well-preserved antique rosaries were constructed in this style, and for good reason. Ring caps allow you to create a very secure rosary with a wonderful drape. Drape is how easily the rosary will curl up in your hand. The guides below may seem complicated at first, but you'll soon get the hang of it if you follow each of the steps in order.
Step 1: purchase your beads, and determine the gauge of wire which your bead drills will accept for the loops you will bend. If your bead drills will take only 22ga and thinner wire, consider either re-drilling the beads to accept a thicker gauge, or choosing a wire wrapped construction technique. Simple loop construction is best for 21ga and thicker wires so that the weight of the beads is properly supported.
Step 2: determine the inner diameter and wire gauge of the jump rings which work best with your bead size and construction wire gauge. Jump rings are cut not only in different inner diameters, but in different wire gauges as well.
Rings cut in heavier gauges will bring the metal visually forward in your design. Each increment of increased wire gauge thickness will also increase the outer diameter of the ring, so a 19ga, 2mm ID ring will be wider across its full diameter than a 20ga, 2mm ID ring.
Step 3: don't forget to purchase a small batch of rings to connect your rosary center and your crucifix. In most cases, these will be larger than your ring cap rings. Sizing for connecting rings is given below.
Ring Cap Sizing Guide
Here are recommended bead size/jump ring size/construction wire gauge combinations. There is overlap between bead size and ring cap size, so that you have plenty of flexibility in determining your construction parameters as far as the beads are concerned. One thing to bear in mind is that fatter wires may not fit into tiny ring caps. Be aware that inside the ring cap, the construction wire is doubled (one wire coming out, the end of the bent wire coming back in). For example, a 19ga wire is too fat to fit doubled over into a 20ga, 1.59mm inner diameter ring!
For 5.5mm to ~6.5mm round beads:
20g, 1.6mm ID (inner diameter) jump rings, with 21ga construction wire.
For 6mm to ~8.5mm round beads:
20g, 1.7mm or 1.8mm ID (inner diameter) jump rings, with 20ga construction wire. A very nice fit, especially for larger, feminine rosaries!
For 8mm to ~10mm round beads:
20g, 2mm ID (inner diameter) jump rings, with 20ga construction wire, or
20g, 2mm ID (inner diameter) jump rings, with 19ga construction wire (for weighty beads like rhodochrosite, sapphire and celestite, or for beads with drills over 1mm which require thicker construction wire).
For 8mm to ~12mm round beads:
19g, 2mm ID (inner diameter) jump rings, with 19ga construction wire. A good combination for masculine rosaries and Pater beads.
For round beads 12mm and larger:
19g, 2.2mm ID (inner diameter) jump rings, with 19ga construction wire. 2.2mm ID rings will require you to bend a larger loop so that the ring cap seats properly against the bead.
For connecting rings:
Most rosary centers will accept 18ga, 2.5mm inner diameter rings. For very small rosary centers, 19ga, 2.5mm inner diameter will usually work. To connect your crucifix, 18ga, 3mm inner diameter will work with most small and medium sized crucifixes. Big or heavy crucifixes might require that you step up to 16ga, 3.5mm or 4mm inner diameter, or make the connection with a wire bowtie wrap.